
Furoshiki is a traditional Japanese method for wrapping objects with fabric, and today it has become the essential element in gift-giving in Japan. Instead of wrapping an object with paper, a piece of fabric is folded and knotted to conceal a gift. Hundreds of variations for folding and tying fabric over virtually anything highlight this beautiful intersection of tradition and function.
A handmade bento bag is a lovely spin on furoshiki because the gift recipient can reuse it to carry daily items. In addition to sewing up very quickly, the small amount of fabric required to make a bento bag provides a quick way to use scraps of something special you’ve been saving. Additionally, sewing one is an easy way to take a break from a bigger project, or satisfy the sewing itch when you are busy with life.

Supplies / Notes
This Bento Bag Recipe is flexible to make the most of scrap fabric. The smallest recommended size uses two 10” (24cm) squares of fabric, and up to two 18” (46cm) squares of fabric. Finishing the raw edges with a straight stitch and then hand-fraying holds up with regular use, but alternate finishing instructions are provided if you prefer a more professional look.
- Two 10×10” (24x24cm) to 18×18” (46x46cm) squares of fabric, pins, thread, sewing machine. Hand sewing needle and embroidery thread are optional.
- Recommended fabrics: linen, voile, lawn, quilting cotton. Larger sizes can accommodate heavier fabric such as canvas. Not recommended for 1-way designs.
- Sizing Guidelines: 10×10” (24x24cm): wrap a small jewelry box. 14×14” (36x36cm): carry a small knitting project, store a lunch, or gift-wrap finished objects such as mittens or a cowl. 18×18” (46x46cm): carry a medium to large knitting project, or gift-wrap finished objects such as a piece of clothing. The model in the first photo is holding the large size.

Instructions
1. Cut one square in half diagonally to create two right triangles. Part of the long edge you just cut will become the handles of your bag. Be mindful when dealing with this bias edge, it can easily stretch out.
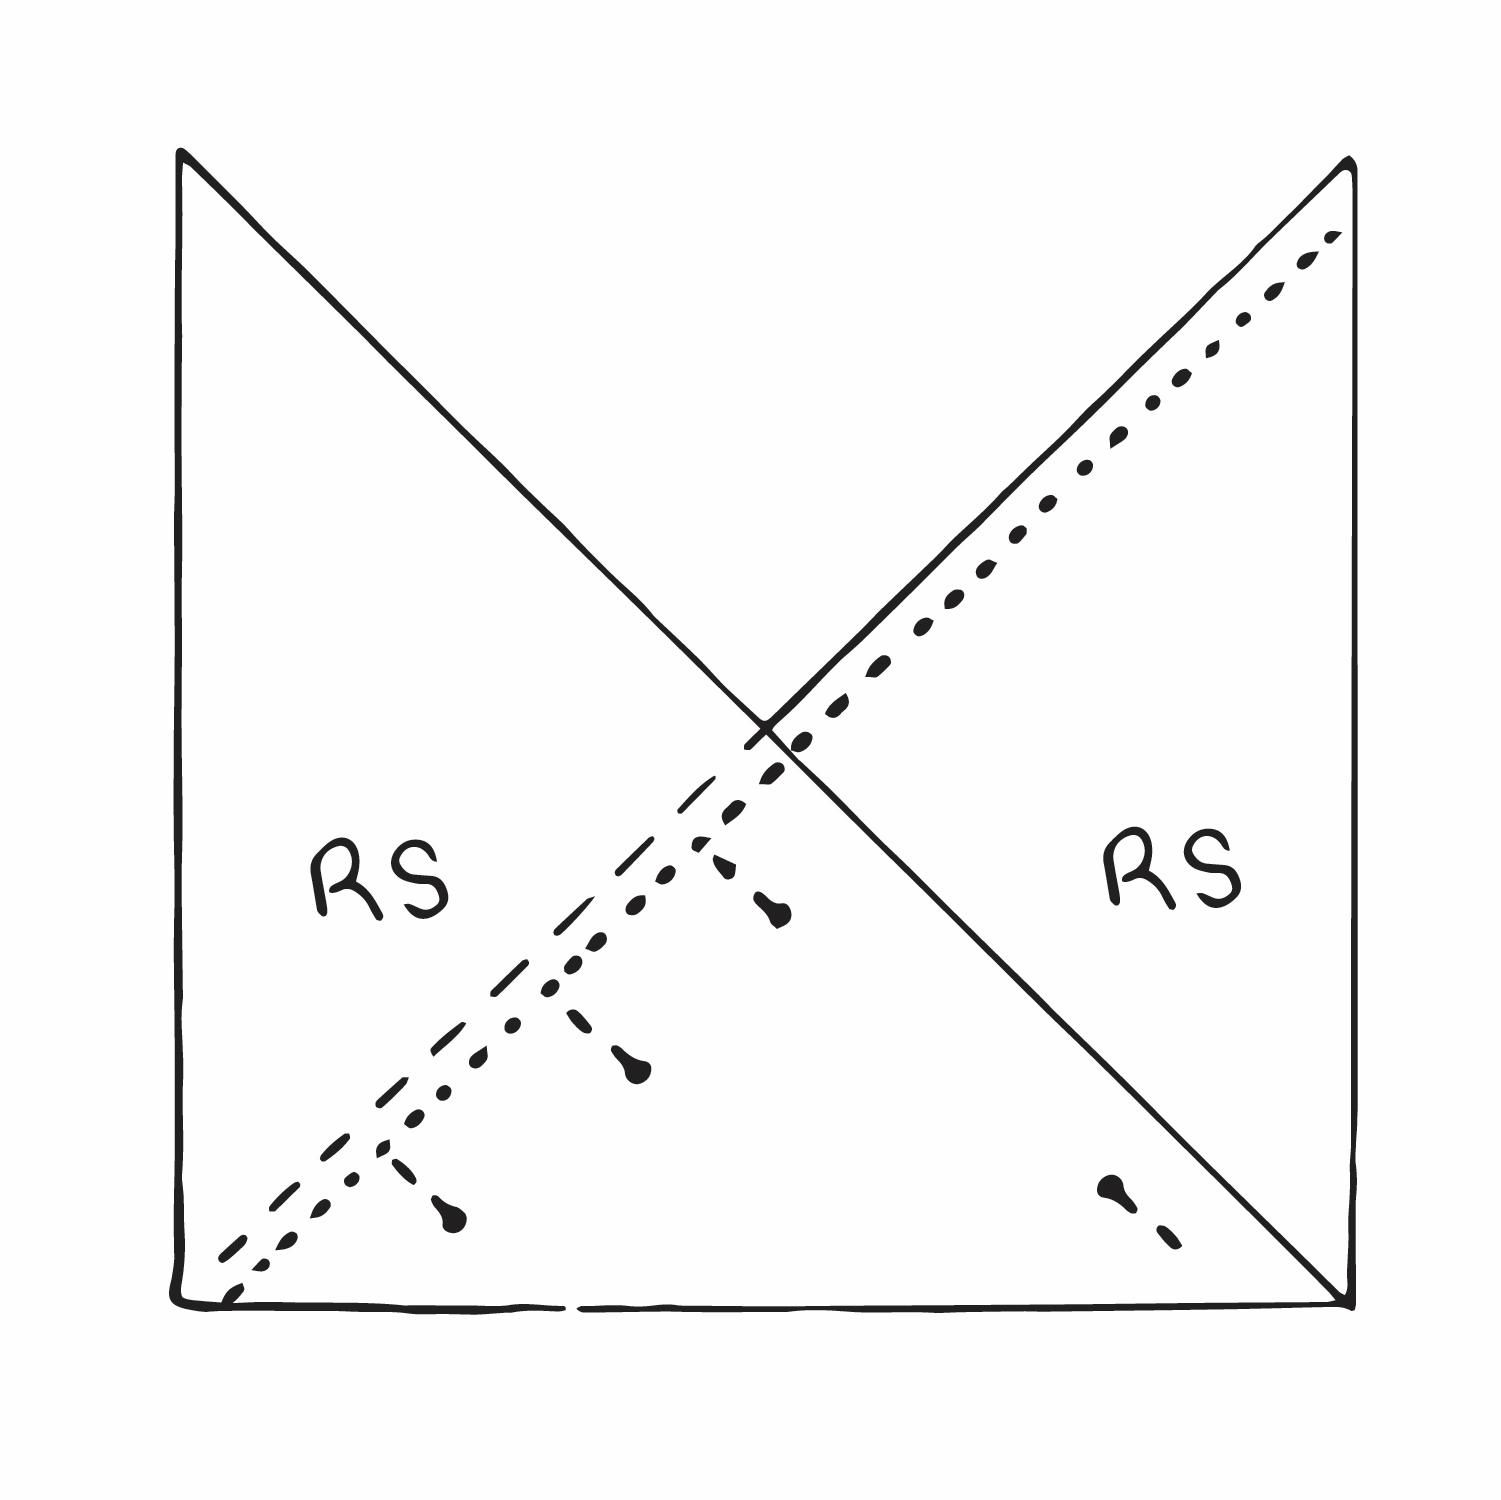
2. Lay two triangles on top of each other to make an almost-square, both sides RS (right side) up. Pin the free edge of the top triangle to the bottom one. Sew this long edge from the bottom corner all the way to the top corner using a ¼” (6mm) seam allowance.
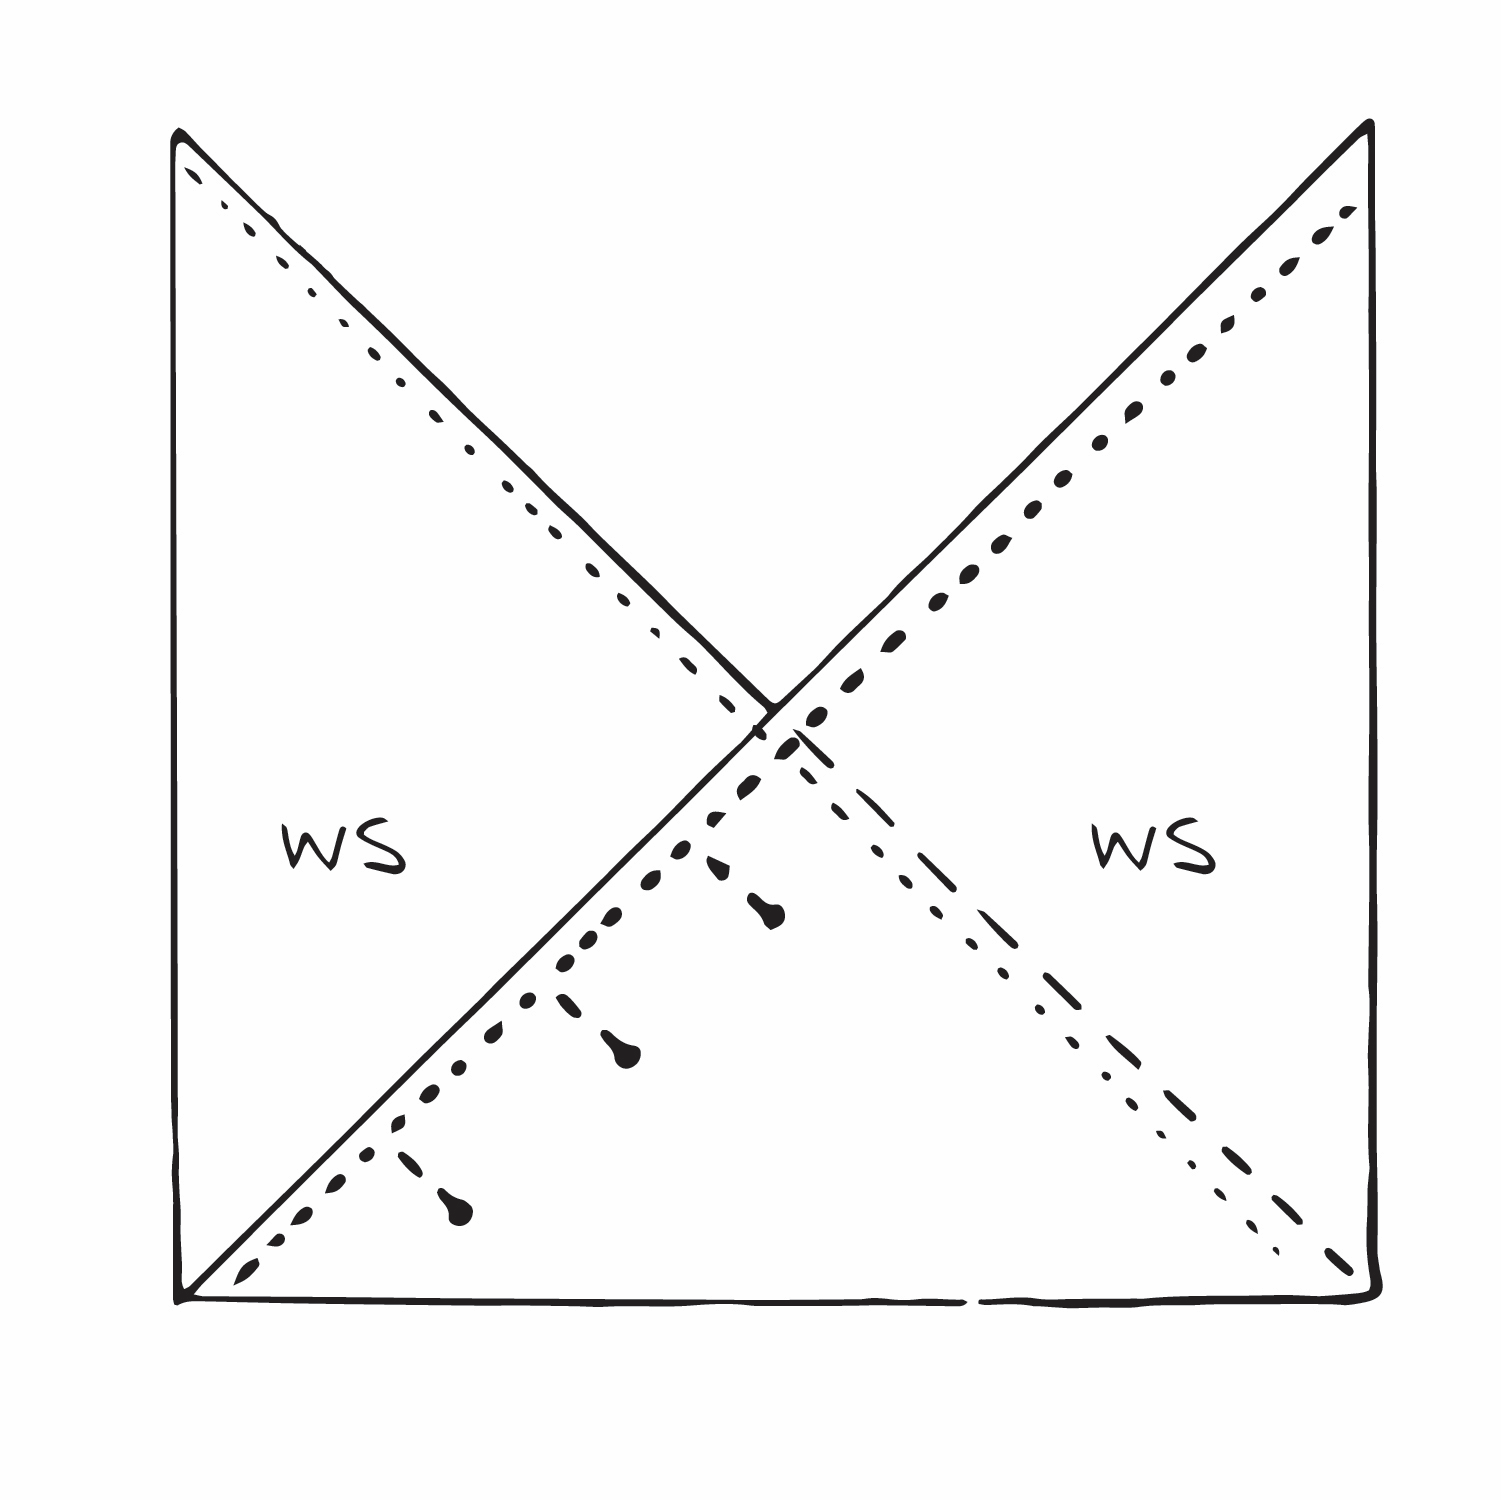
3. Flip the two triangles over so both wrong side (WS) face up. Pin the free edge of the top triangle to the bottom one. Sew long edge all the way to the top at ¼”(6mm). Fray long edges to stitching line if desired
Repeat steps 1-3 with second square.
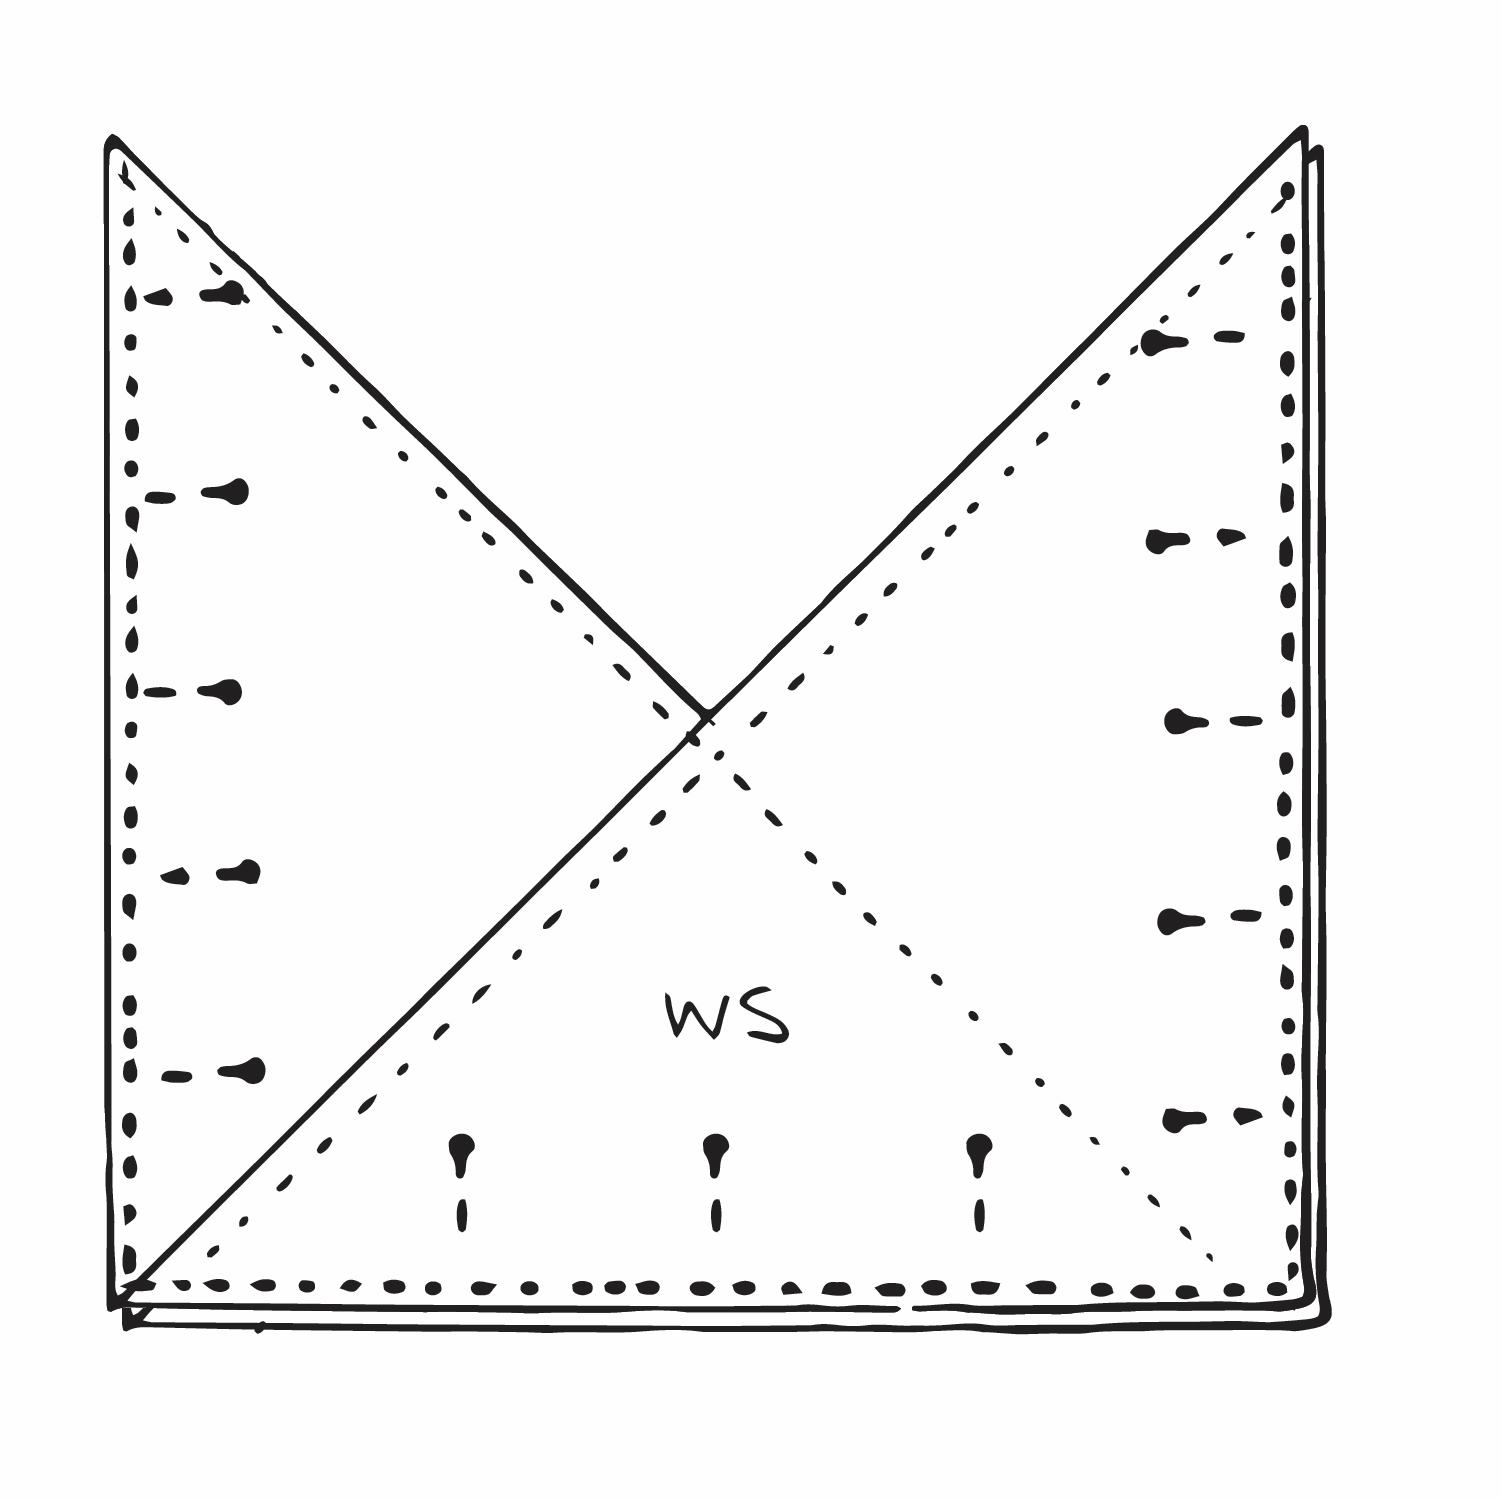
4. Take both sewn pieces and pin RS together. Sew the sides and bottom using a 1/2” (1cm) seam allowance. Finish edges if desired and press seam open.
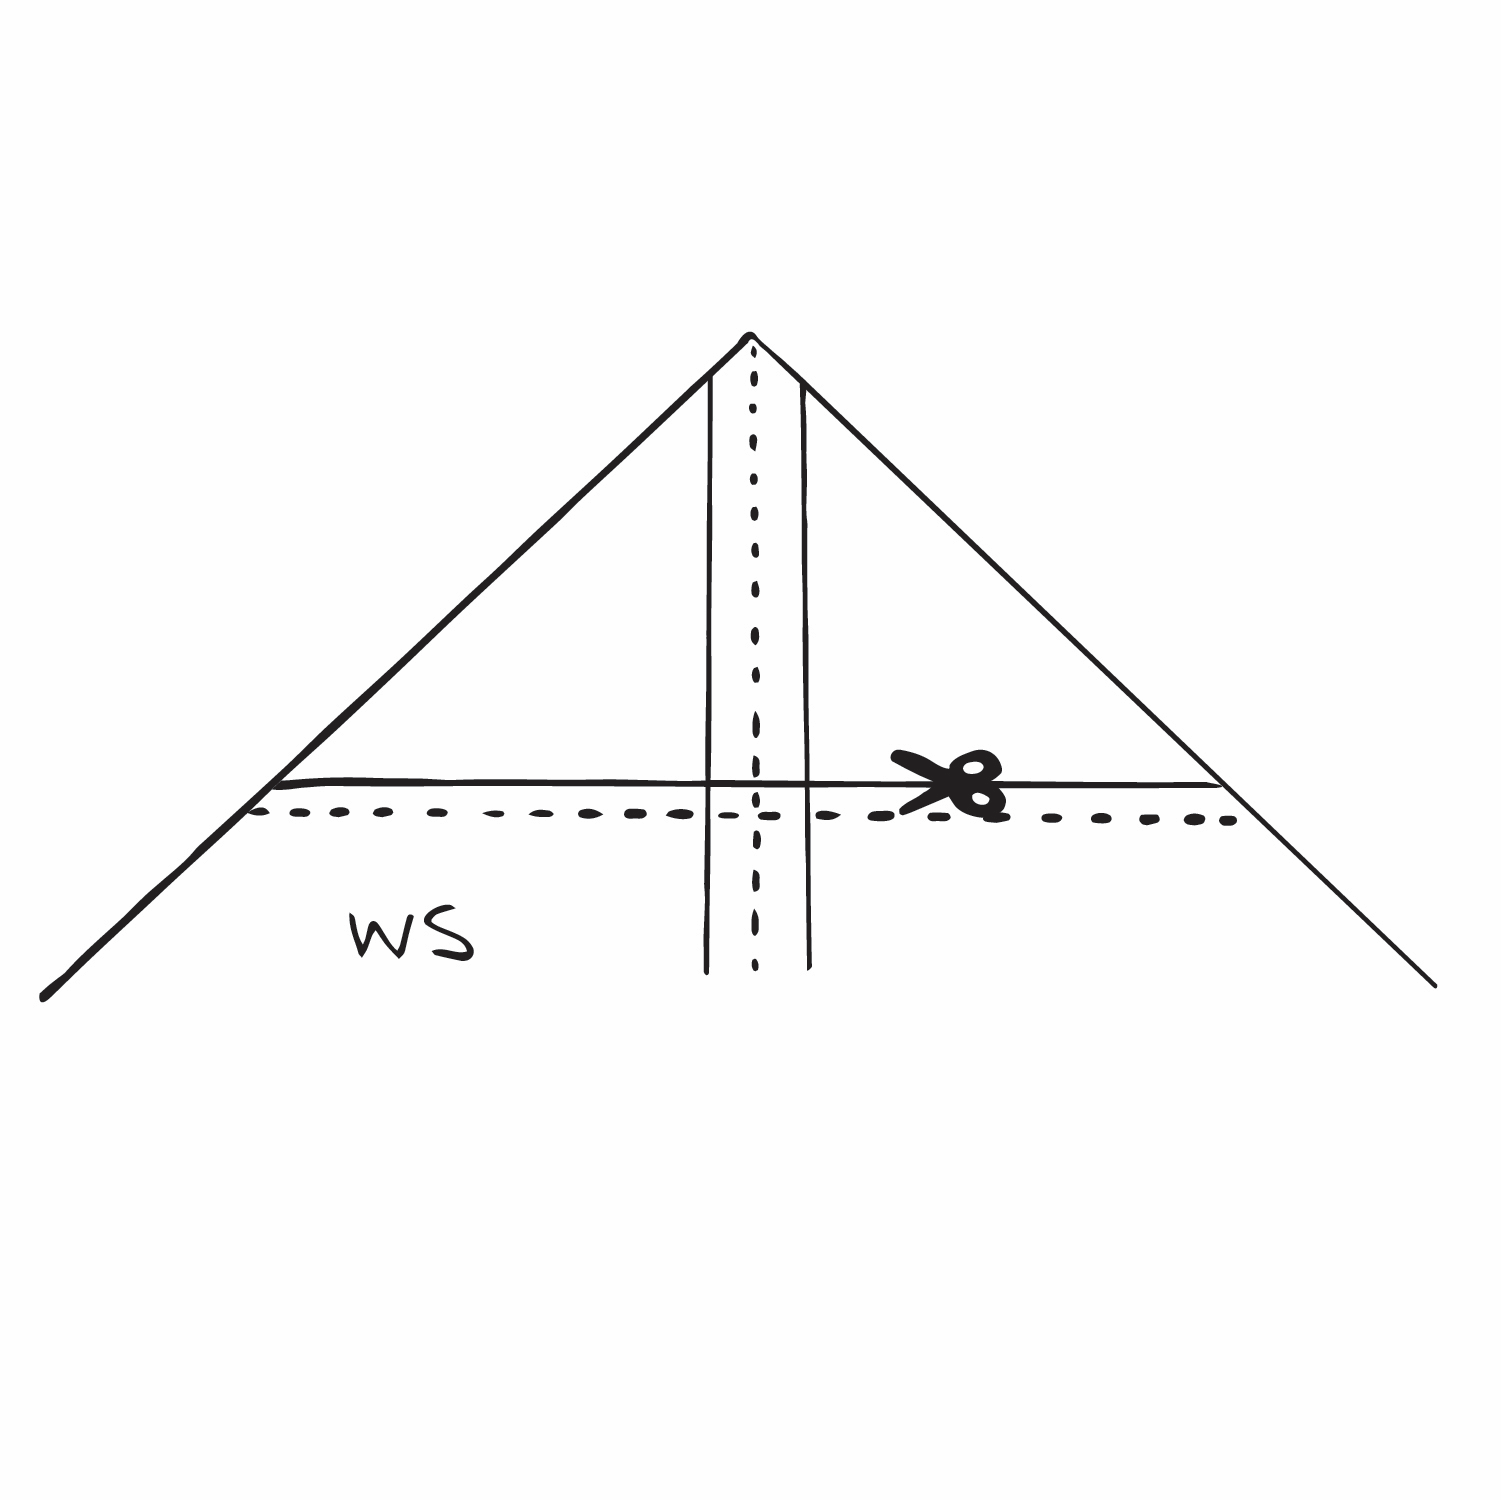
5. Keep WS out and prop the bag open. Pinch bag shut at corner and lay the corner seam lines on top of each other. Be sure it lays flat and smooth. From the corner, mark at 1” (2.5cm) in (2”(5cm) in for larger bags), and sew across this corner. Trim excess and finish seam allowance if desired. Repeat for other corner. Be sure to move the handle out of the way while you sew! This step will allow your bag to stand up on its own.
6. Turn RS out and give a final press. Unravel the hem on the handle edges by wiggling a pin between the threads up to the stitching line. If desired, hand stitch with embroidery thread to reinforce at the point where the triangles overlap.
Variations
Selvage-edge handles or using smaller scraps: Instead of cutting fabric for steps 1 and 2, use manila or pattern paper. Using this pattern piece you just created in step 2, cut 4 triangles with long edges along selvage (or anywhere you can squeeze in the pattern piece). Continue with step 3.
Double-turned hem: before step 3, double turn and hem the long edges of each triangle. Turn the fabric under ¼” (6mm), press. Turn the fabric under another ¼” (6mm). Press and hem close to the folded edge. This will create a slightly smaller bag than the raw-edged version.
French seams: In step 6, use french seams to sew sides and bottom. When sewing the final seam, the corners will get bulky. Because of the way the bottom of the bag is finished, the corners will be cut off, so don’t worry about sewing all the way into the corners. Use your best judgement for this variation when making the smaller sizes as seams get very bulky with stiff fabric.
This pattern was originally published in the No. 4 / Lines issue of Making Magazine. All photos by Carrie Bostick Hoge. Illustrations by me.
