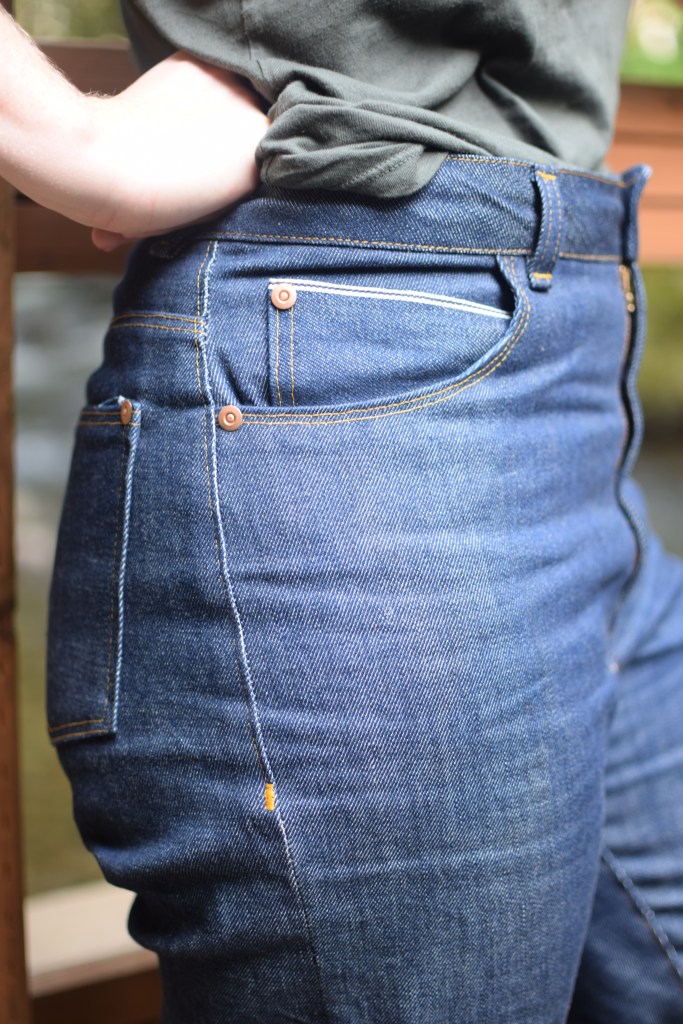
I’ve been wearing my first pair of Dawn jeans to death, and they have developed some holes! I’ve patched them but I needed a second pair in my rotation (once it cools down, right now i cannot imagine wearing tight jeans in this heat). Inspiration struck and I decided to sew another pair from my stash using some made-in-the-USA Cone Mills denim from Threadbare fabrics.
obligatory butt shot. i sewed on a patch I got in Indonesia!
I didn’t do anything to this denim before sewing it, they are truly RAW. we’ll see if i regret this. I basted the inseam and the side seams, tried them on, and was shocked by how well they fit. when i finished the waistband and belt loops, i put them on and i couldn’t close them. my last pair started out pretty good but stretched out, so i decided to wear them around the apartment for a few hours. after 1 day of wearing them around the house i went to get the buttons installed and i was able to close the jeans! they are still quite tight and are going to take some more breaking in to be comfortable.
after I finished constructing the jeans, I went to Star Snaps NYC to have rivets and buttons installed. I installed the rivets and buttons myself for my last pair, and doing this without the right equipment or access to space where its okay to make hammering noises was really challenging. They did a fab job and I totally recommend their services.
Special thanks to Tillamook State Forest for being so pretty!
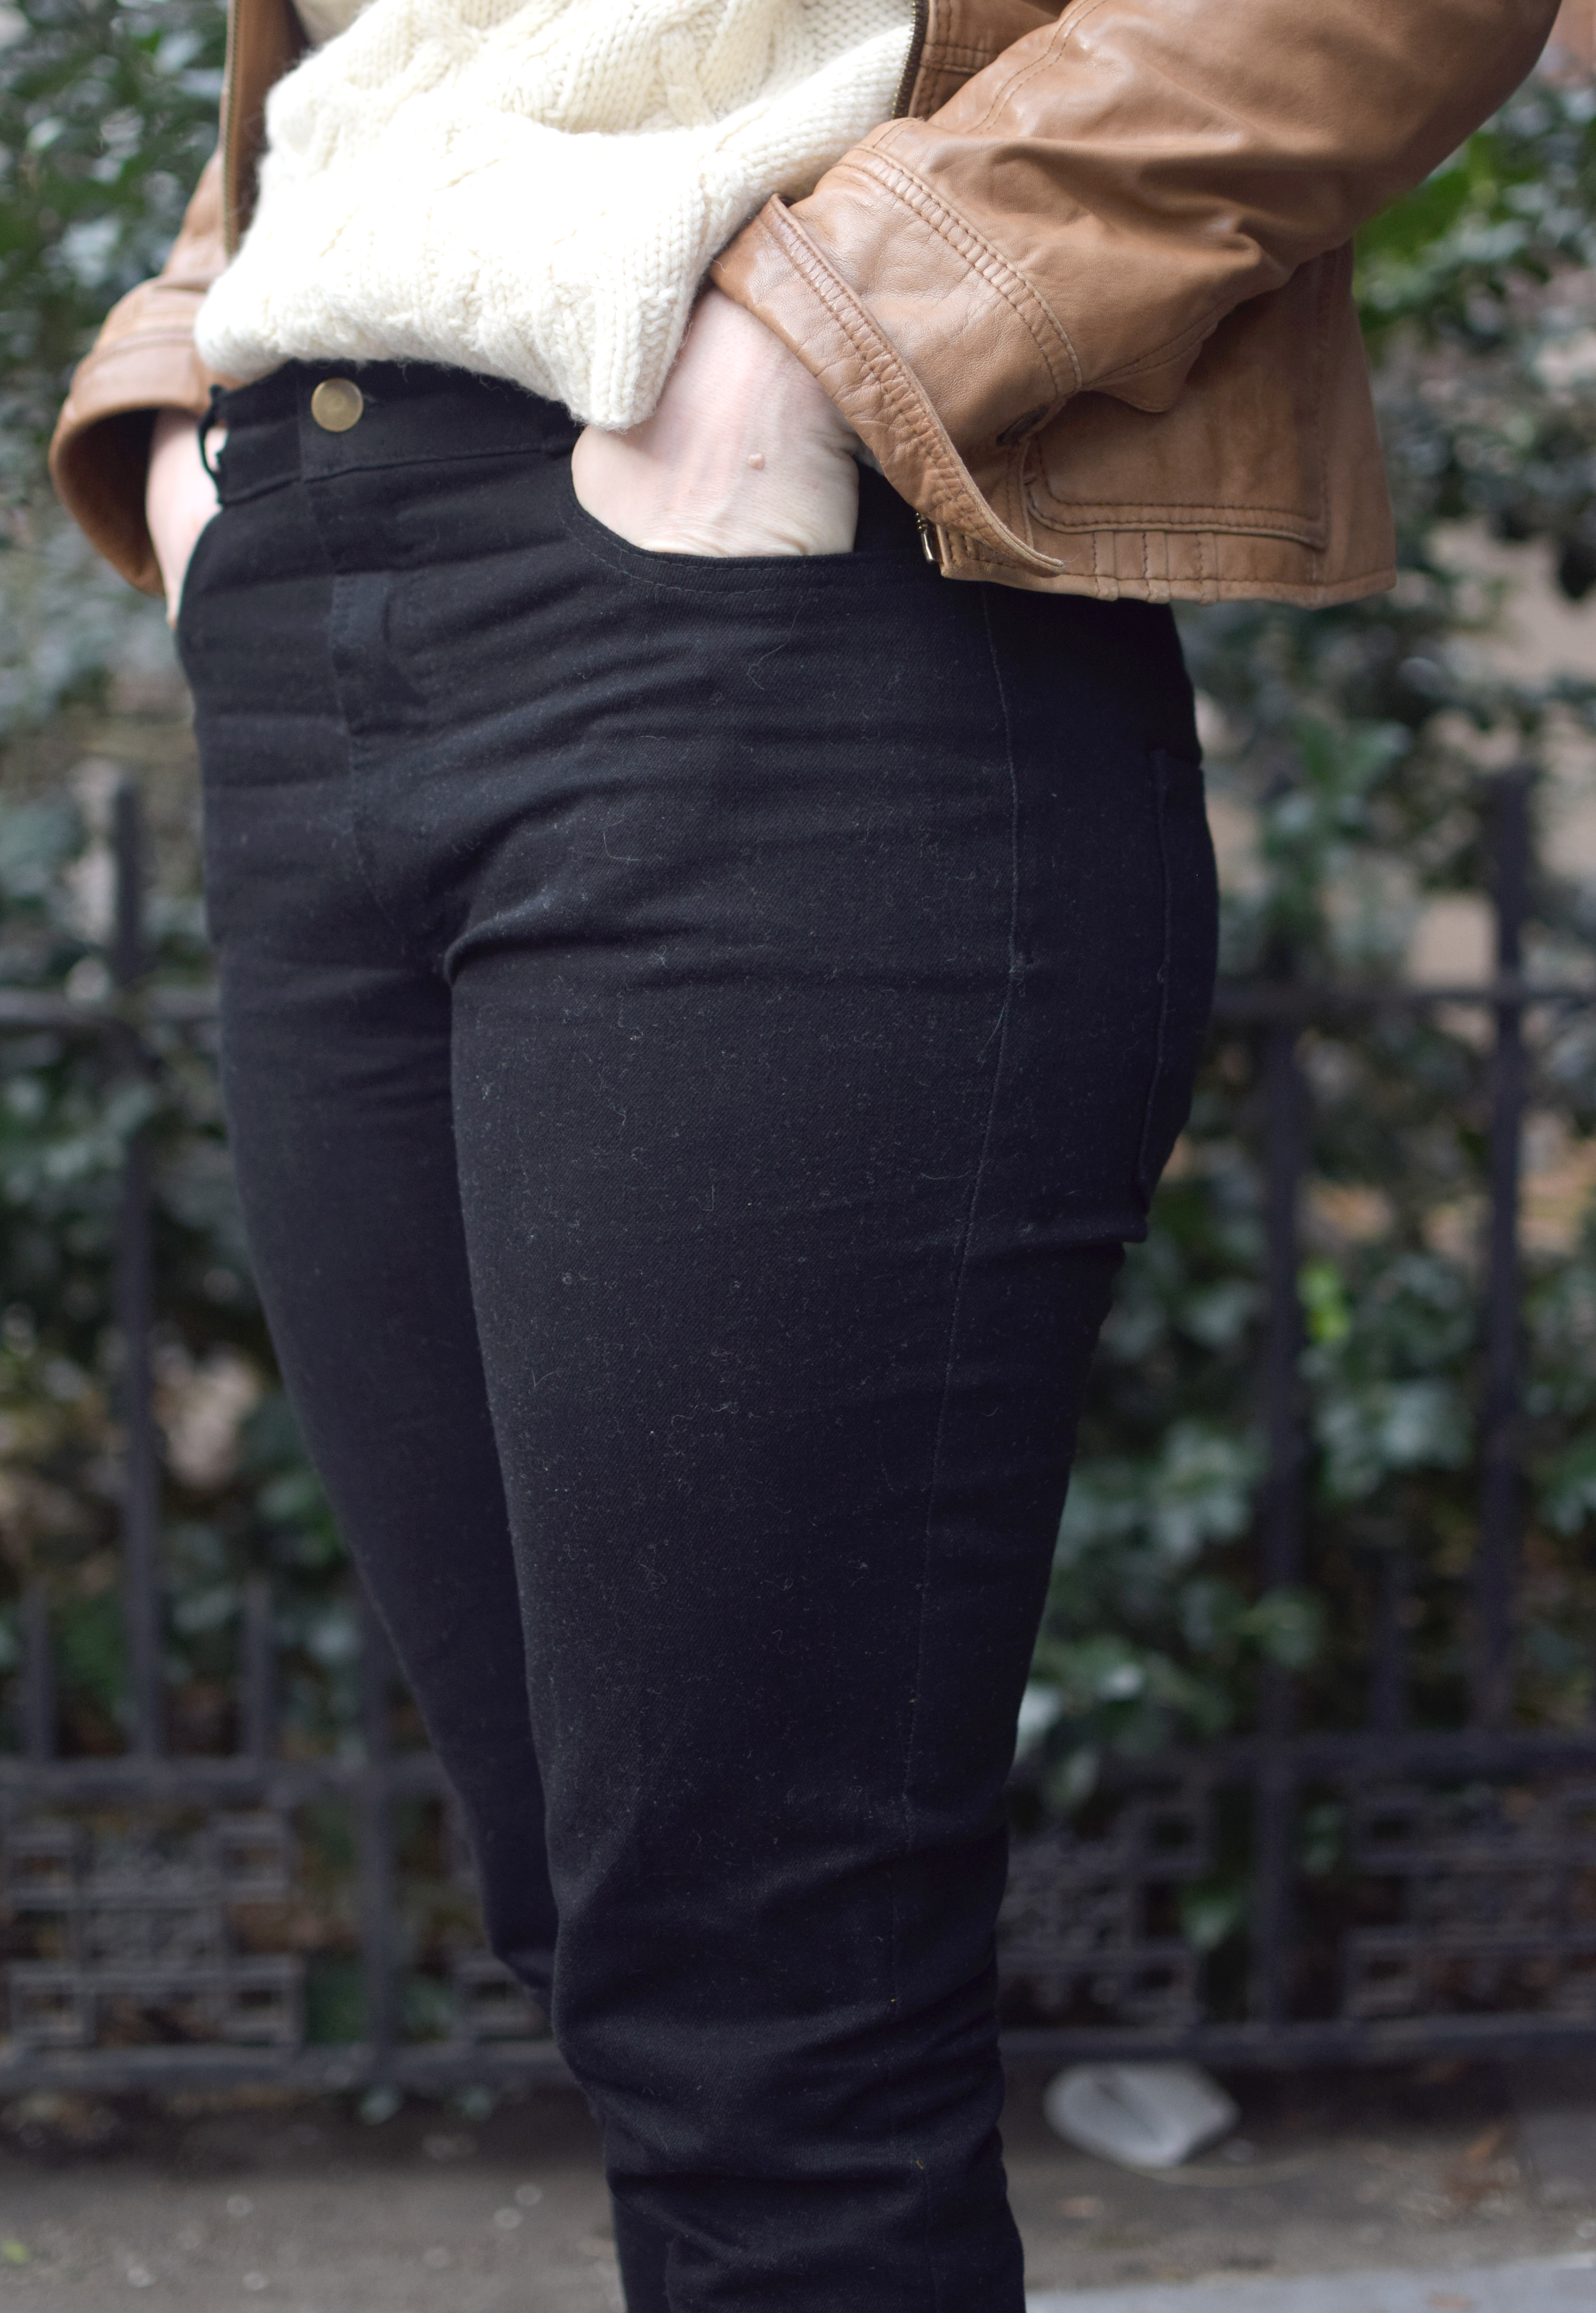
Up until last week, I had only dreamed of having high-waisted rigid denim jeans. So, after dreaming long enough, I decided to get to work. Some very special vintage Japanese selvedge and a hardware kit from Blackbird Fabrics was patiently waiting in my stash, begging to be made into said dream jeans. So really, no excuses besides my fear of failure.
When I decided I was going to make these, I almost went for the Ginger jeans again, but 1. I wanted a higher rise, and 2. Ginger is designed for stretch denim. Much like Jasika’s commentary on the Dawn Jeans, I was very skeptical when that pattern came out. But after seeing how amazing Jaskia’s and Lauren’s versions turned out, I decided to go for it.
I measured the straight leg pattern pieces against my favorite pair of RTW jeans I own (that are too tight in the thighs but are perfect everywhere else). As I cut out a muslin, I sharpied the original inner thigh cut line and added ample ease so I could easily add room after I sewed the inseam and side seams if needed (and I did need it). I also tapered the straight leg in a bit to match the RTWs, and I like where I ended up.
I only muslined the front and back legs and back yoke. In order to get pants that were try-onable I extended the front pockets to the side seams.
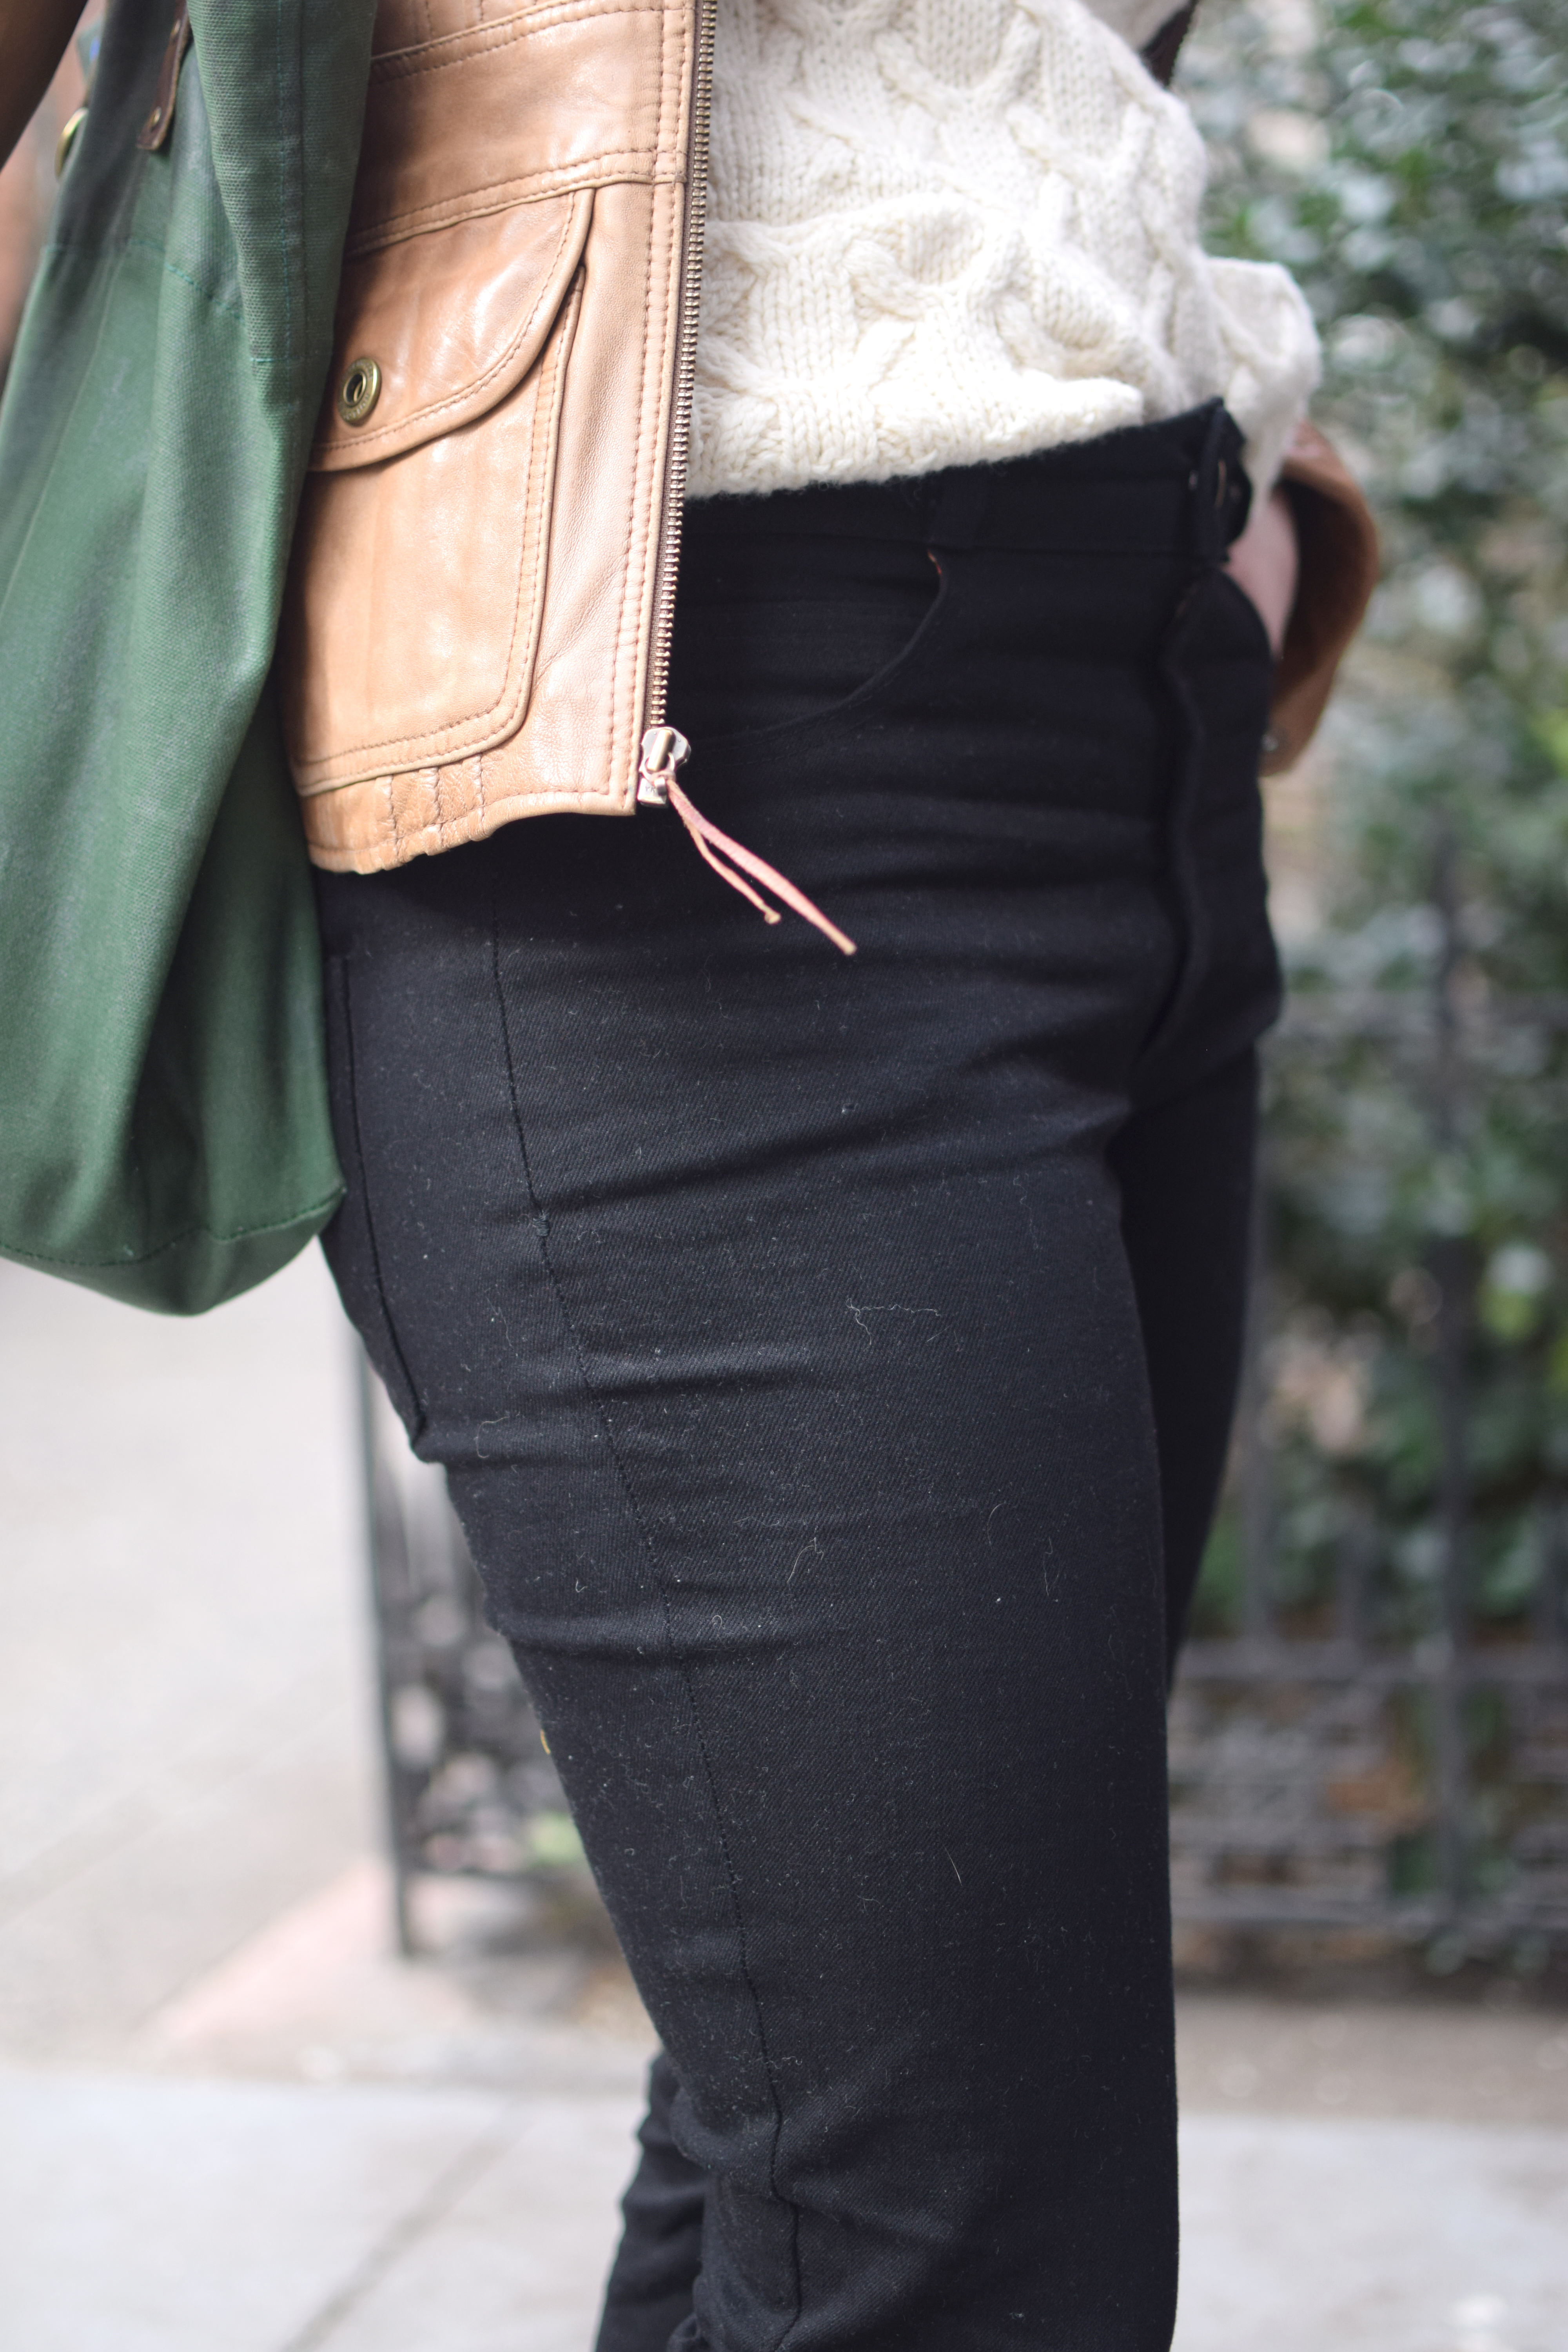
Selvedge coin pocket!! (Thanks for the idea, Jasika!)
I wanted to extend the pockets to become stays, as I hate re-stuffing my pocket bags every time I put on jeans. I copied the Ginger Jeans stay by extending the pocket of the Dawns to sew in the center front seam, but because the directions have you start with the zip fly and I forgot to baste them in prior to constructing said fly, I had to redo it. I also wasn’t paying enough attention when I cut out the pocket bags and cut both on the same side, so I have one pocket that’s right-side in, and one right-side out. I ended up taking out most of the extra room I added to the crotch seam, but I am glad I had extra and was able to take it in (rather than not having enough). Lastly, I had to re cut the waistband with a much more pronounced curve (using THIS very awesome tutorial). The fit is MUCH better now, but they still could come in a little tiny bit more. When I ripped out the first waistband, I also took a small wedge out of the back yoke, since I already was in there ripping out stitches.
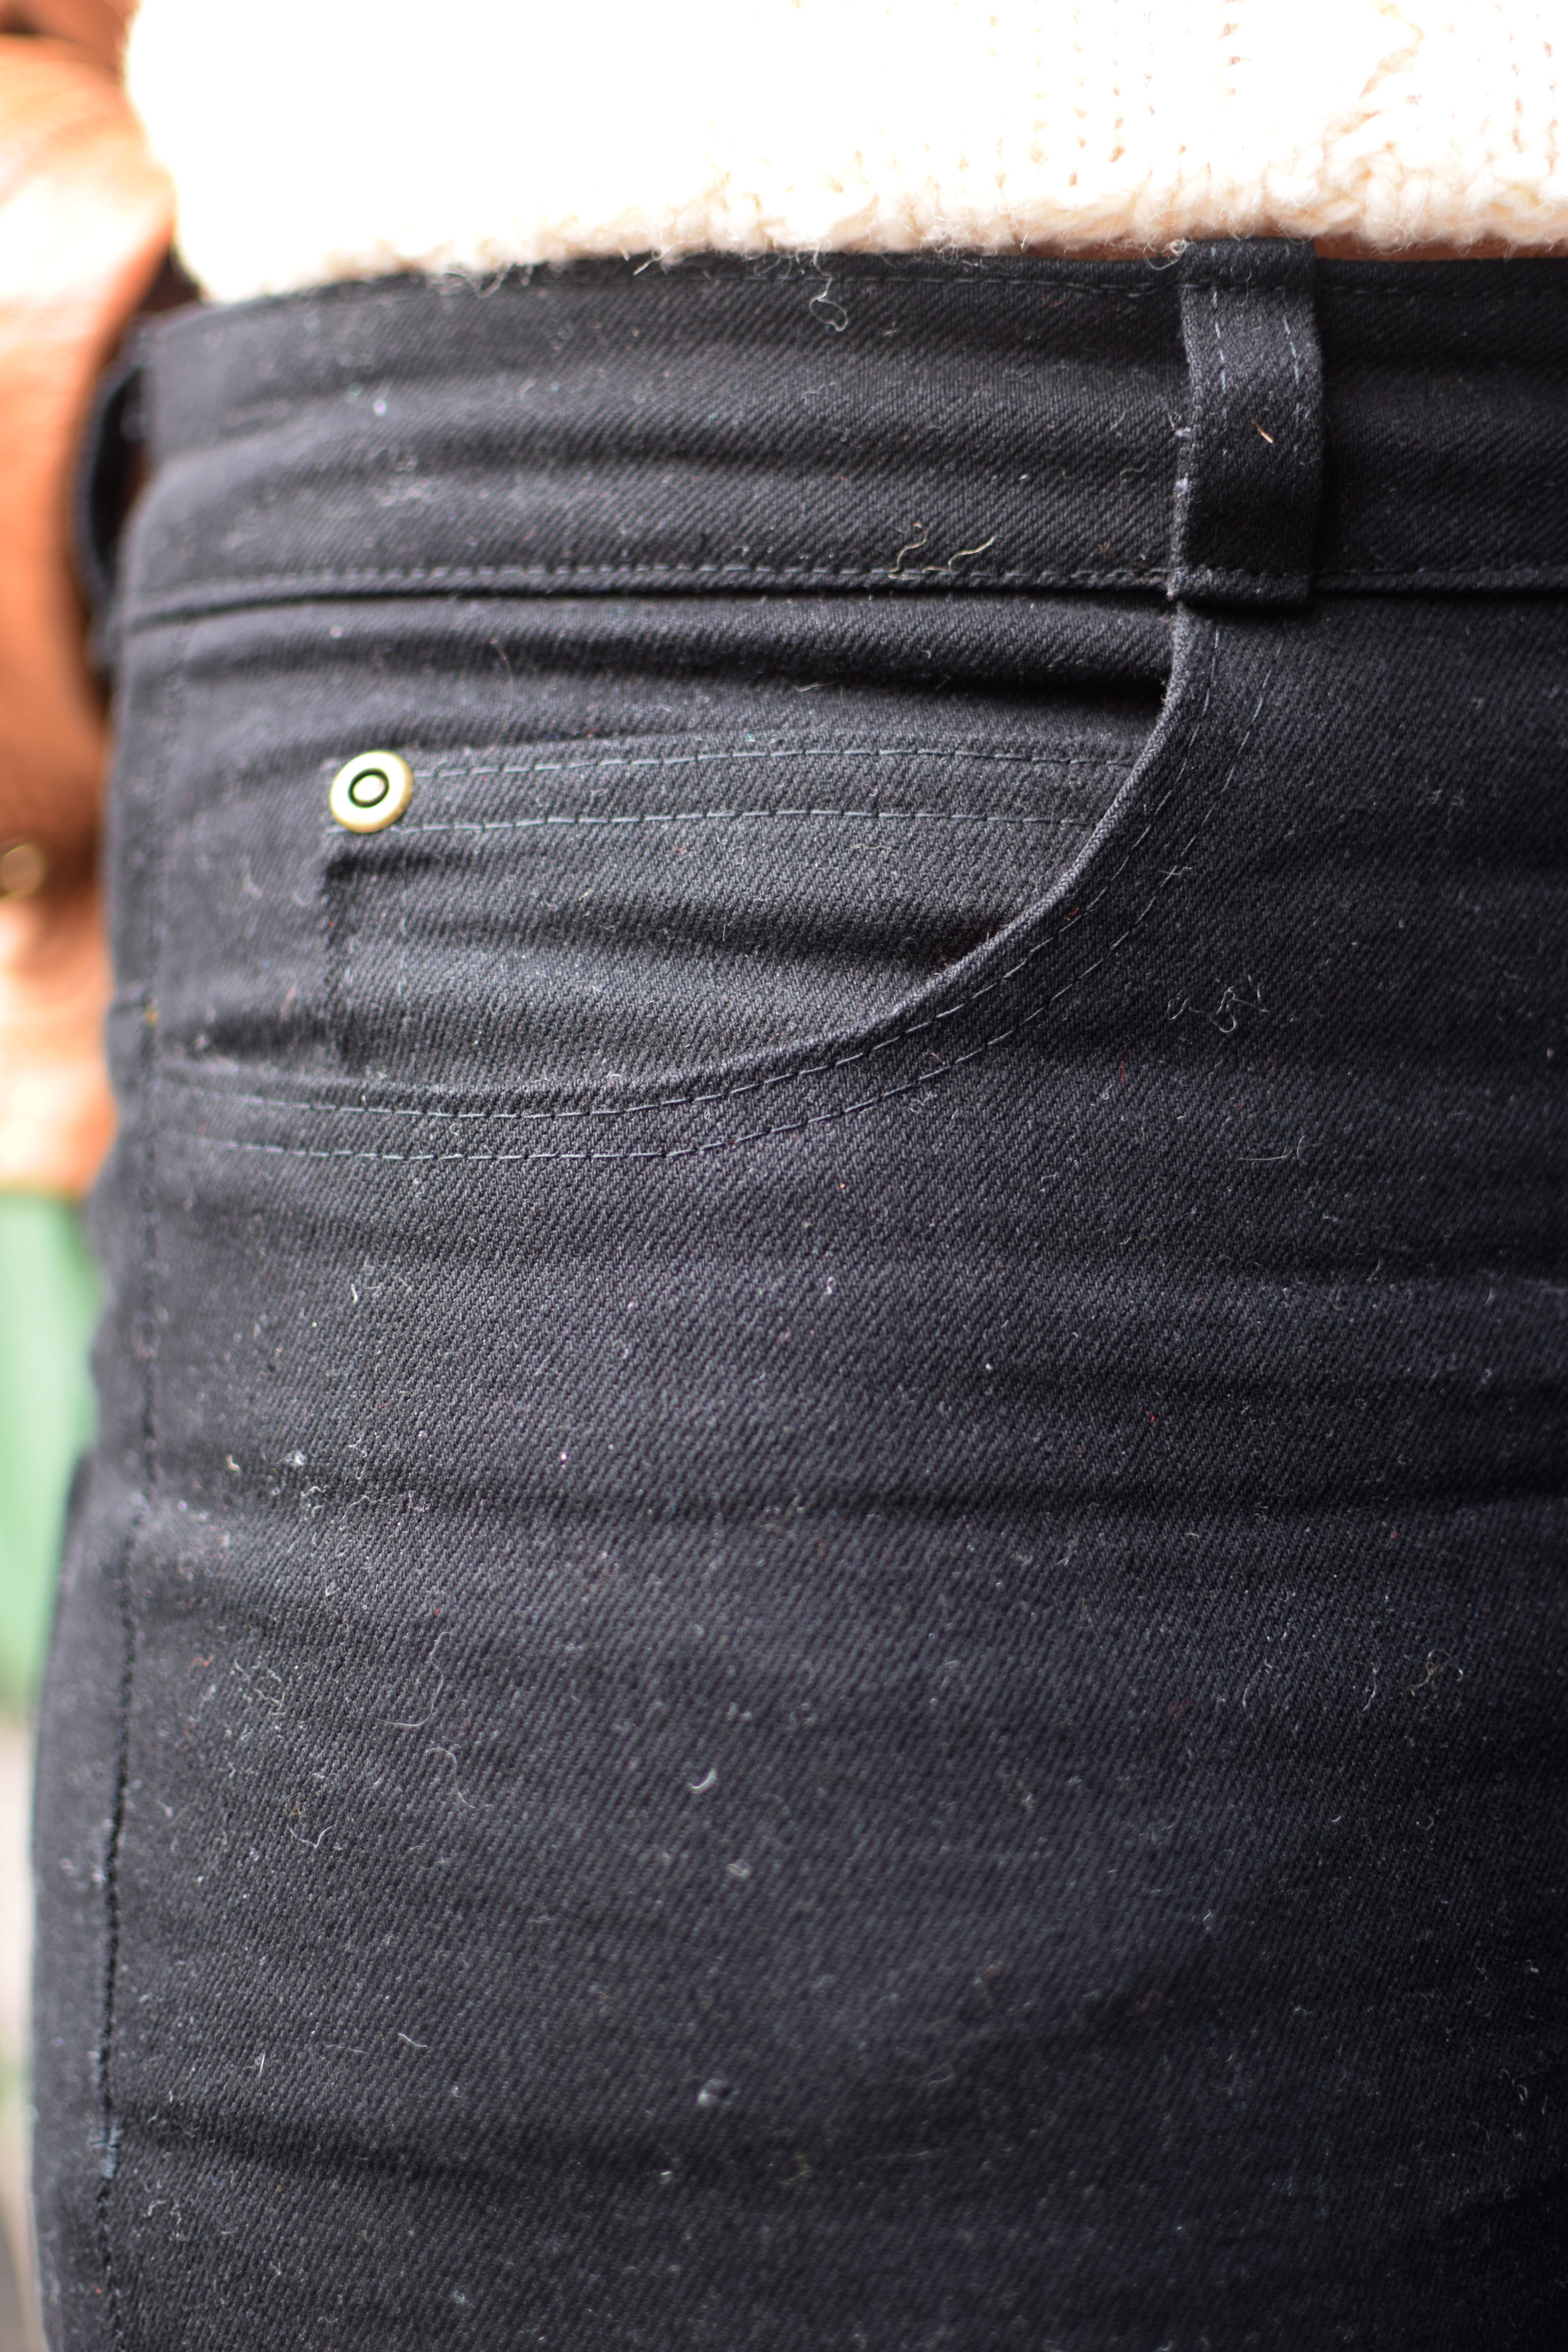
I used regular thread throughout this project, as my machine HATES topstitching thread. I found the bar tacks were super easy to just do a very small length zig zag and go back and forth a few times. I am quite happy with how they turned out.
The rivets, man, the rivets. I don’t have a tailor’s awl, so I used a nail to poke holes in the jeans, but the rivet posts were a little bit wider than the nail, so it took some serious wiggling around to get them to poke through. Super worth it, though, I think it makes them look so much more legit.
I am SO HAPPY with how these turned out, I cannot wait for them to develop their unique wear lines. I am gonna try to maximize wear and minimize washing…. we’ll see how I do. They stretched out a bit from wearing them on my trip to Portland, but I think once I give them their first wash, they’ll tighten up a bit. They do fit very snugly when I sit down, so I can’t imagine them being much more fitted when I am standing. The toils of rigid denim I guess!
I finally made some jeans, and I am pretty happy with them! The motivation to make these came from the sad day when the zipper broke on my favorite pair of black jeans. I really felt their absence from my wardrobe, so I decided I would take the plunge and use my Cone Mills black denim and try out the Ginger Jeans (View B).
posting a picture of my butt on the internet is a very odd feeling.
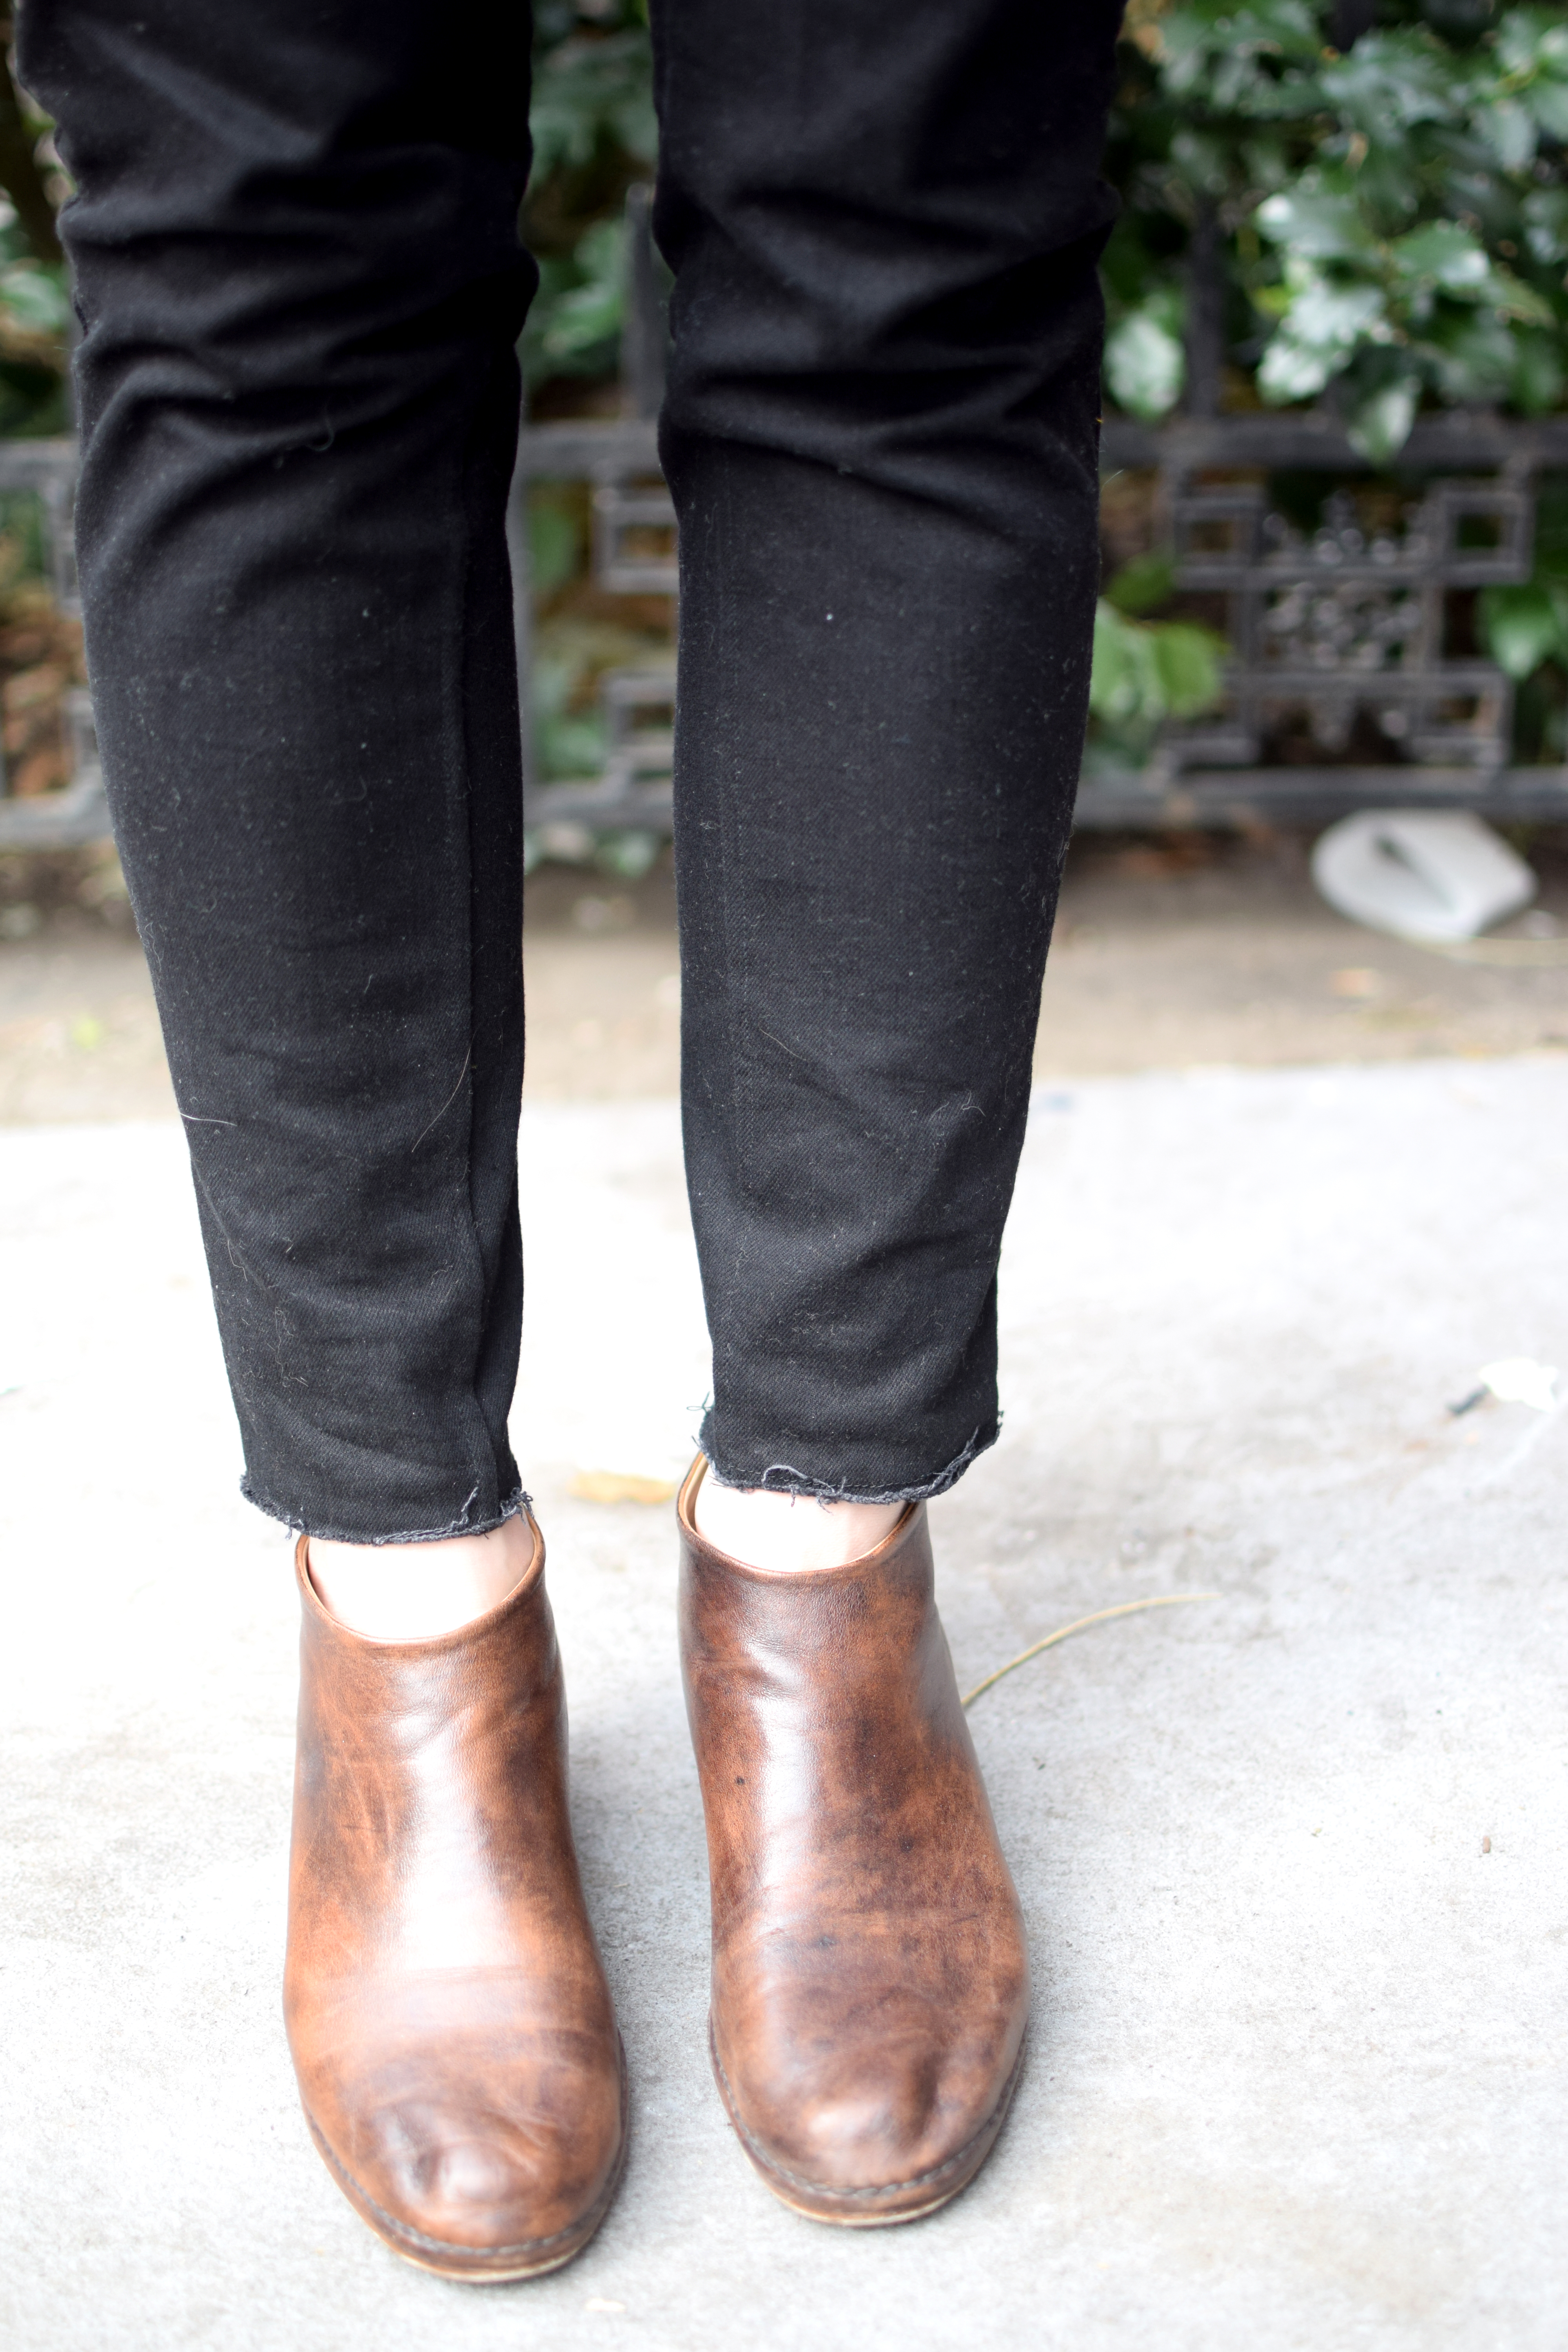
Overall I am extremely happy with these jeans and have incorporated them into my everyday wardrobe, so thats a huge positive!!! I am also very happy with the zipper fly, the way the pattern has you do it is very easy. I did a raw hem, so I cut 3.5″ off the bottom of the jeans, and did a straight stitch a 1/2″ up from the bottom to prevent extreme fraying.
Next time I will place the pockets higher on the butt, and take in the waist a little more, they are a little bit baggy in the front crotch area. I also think I’ll raise the hem a couple of inches, as these could really have a higher rise.
Oops, I forgot to lengthen my stitch length for the waistband…