here’s a bunch of stuff I made over the past couple of months.
Ret nem
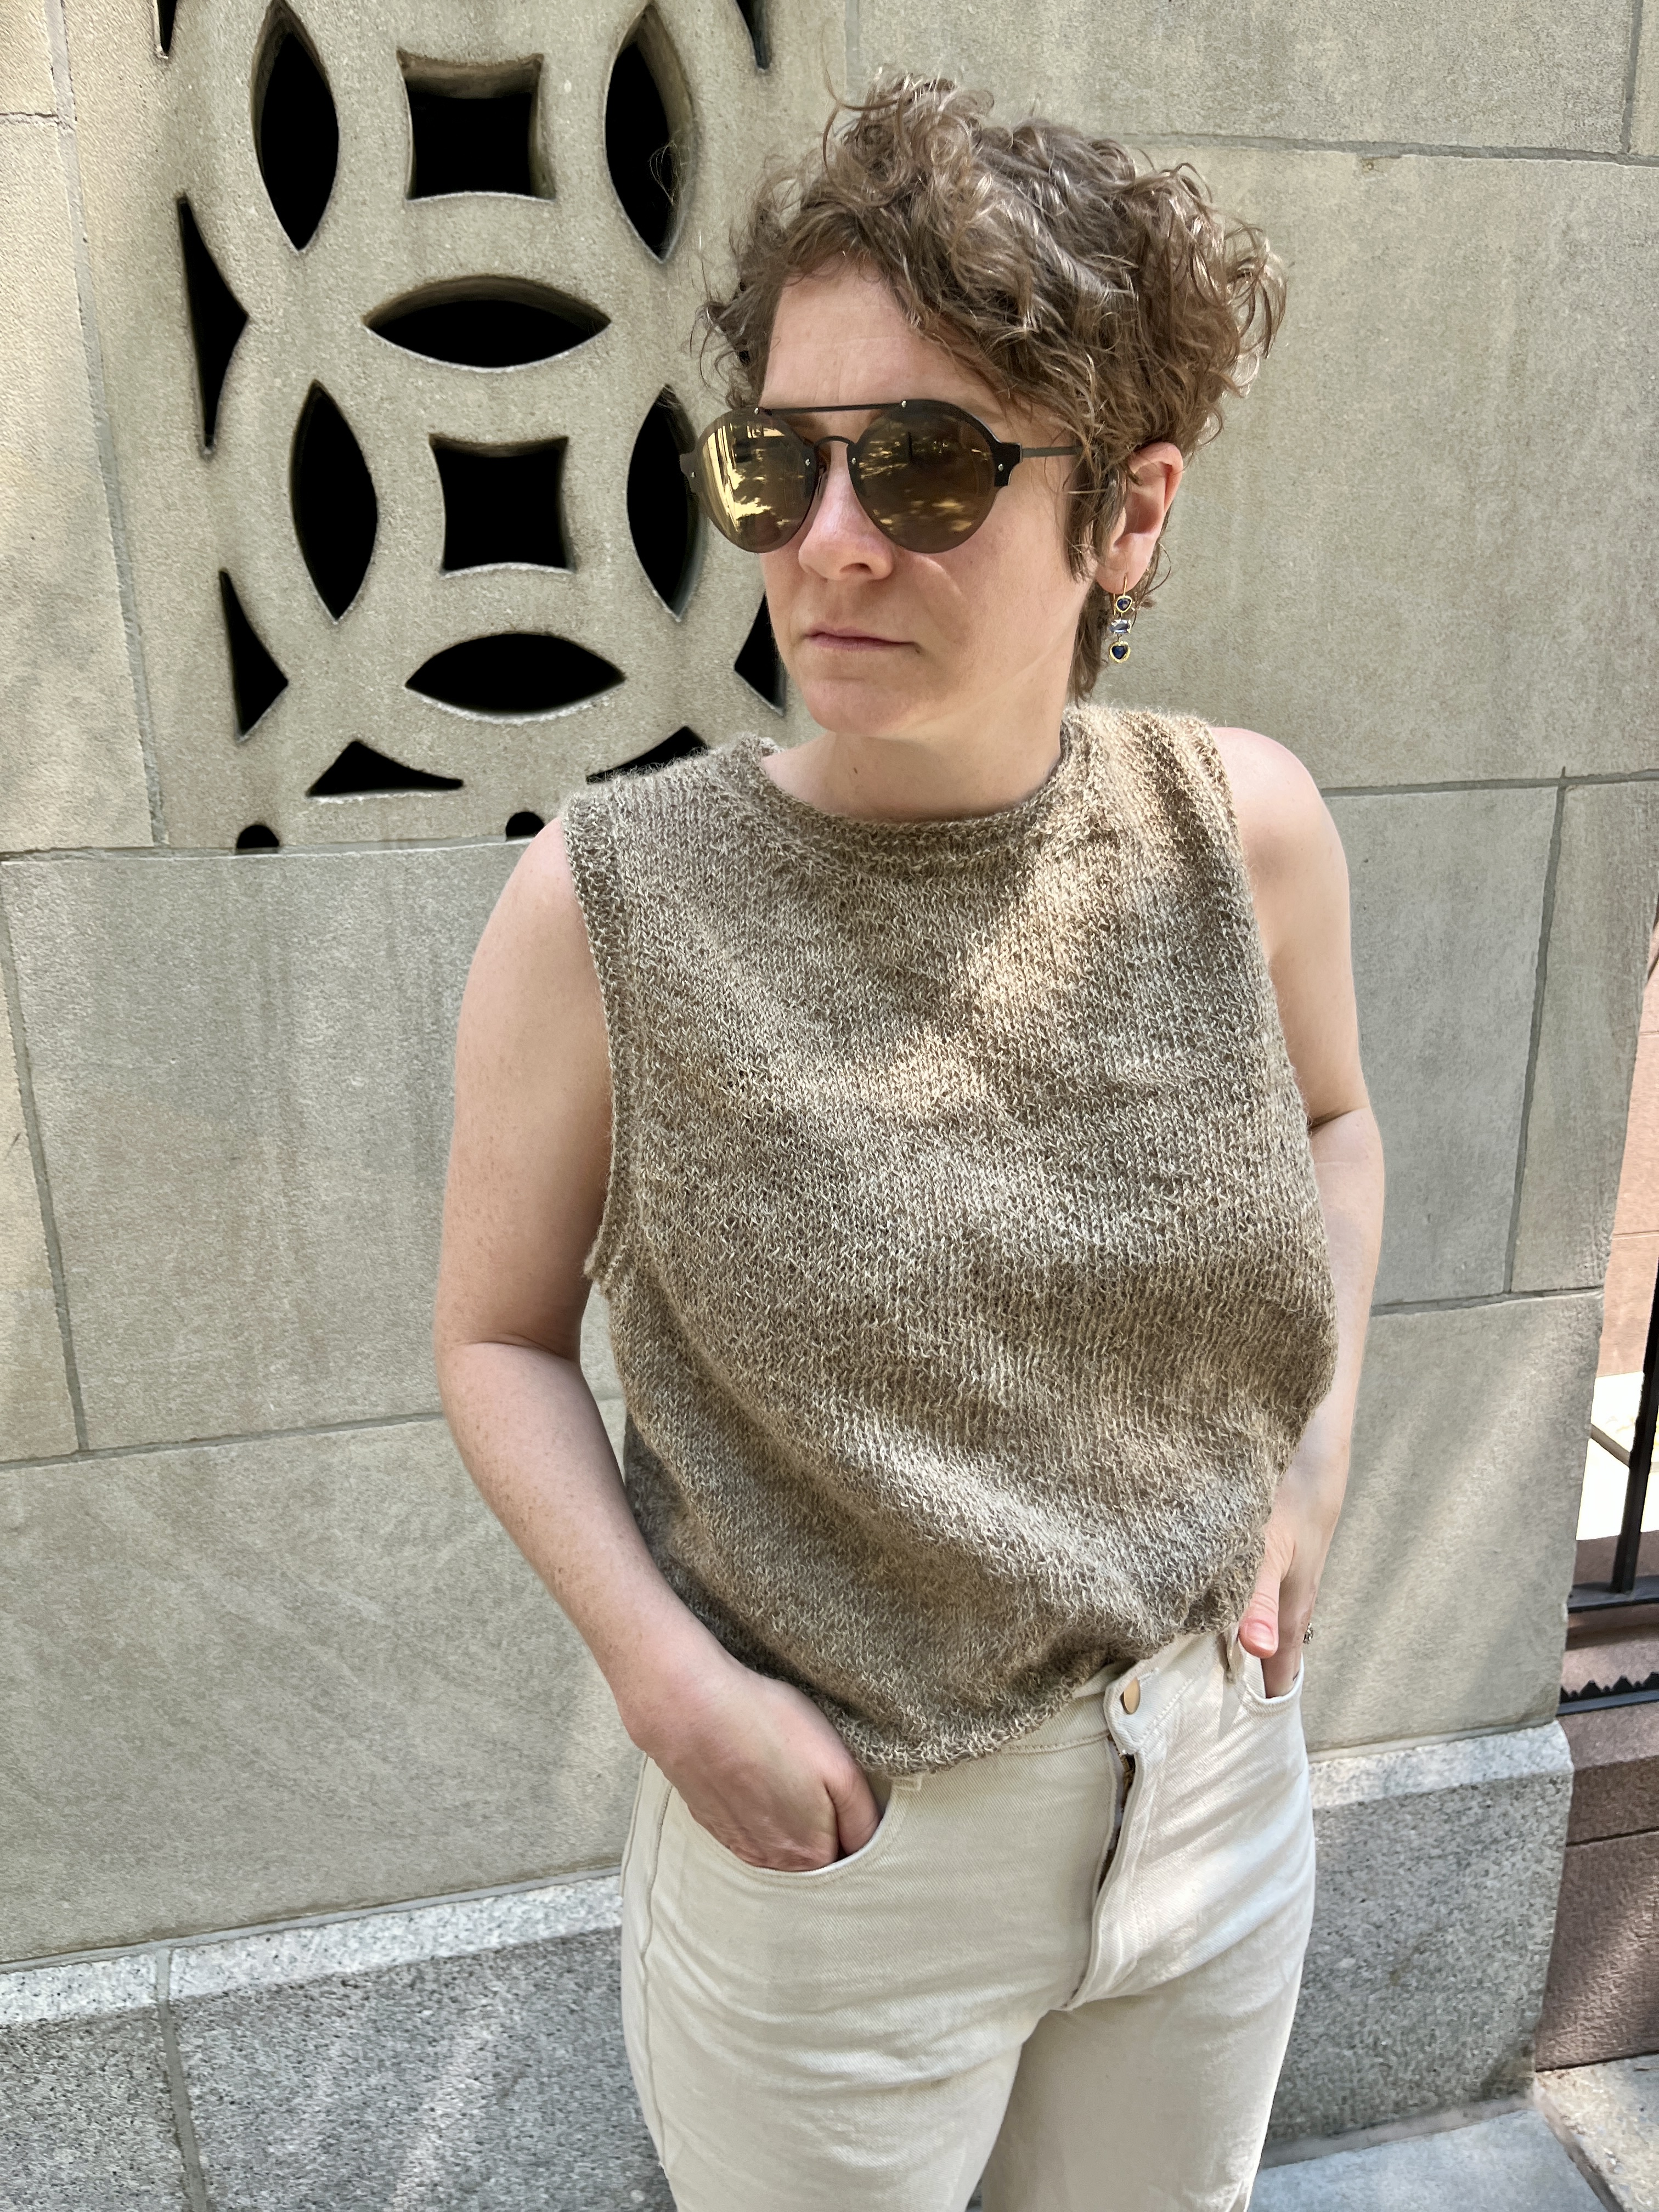
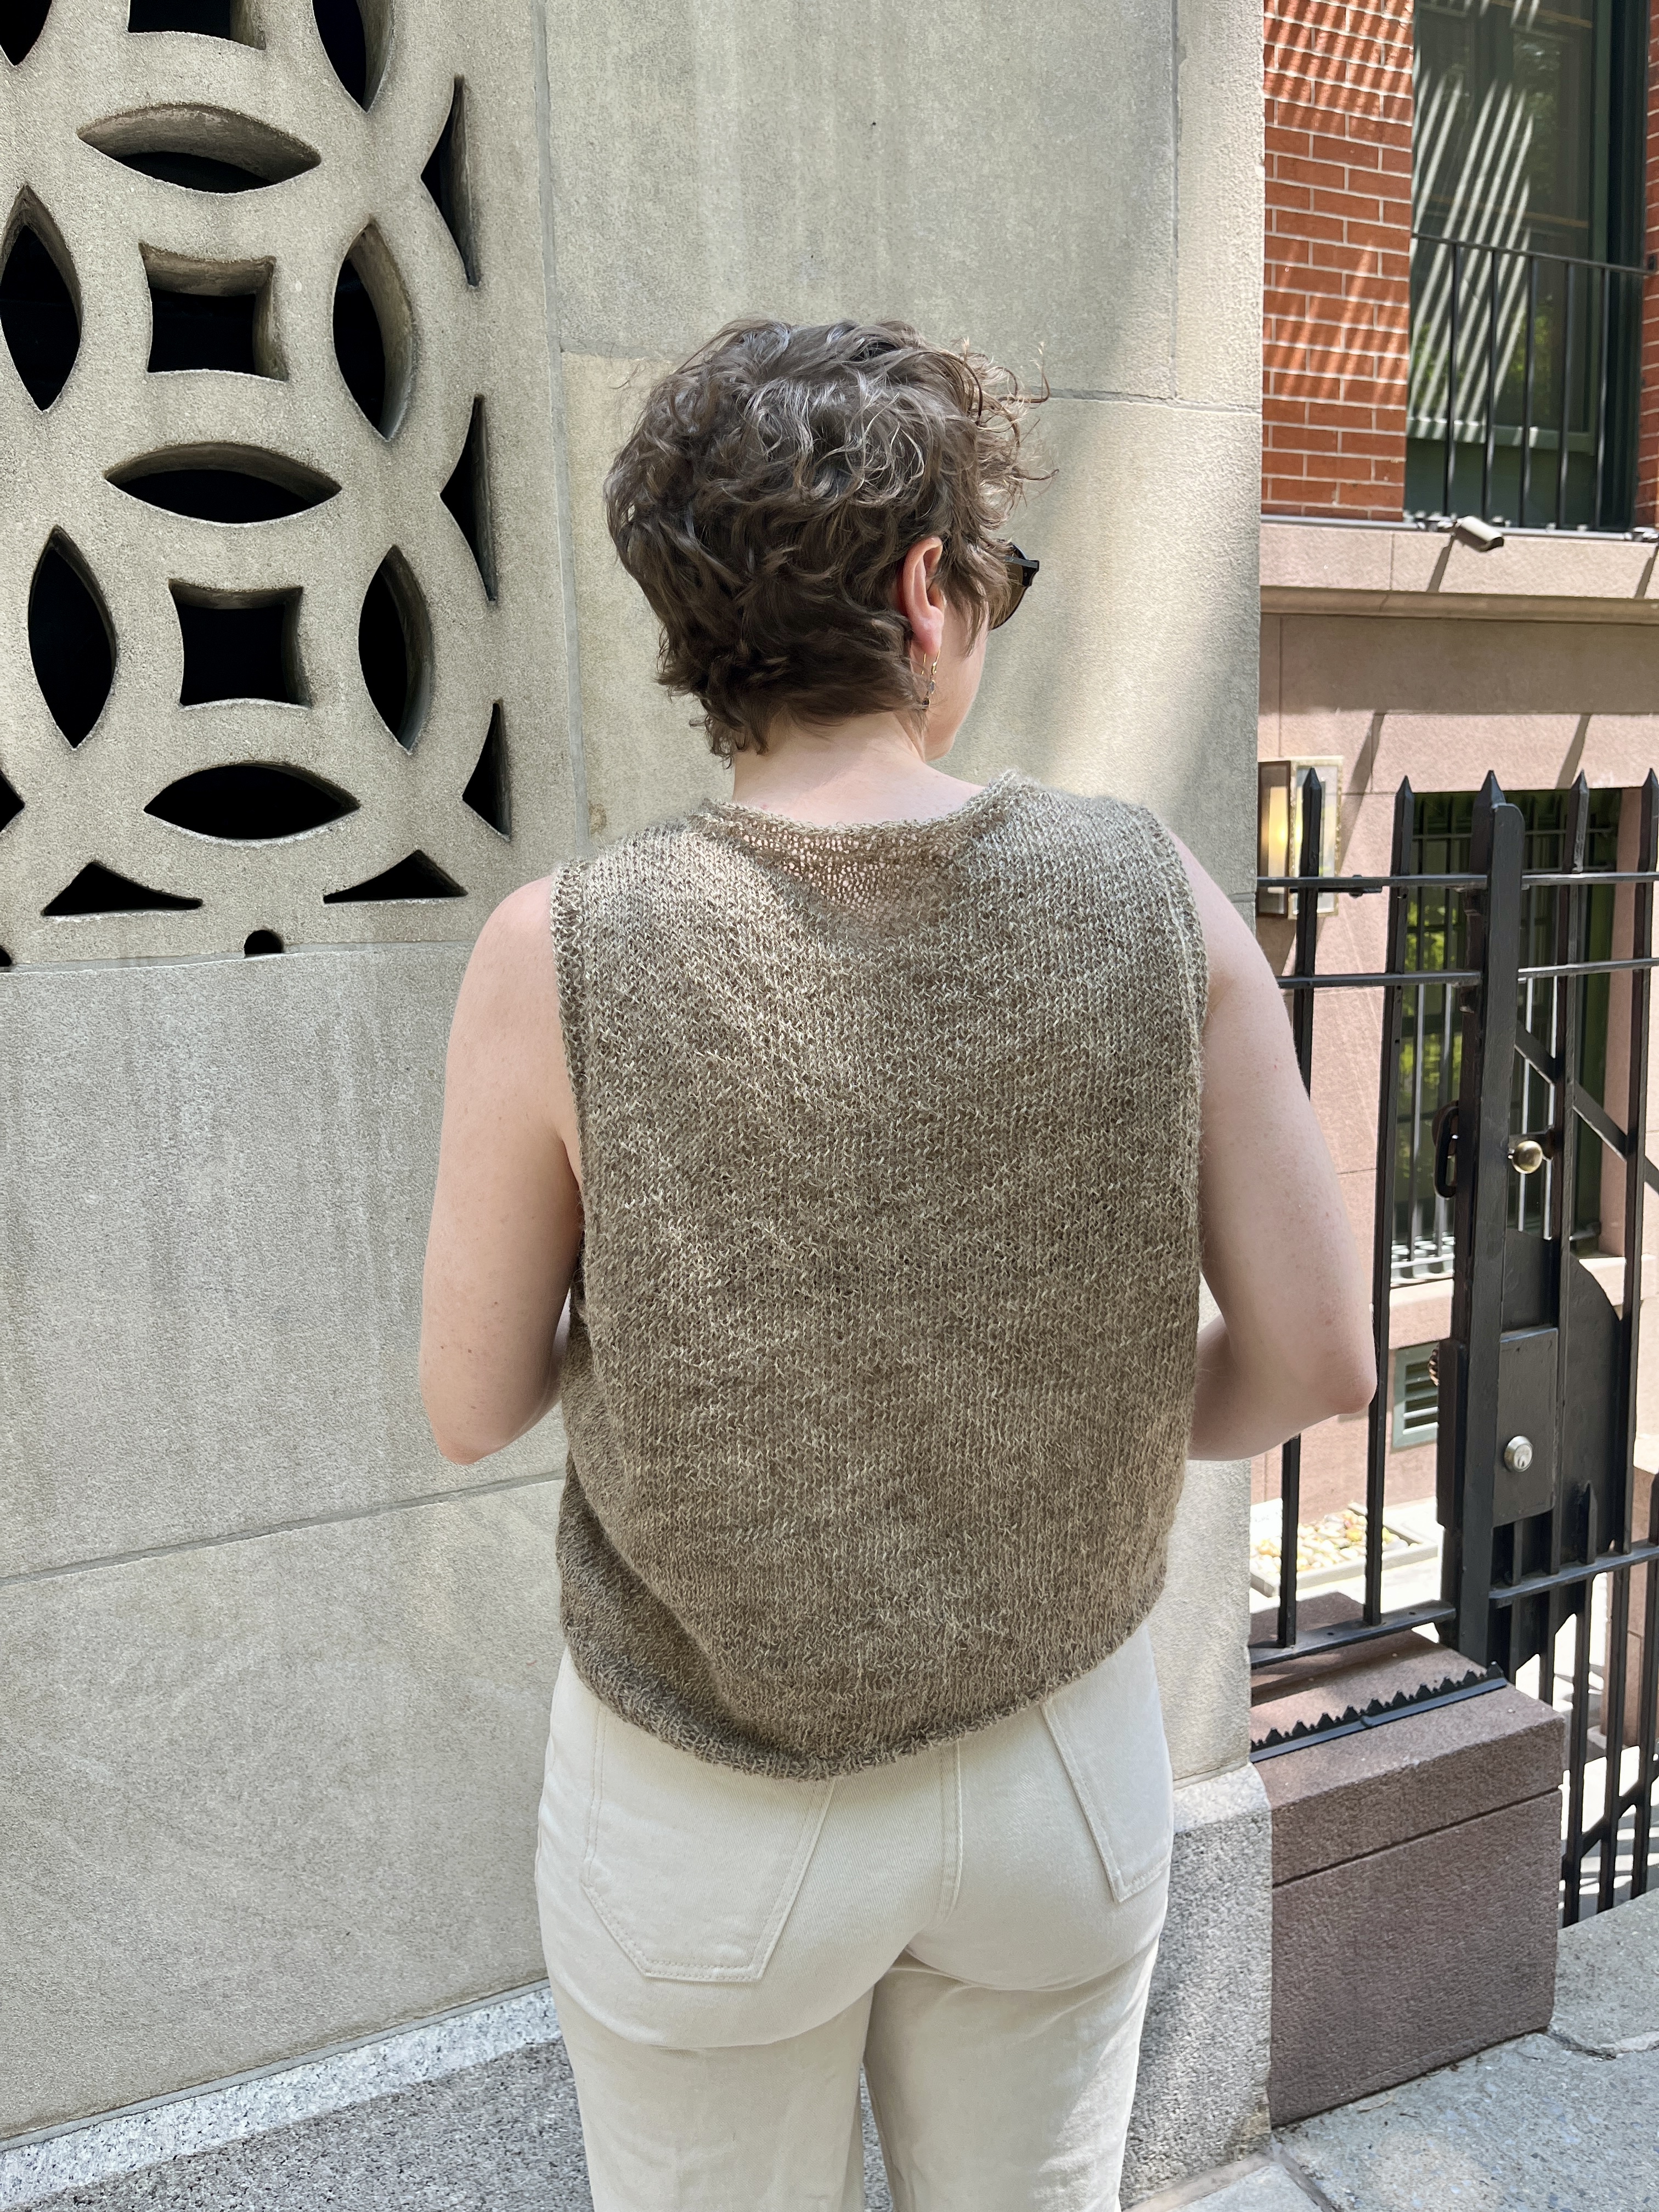
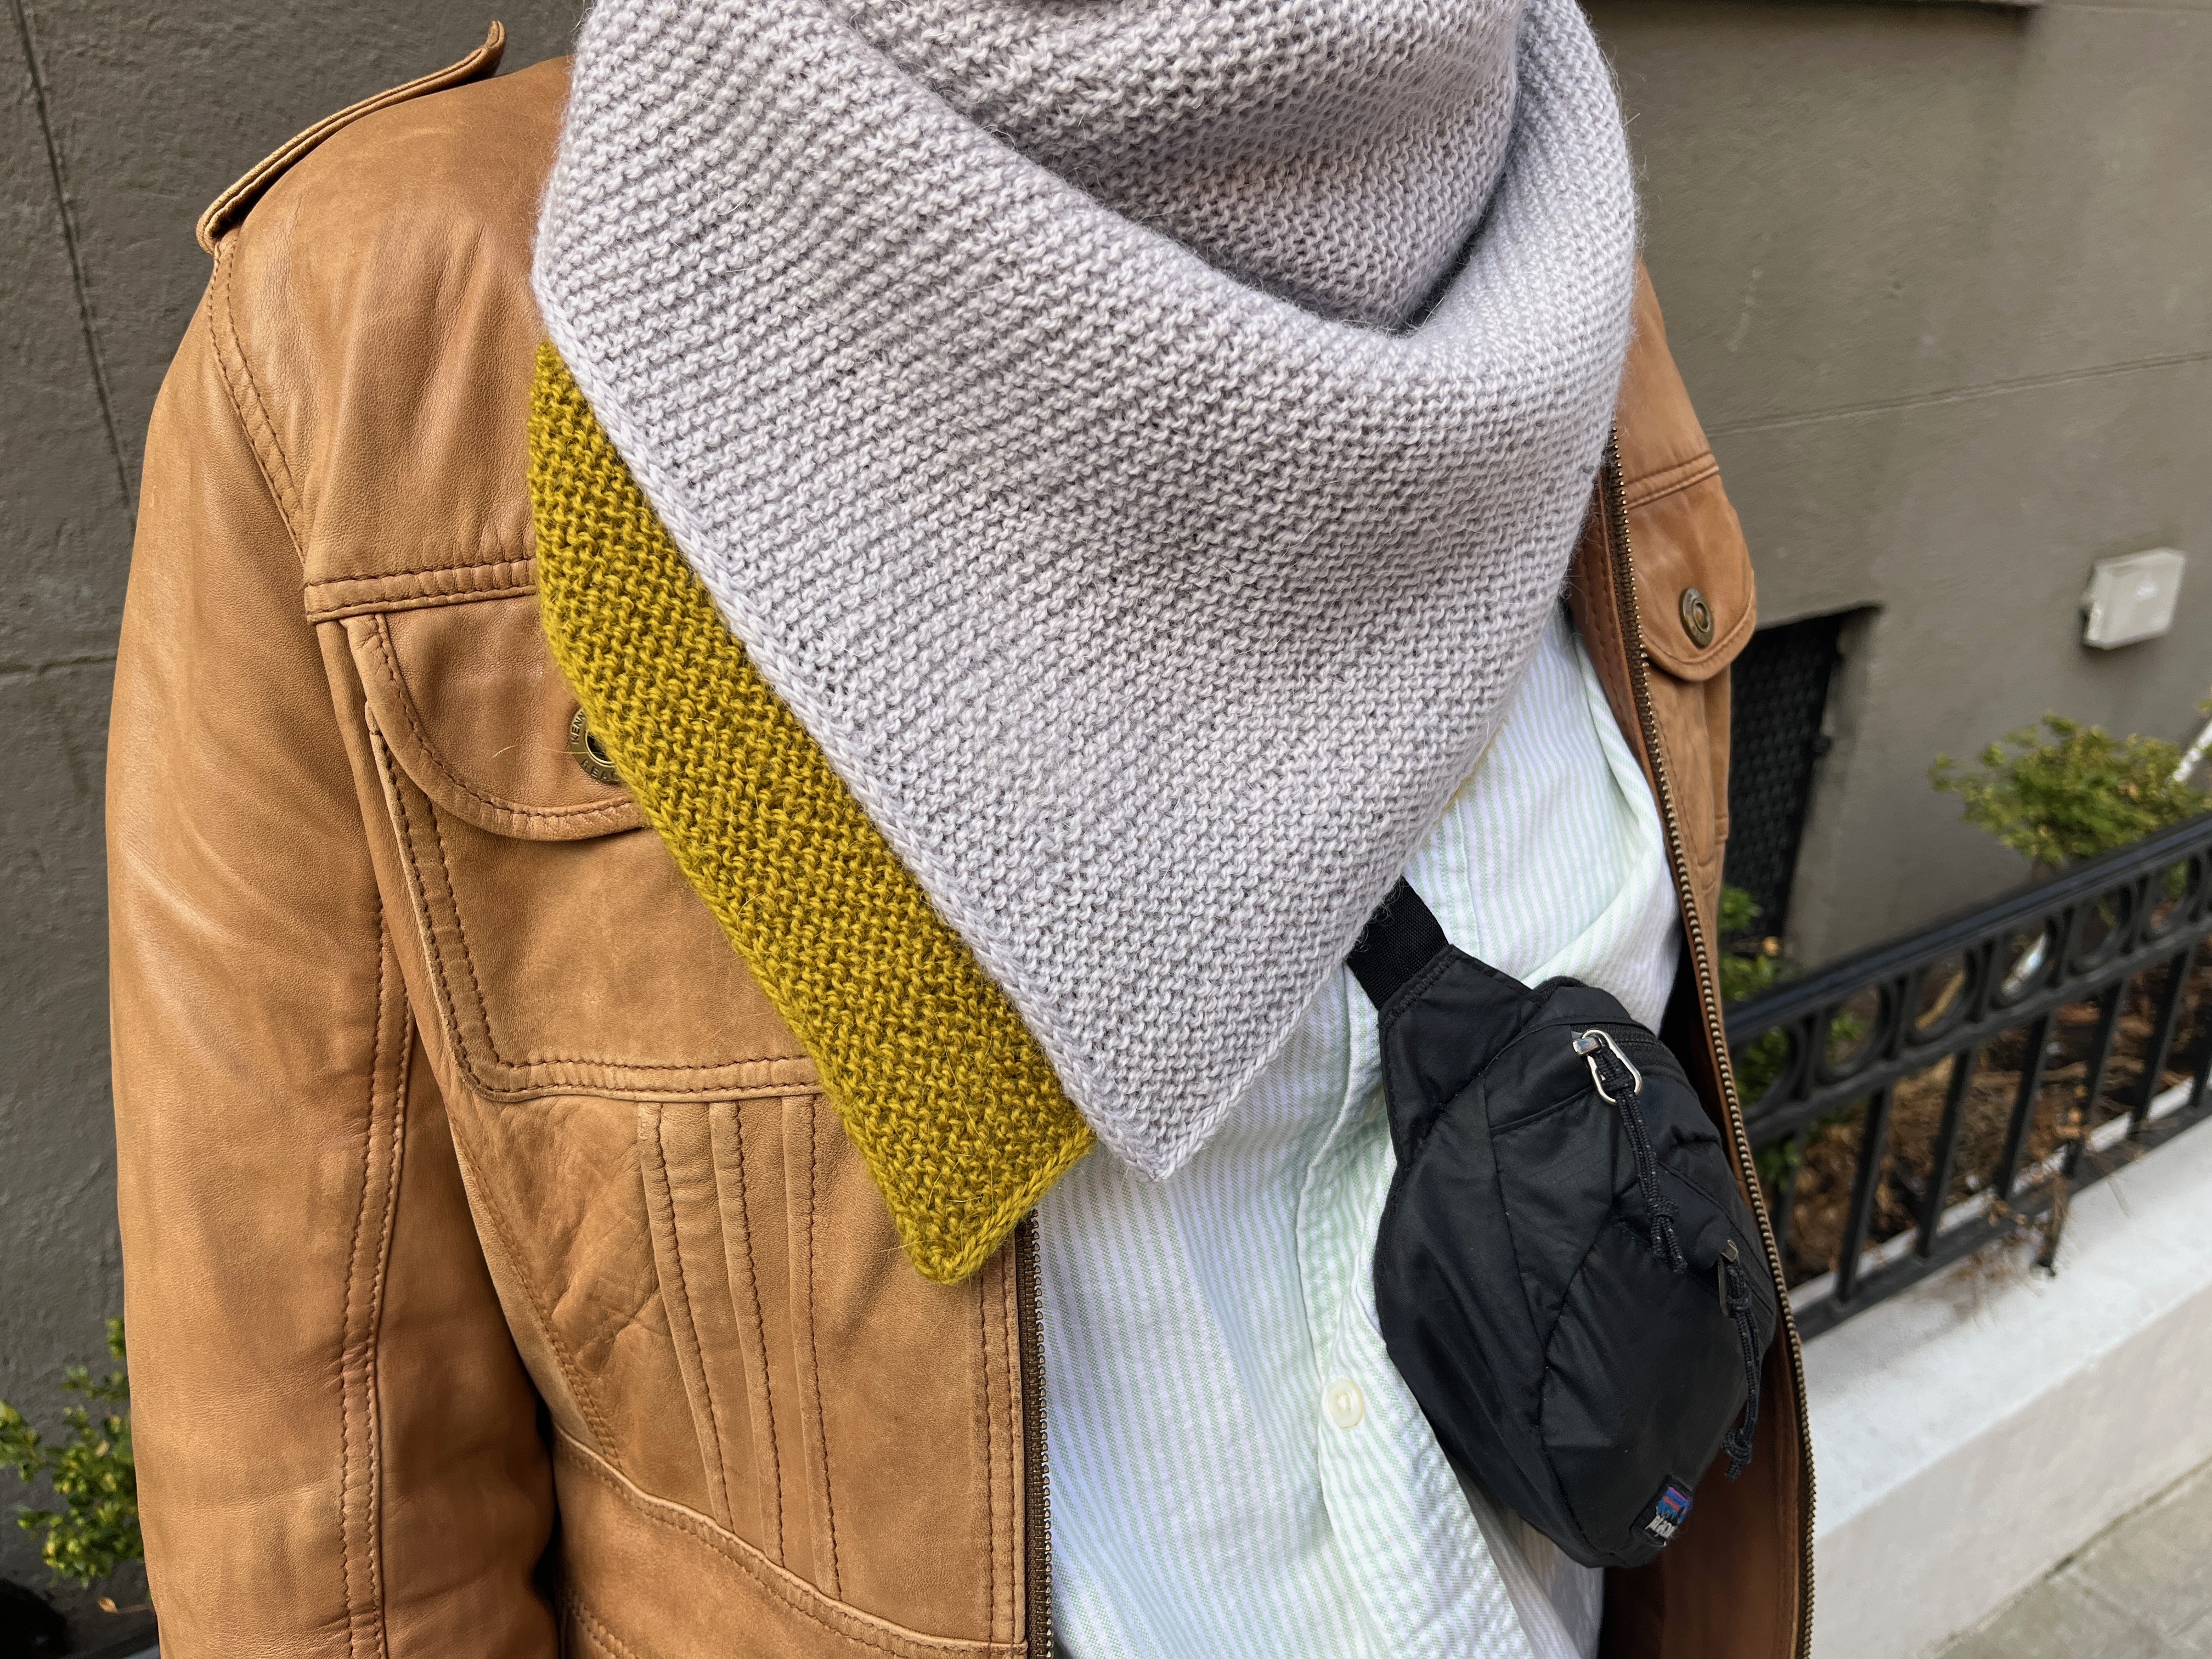
What a project. I was in the bay area in Sept last year and made a detour to a verb for keeping warm. I knew I wanted a SQ of something special, so I poured over their wall of samples to choose one for verb to naturally dye for me. I never think I like purples but I am SO drawn to them. I ordered the yarn and impatiently waited, hunting down the perfect pattern for it.
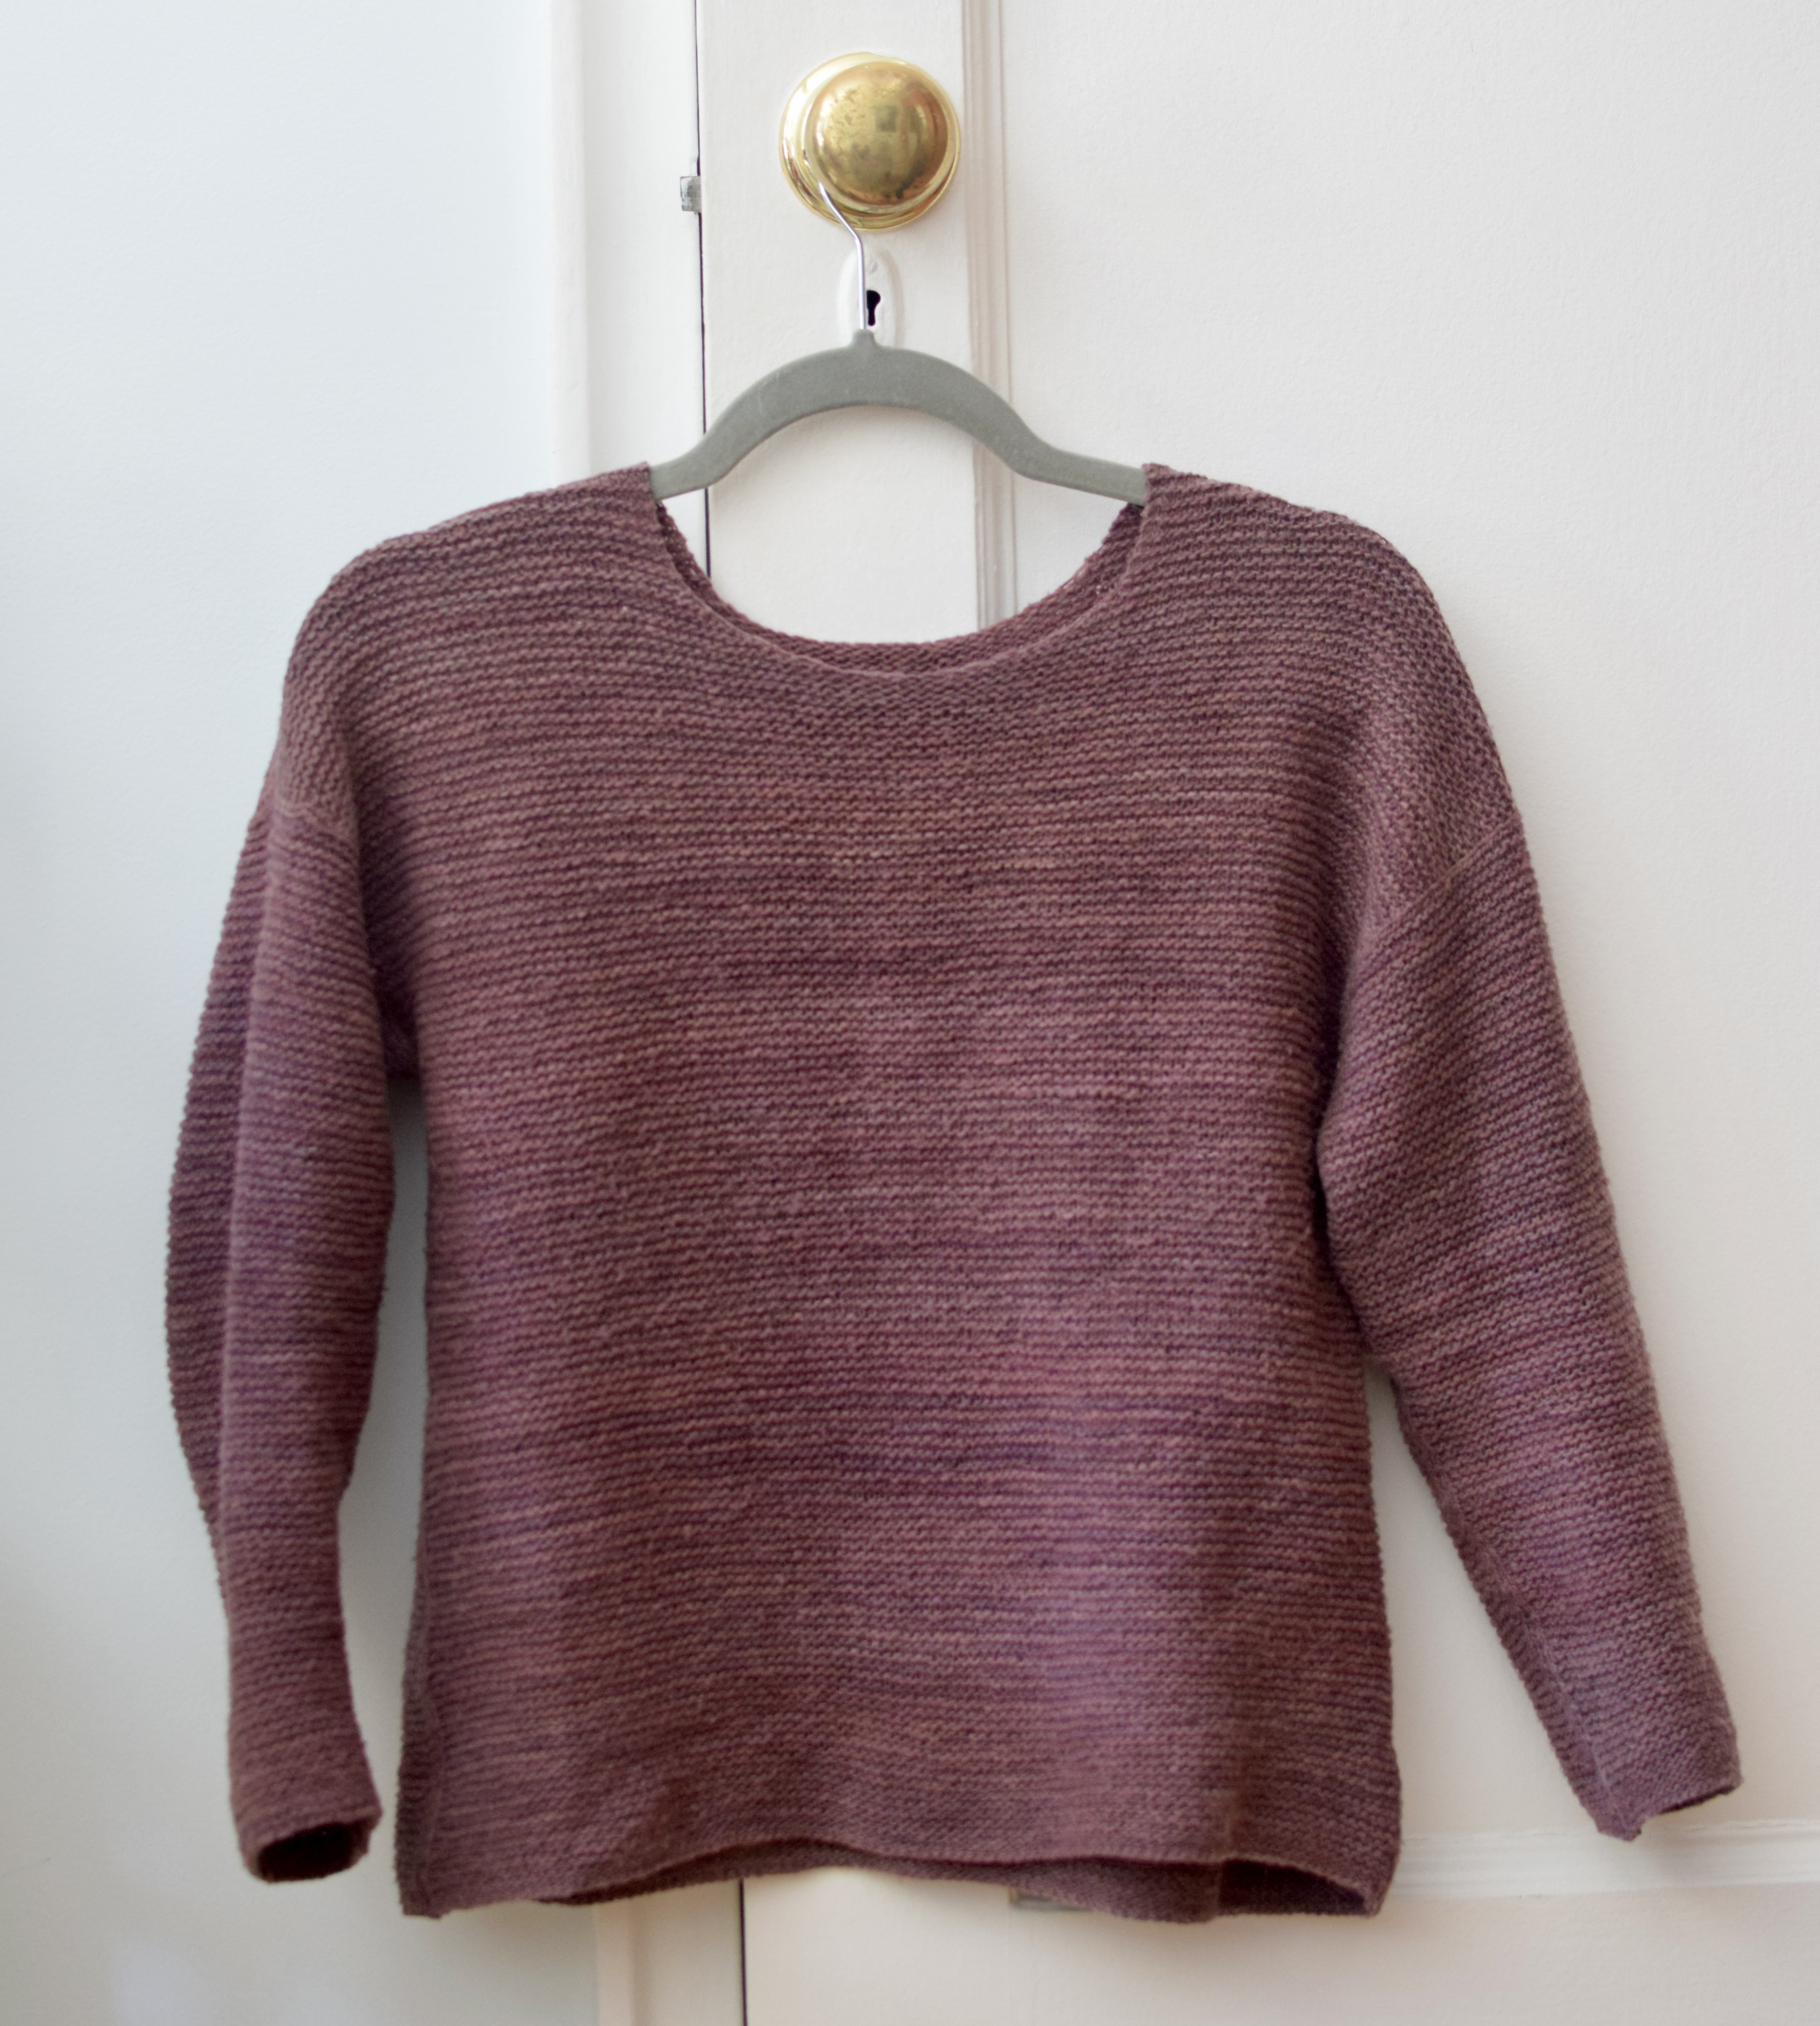
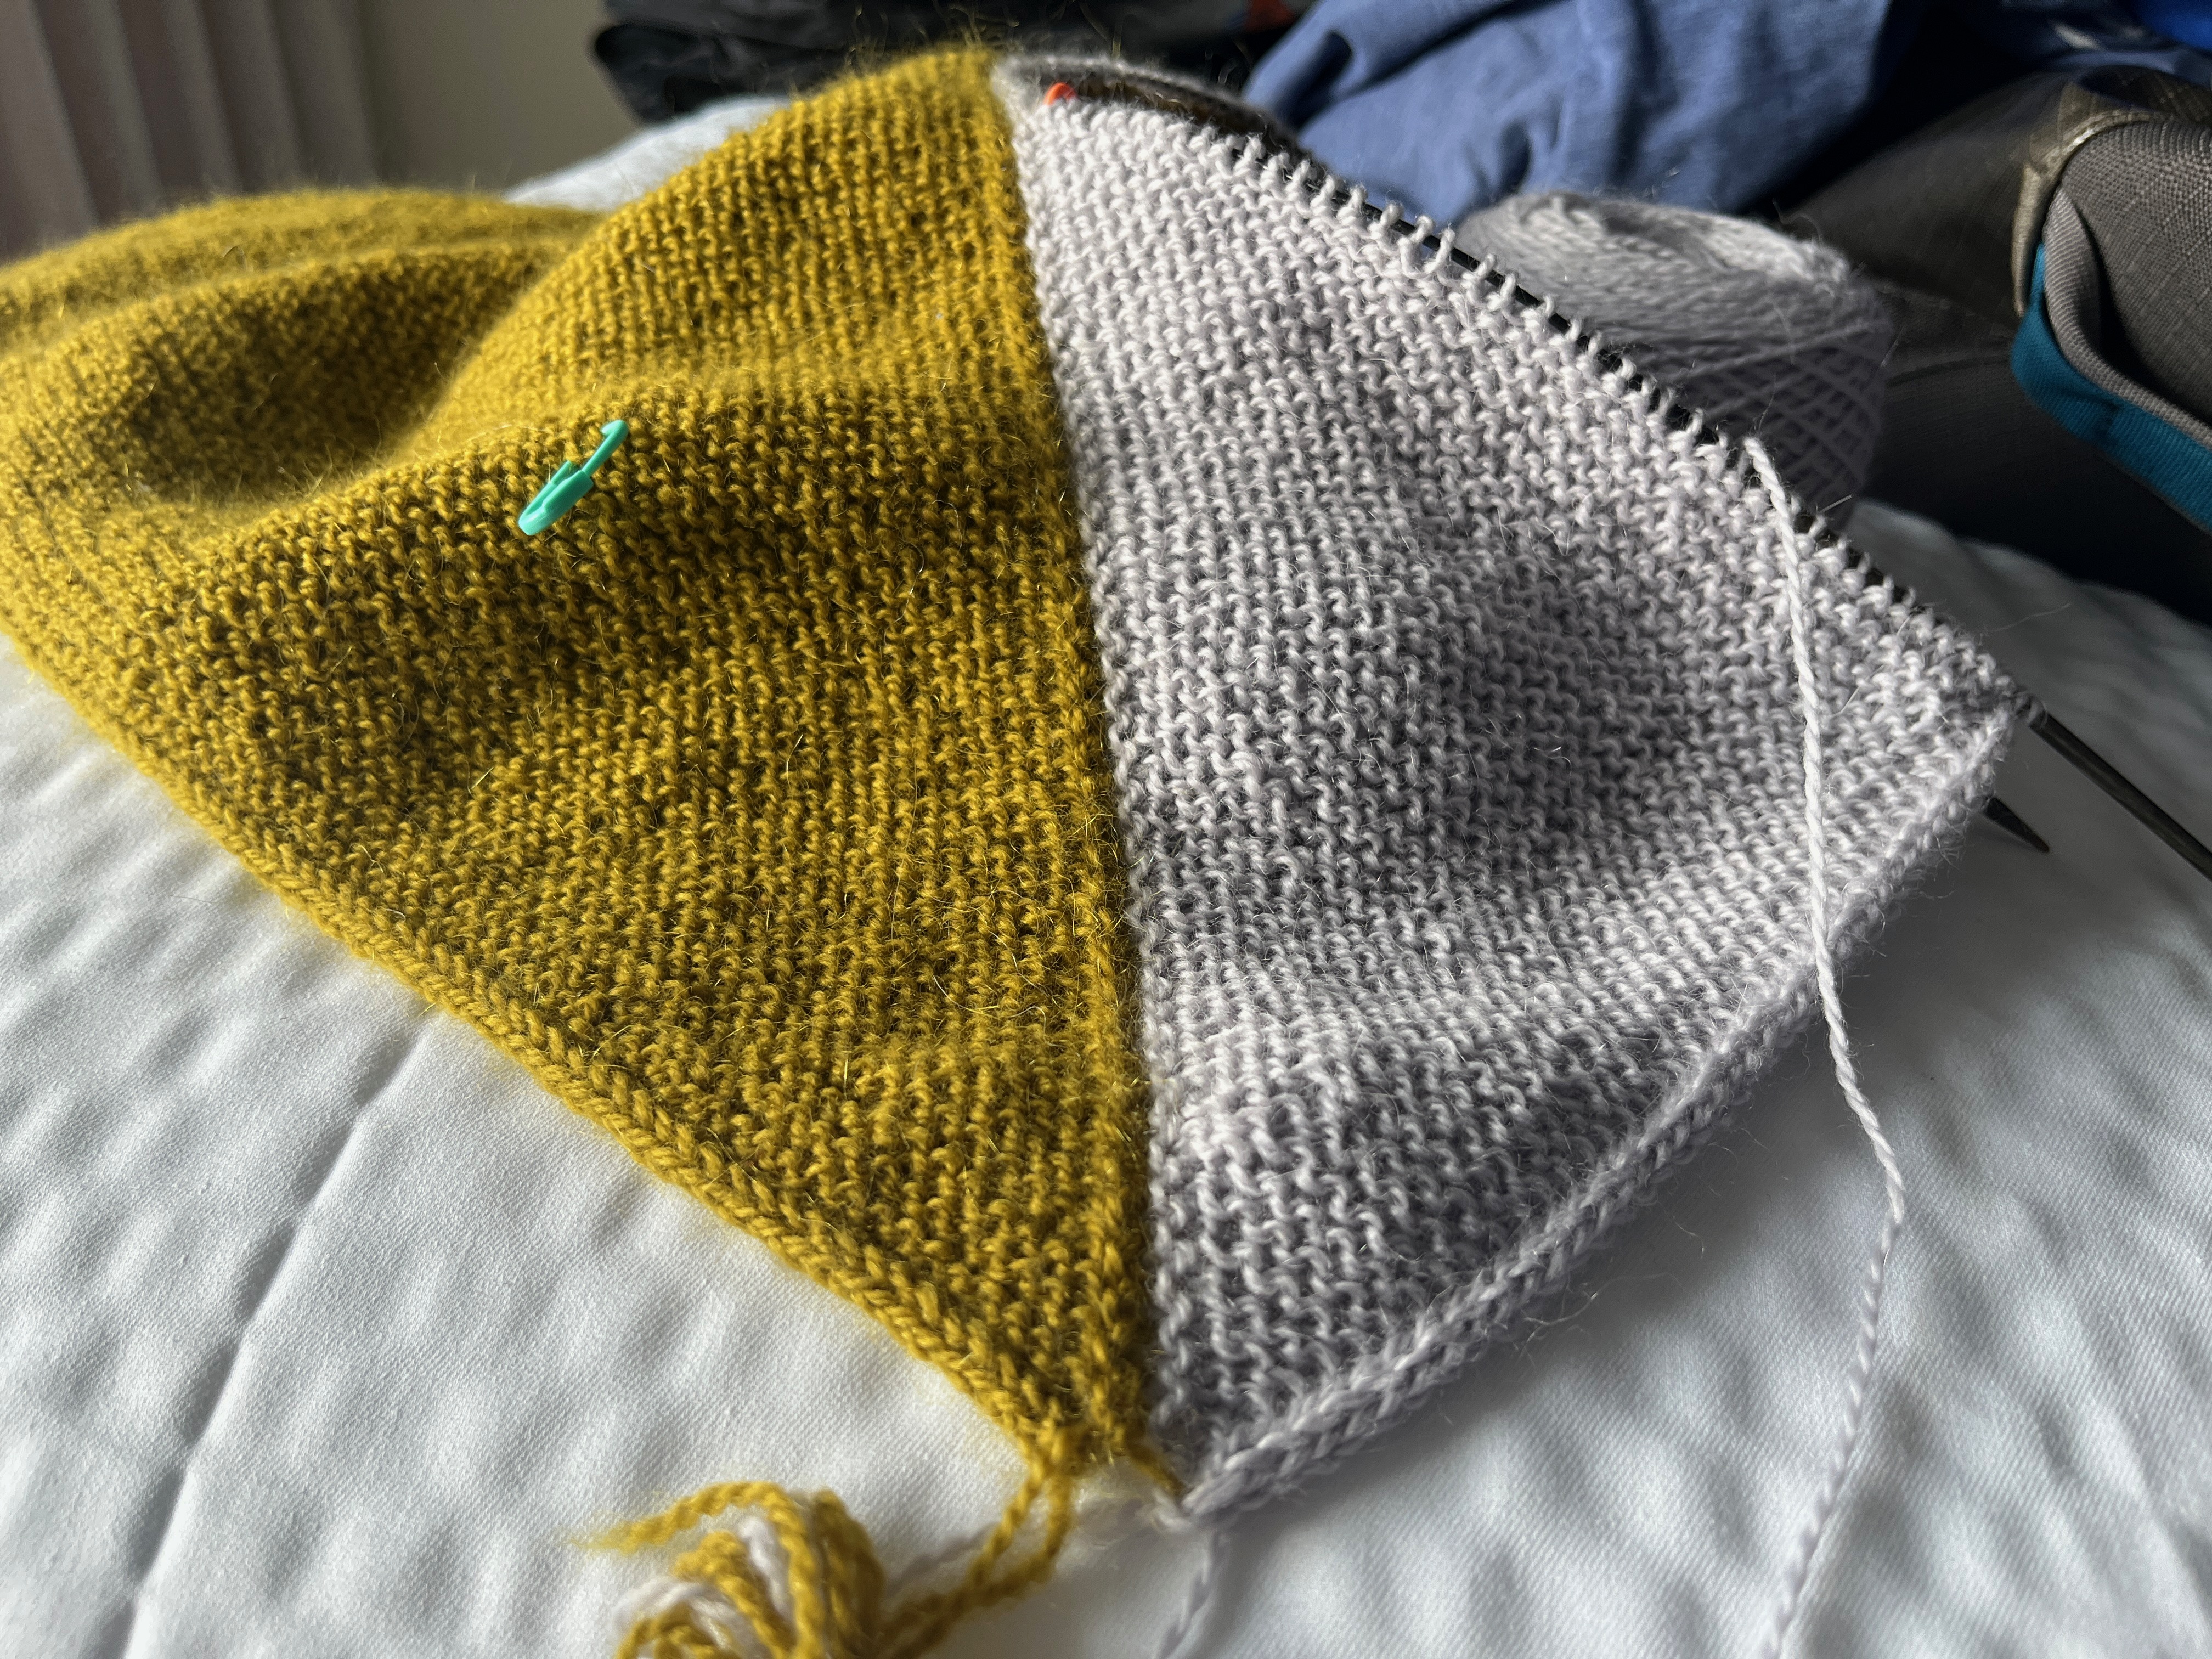
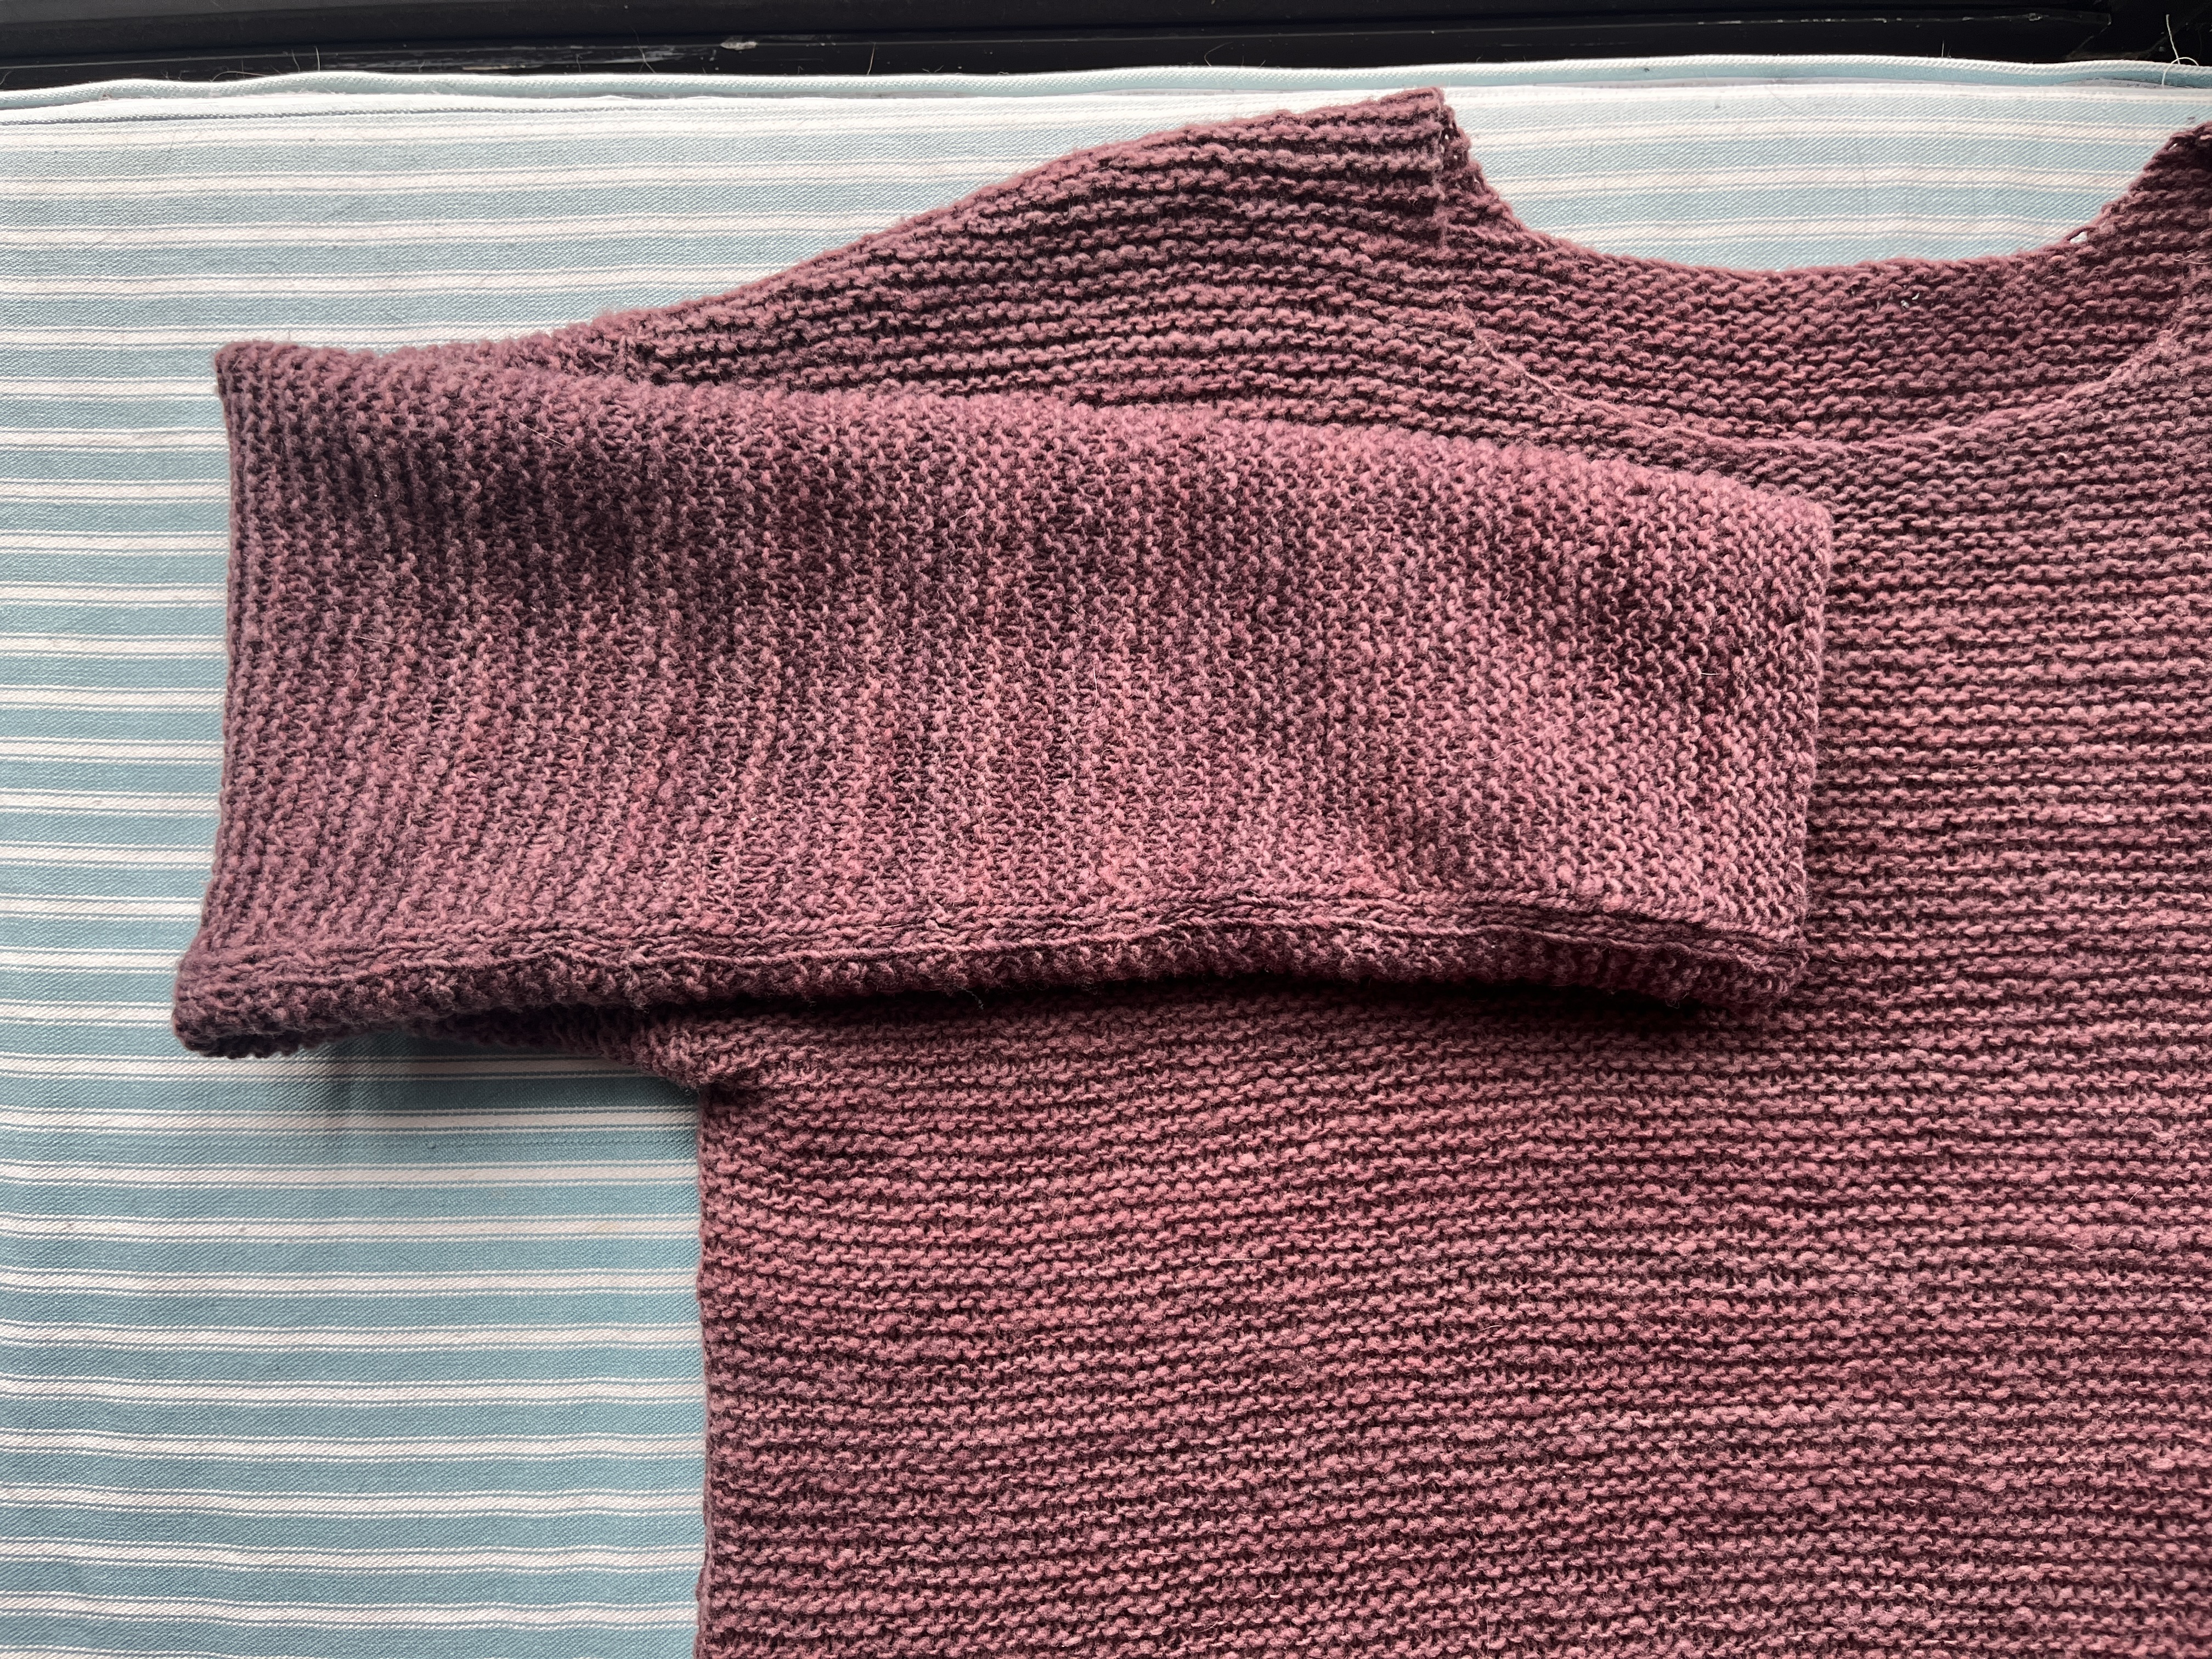
I normally pick a pattern before selecting yarn (because THAT is how you acquire a stash), but this was a worthy exception. I have been enamored with garter stitch so I searched for an allover-garter fingering weight sweater and LET ME TELL YOU there is not a lot out there. Patterns that appeared promising did not have many projects to review. After much deliberation, I settled on Ret Nem. I love the quiet details of the seams. It took an INCREDIBLY long time to knit. After a couple of wears, I’m observing felting at the armpits, but maybe thats ok? Despite this, it fits like a dream: extremely lightweight and soft. I am really pleased with it!

Radish socks

Lets call these dual purpose: an amuse bouche between sweaters, as well as motivation to finish Ret Nem. These radish socks were love at first sight–it went to the top of my queue (but only to be started AFTER I completed the sweater). The hardest part of this project was finding a good brown tweed yarn. I almost settled for knit picks but in a fit of desperation I googled “brown tweedy sock yarn” and found hue loco. With few comments on Ravelry, it was a risky purchase. After a few more wears I will be certain to leave a review!
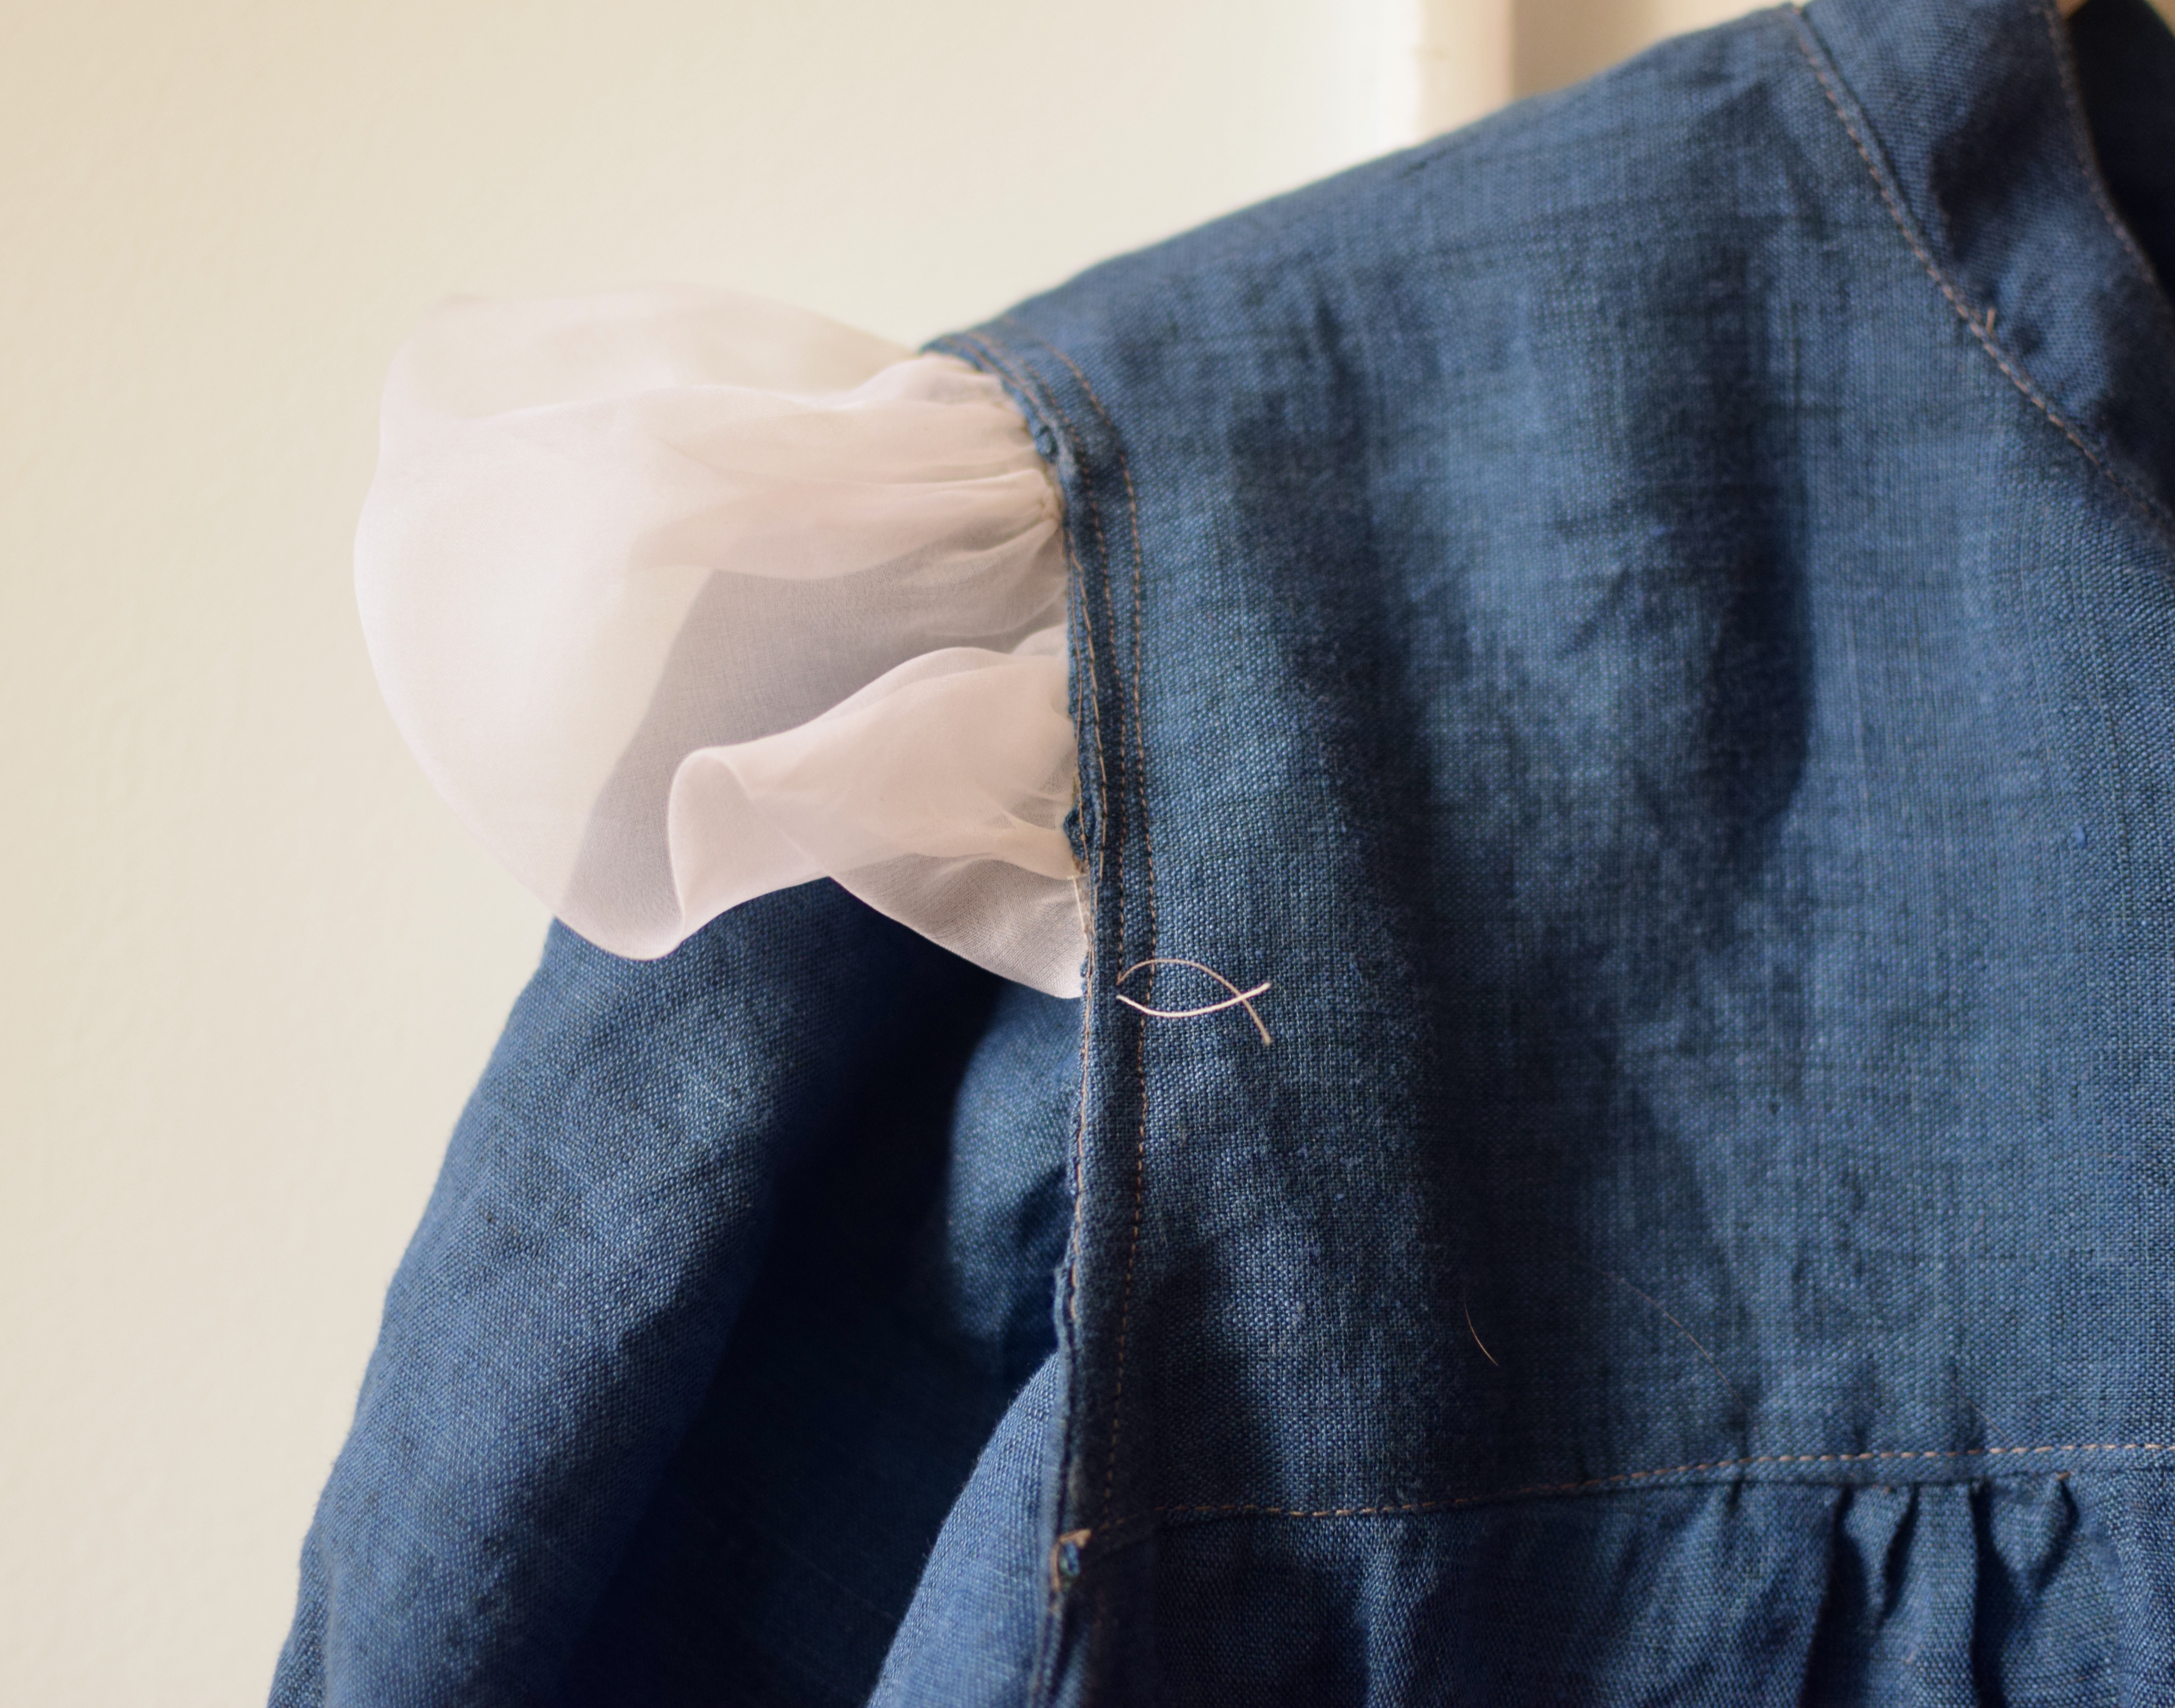
Collared shirt for Jacob
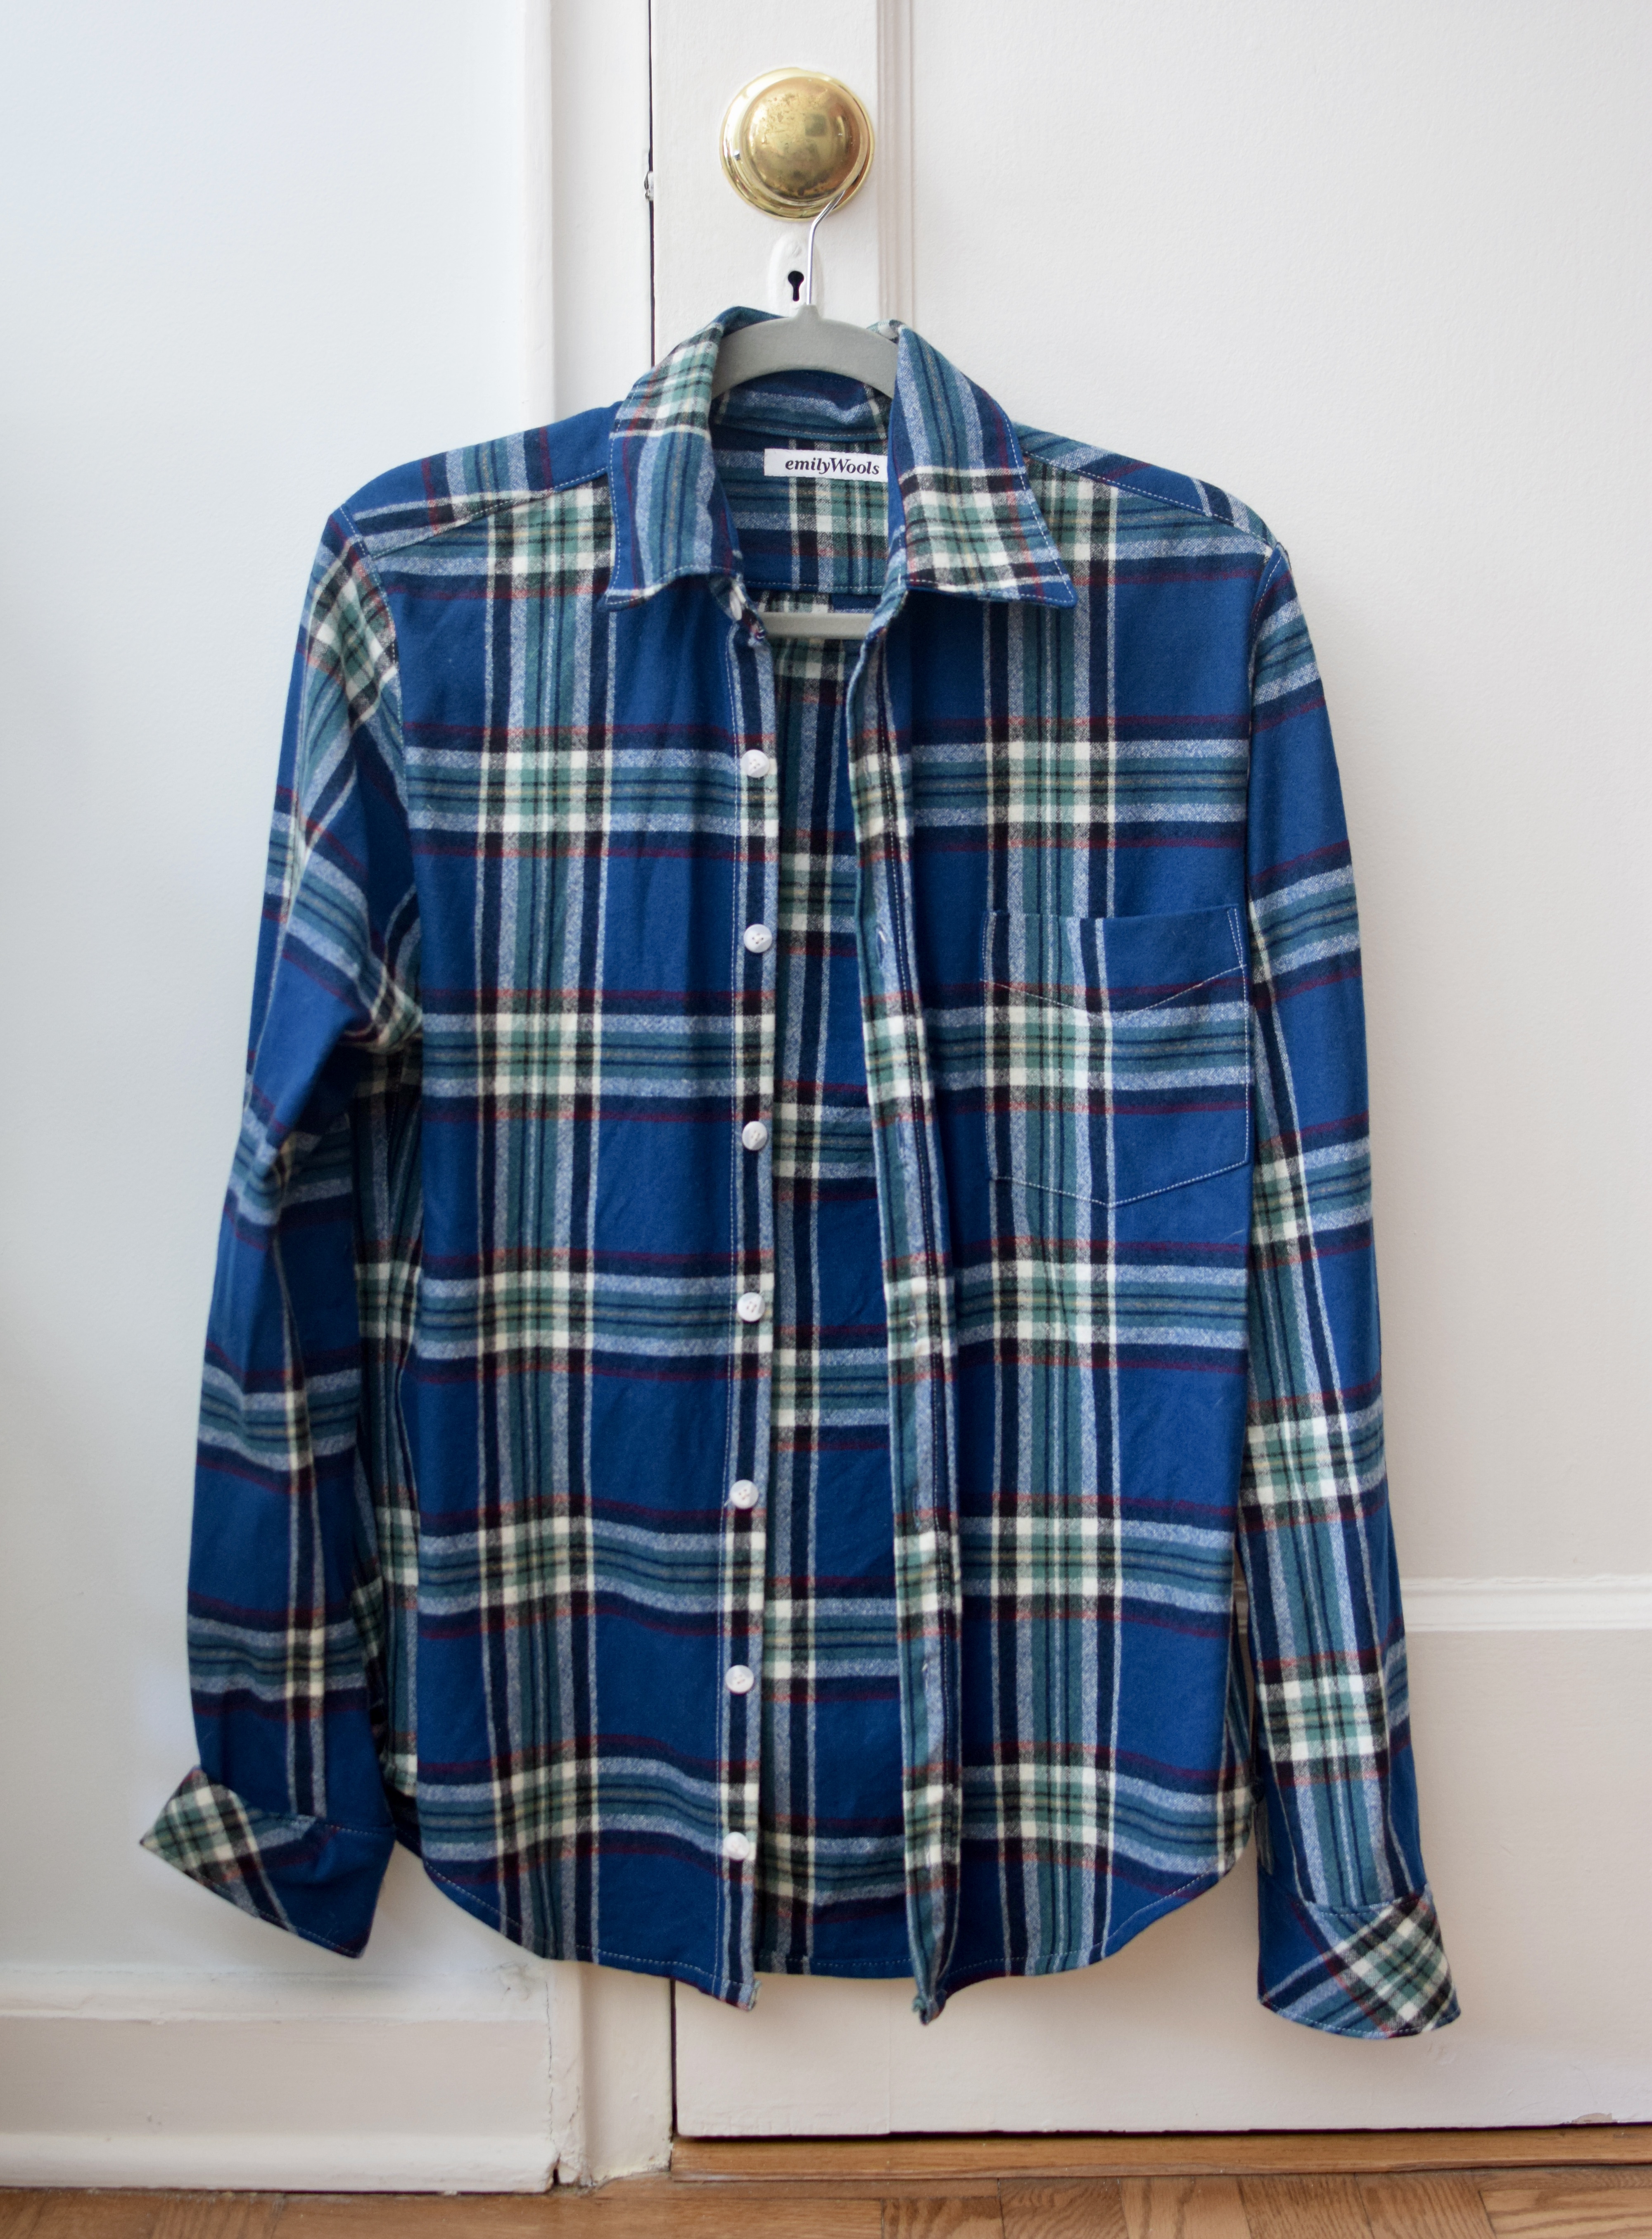
I got some shirting weight Pendleton pre-pando that’s been earmarked for Jacob. I decided it was time, and sewed him up a shirt based on the Jcrew shirt I deconstructed and made a pattern from. The Jcrew shirt is short-sleeved, so I blended it with Grainline’s Archer button up sleeve and cuff, and added a couple of inches because Jacob has such long arms. It turned out really well, I am pretty proud of it. French seams throughout, and it fits him perfectly!
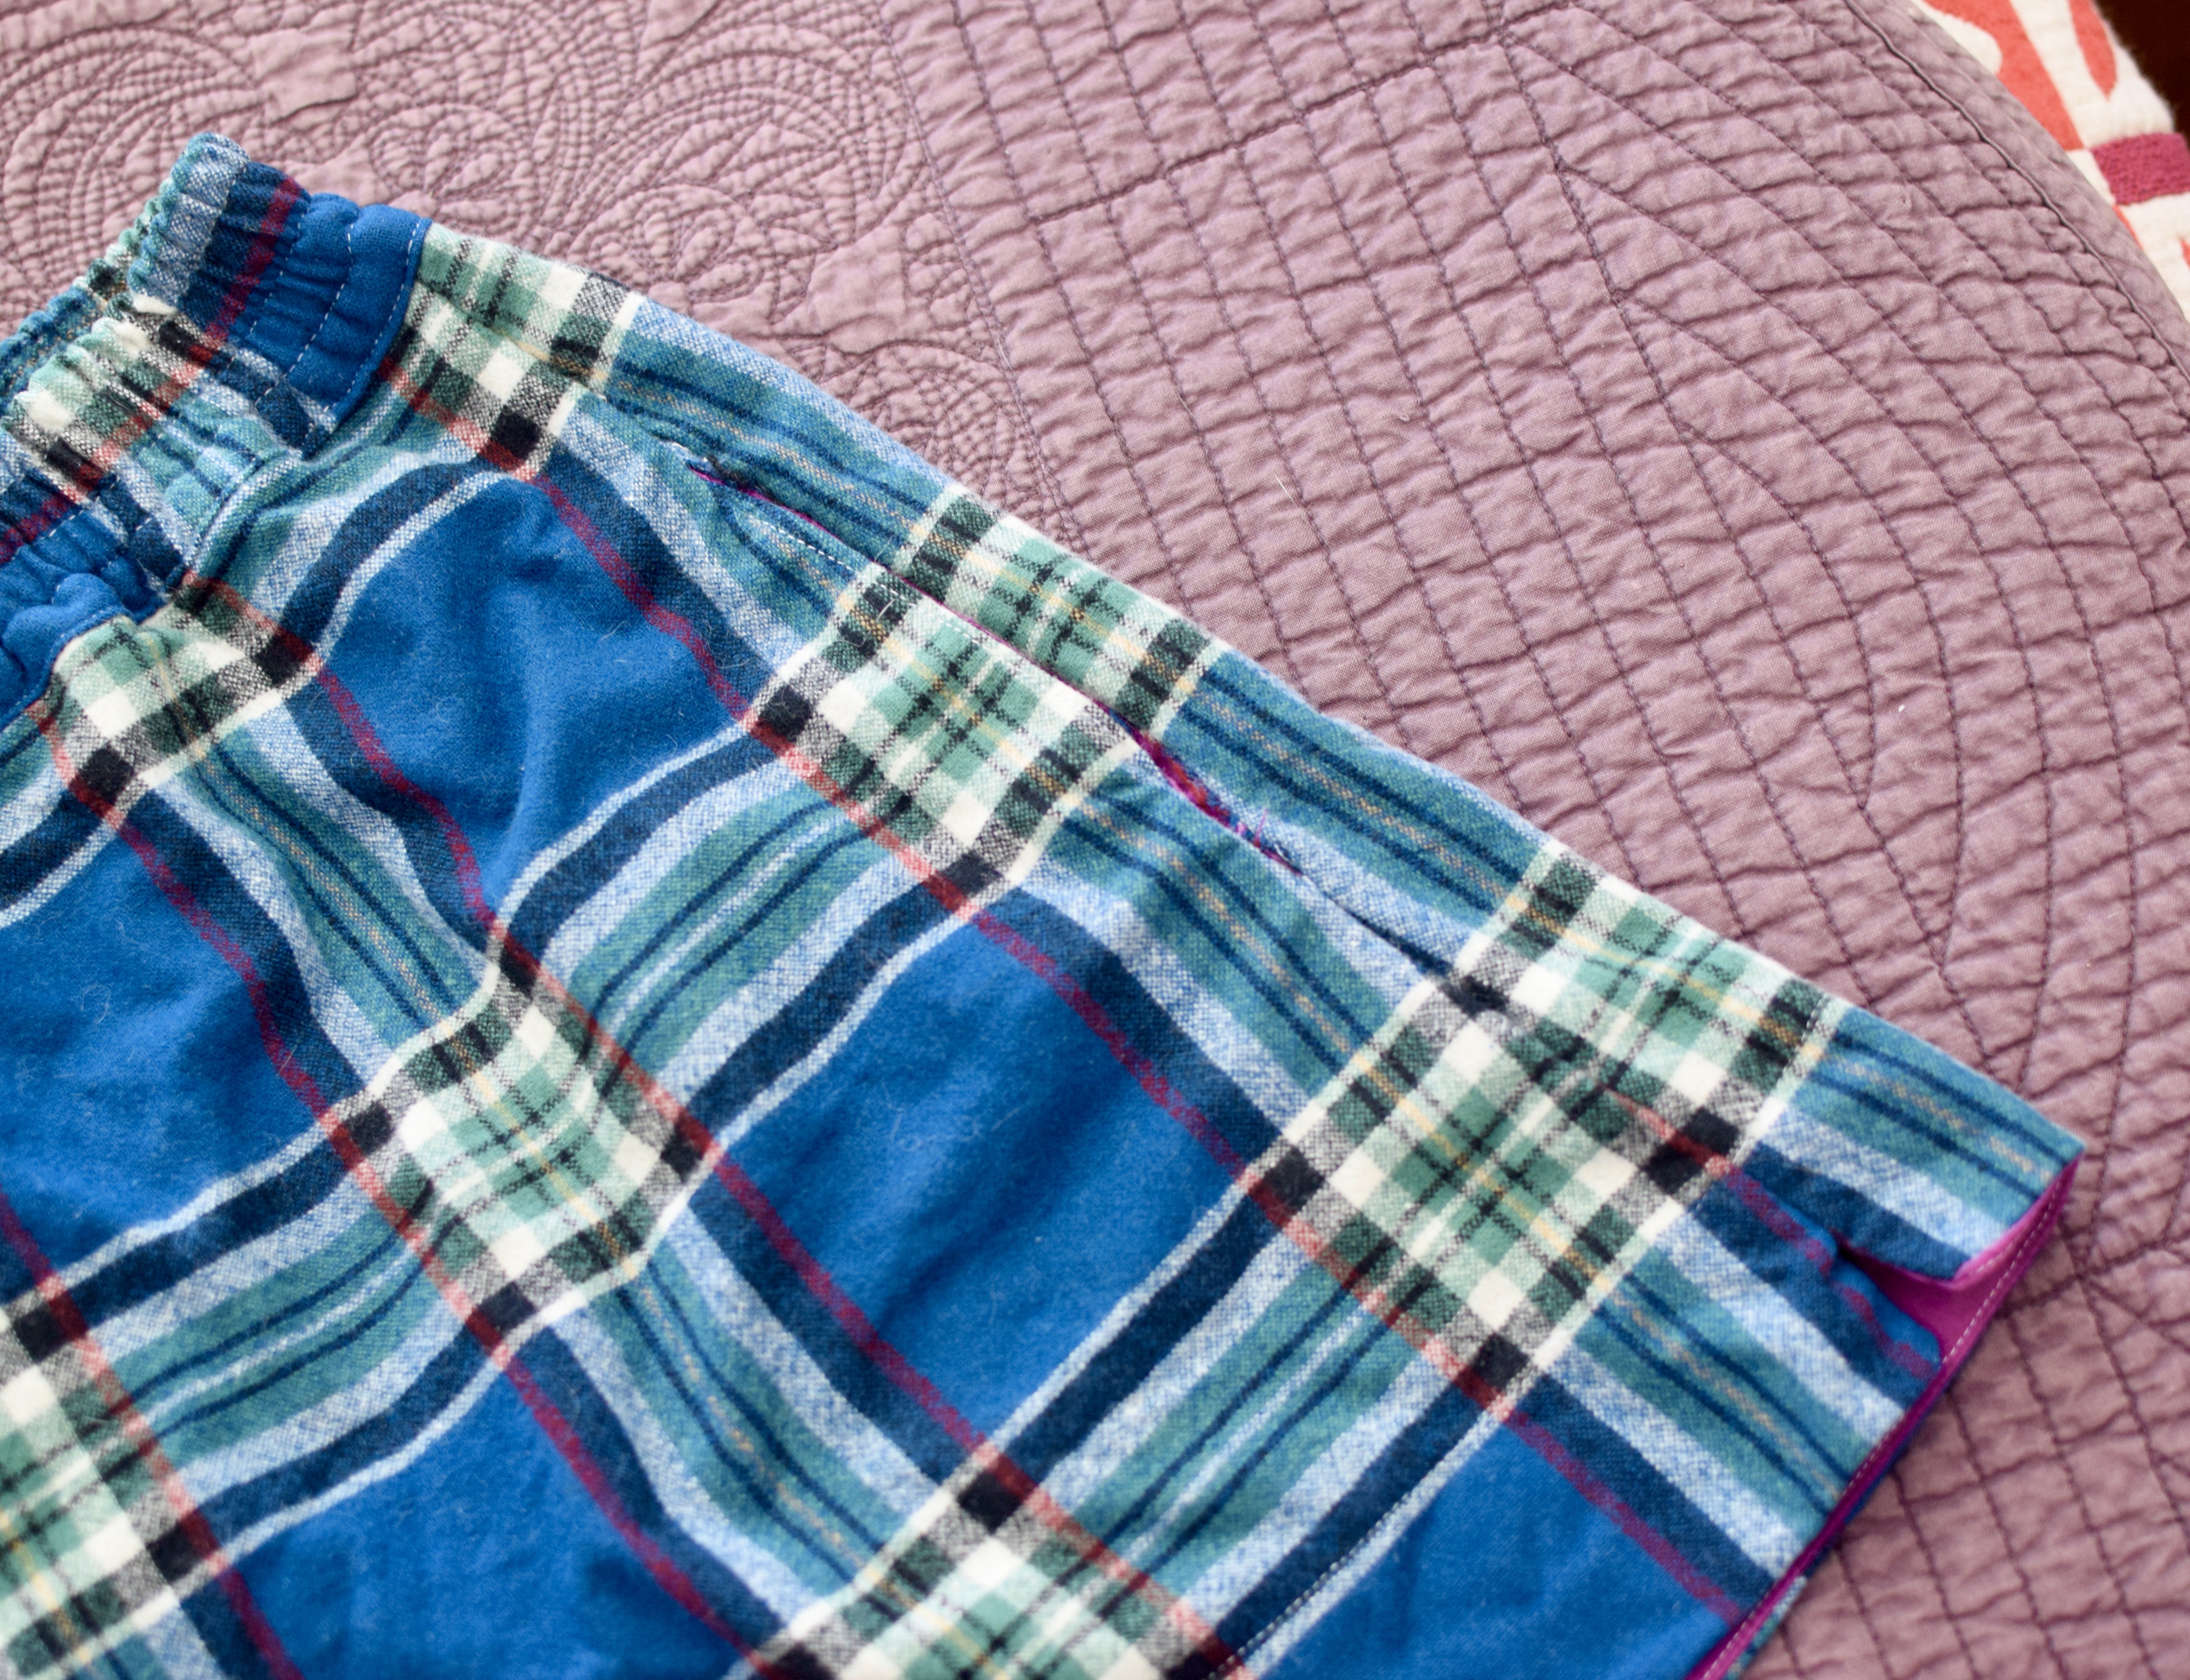
More Bailee shorts
I made another pair of bailee shorts using leftover Pendleton from Jacob’s collared shirt. they are SO comfortable ive been wearing them as PJs all winter.