I may have gone a little wild. In the past month I have made 3 Arkies, including 1 for Jacob, and 2 pairs of Bailee shorts. Tessuti advertises these as a matching set, so I wanted to give it a go to make this work as a set of not-pajamas.
I fell for the idea of making this out of Merchant and Mills’ Louisiana linen for our trip to the west coast. While I was at it, I thought I would adapt Arkie for Jacob so he could be part of the fun, his is made out of Sweeps Scrim with coordinating cotton buttons.
The matching plaid top/shorts set turned out fantastic. I used the same construction mods as my first version. The fabric is dreamy, and I have been wearing them a set and as separates nonstop during this late-summer heat wave.
Here’s how I adapted the top for Jacob: I went up two sizes and took in about 4″ width at the hips. I also lengthened the body 2″ and the sleeves an inch. If I make this again, I want to make the shoulder area a bit more roomy, perhaps by dividing the back piece into a yoke and a lower back body with a pleat? Overall, though, Jacob’s version turned out great.
I had just enough linen leftover from Jacob’s shirt to squeeze in a second pair of Bailee shorts. At first glance, this shorts pattern doesn’t seem that unique, but they have nice details and I really like how they fit me.
Last week I had a camp collar shirt curiosity that morphed into a frequency illusion. This type of shirt has been around for ages, but it has become quite trendy. While I was making this my husband commented that he saw an “article” about the sudden popularity of the Kramer shirt.
After this shirt style was on my mind for a couple of days, I started looking for a pattern to use to make my own. I found out this type of collar goes by many names: revere collar, cuban collar, camp collar among others. My go-to of “camp collar” is not the most universal, so I had trouble finding patterns. I finally thought to check Tessuti. Not sure if it was my subconsious or what but they released the Arkie Shirt this year, and it fit my vision perfectly!
Fabric and buttons
I wanted to use stashed fabric only for this first version. I had just less than enough of some white Merchant and Mills linen, so I had to get creative with how to use it most efficiently. I couldn’t figure out a cutting layout to accommodate the front facing pieces, so I mulled over my other options. I finally decided on some pink cotton for the facing and a brick red cotton for the collar. I thought that the patchwork of colors plus a Liberty fabric pocket would look quirky and cute, but I quickly became concerned that this was giving bowling shirt vibes. I ripped out the red collar piece, and pieced together a new under collar in the white linen instead.
“you’re a disaster my guy” (before I ripped out the red collar)
The buttons are a gift from my friend Alexis, she found them at a flea market. I thought the stripes were pink because I was sewing in very low light 😭, but after I fell in love with them I realized they are orange! I think they look perfect.
Sizing and construction
I went down a size from what the pattern recommended; I cut a straight size 8. The ease is quite generous, and because this is a new silhouette for me, I wanted it to be a bit more close-fitting.
Instead of the recommended seam finishes, I used french seams throughout. I admit that french seams look a bit bulky at the shoulders, but this linen is an unravel-y mess and needs the frenchies. I used this fab tutorial for finishing the side seam splits and they look great.
This was the first time I used the crimp stitch. I did some googling to make sure I was doing it correctly, and I found this great tutorial from a delightful sewer. I think I’ll be using the crimp stitch instead of doing a gathering stitch to prep my set-in sleeve heads from now on.
I sewed down the facing because I hate the feeling of a flapping, floppy facing. This becomes especially annoying when the garment comes out of the wash. I topstitched the shoulder and arm seams. Lastly, I hand-sewed the facing at the shoulder as well as the collar to make sure it looked perfect.
Conclusion
I loved trying out a new type of collar construction (no collar stand!) on this garment. Sewing this collar was pretty easy.
I saw some complaints that the directions in this pattern was hard to follow. I found a few bits tricky, but I read carefully and was able to figure out each step without problems. I love it!
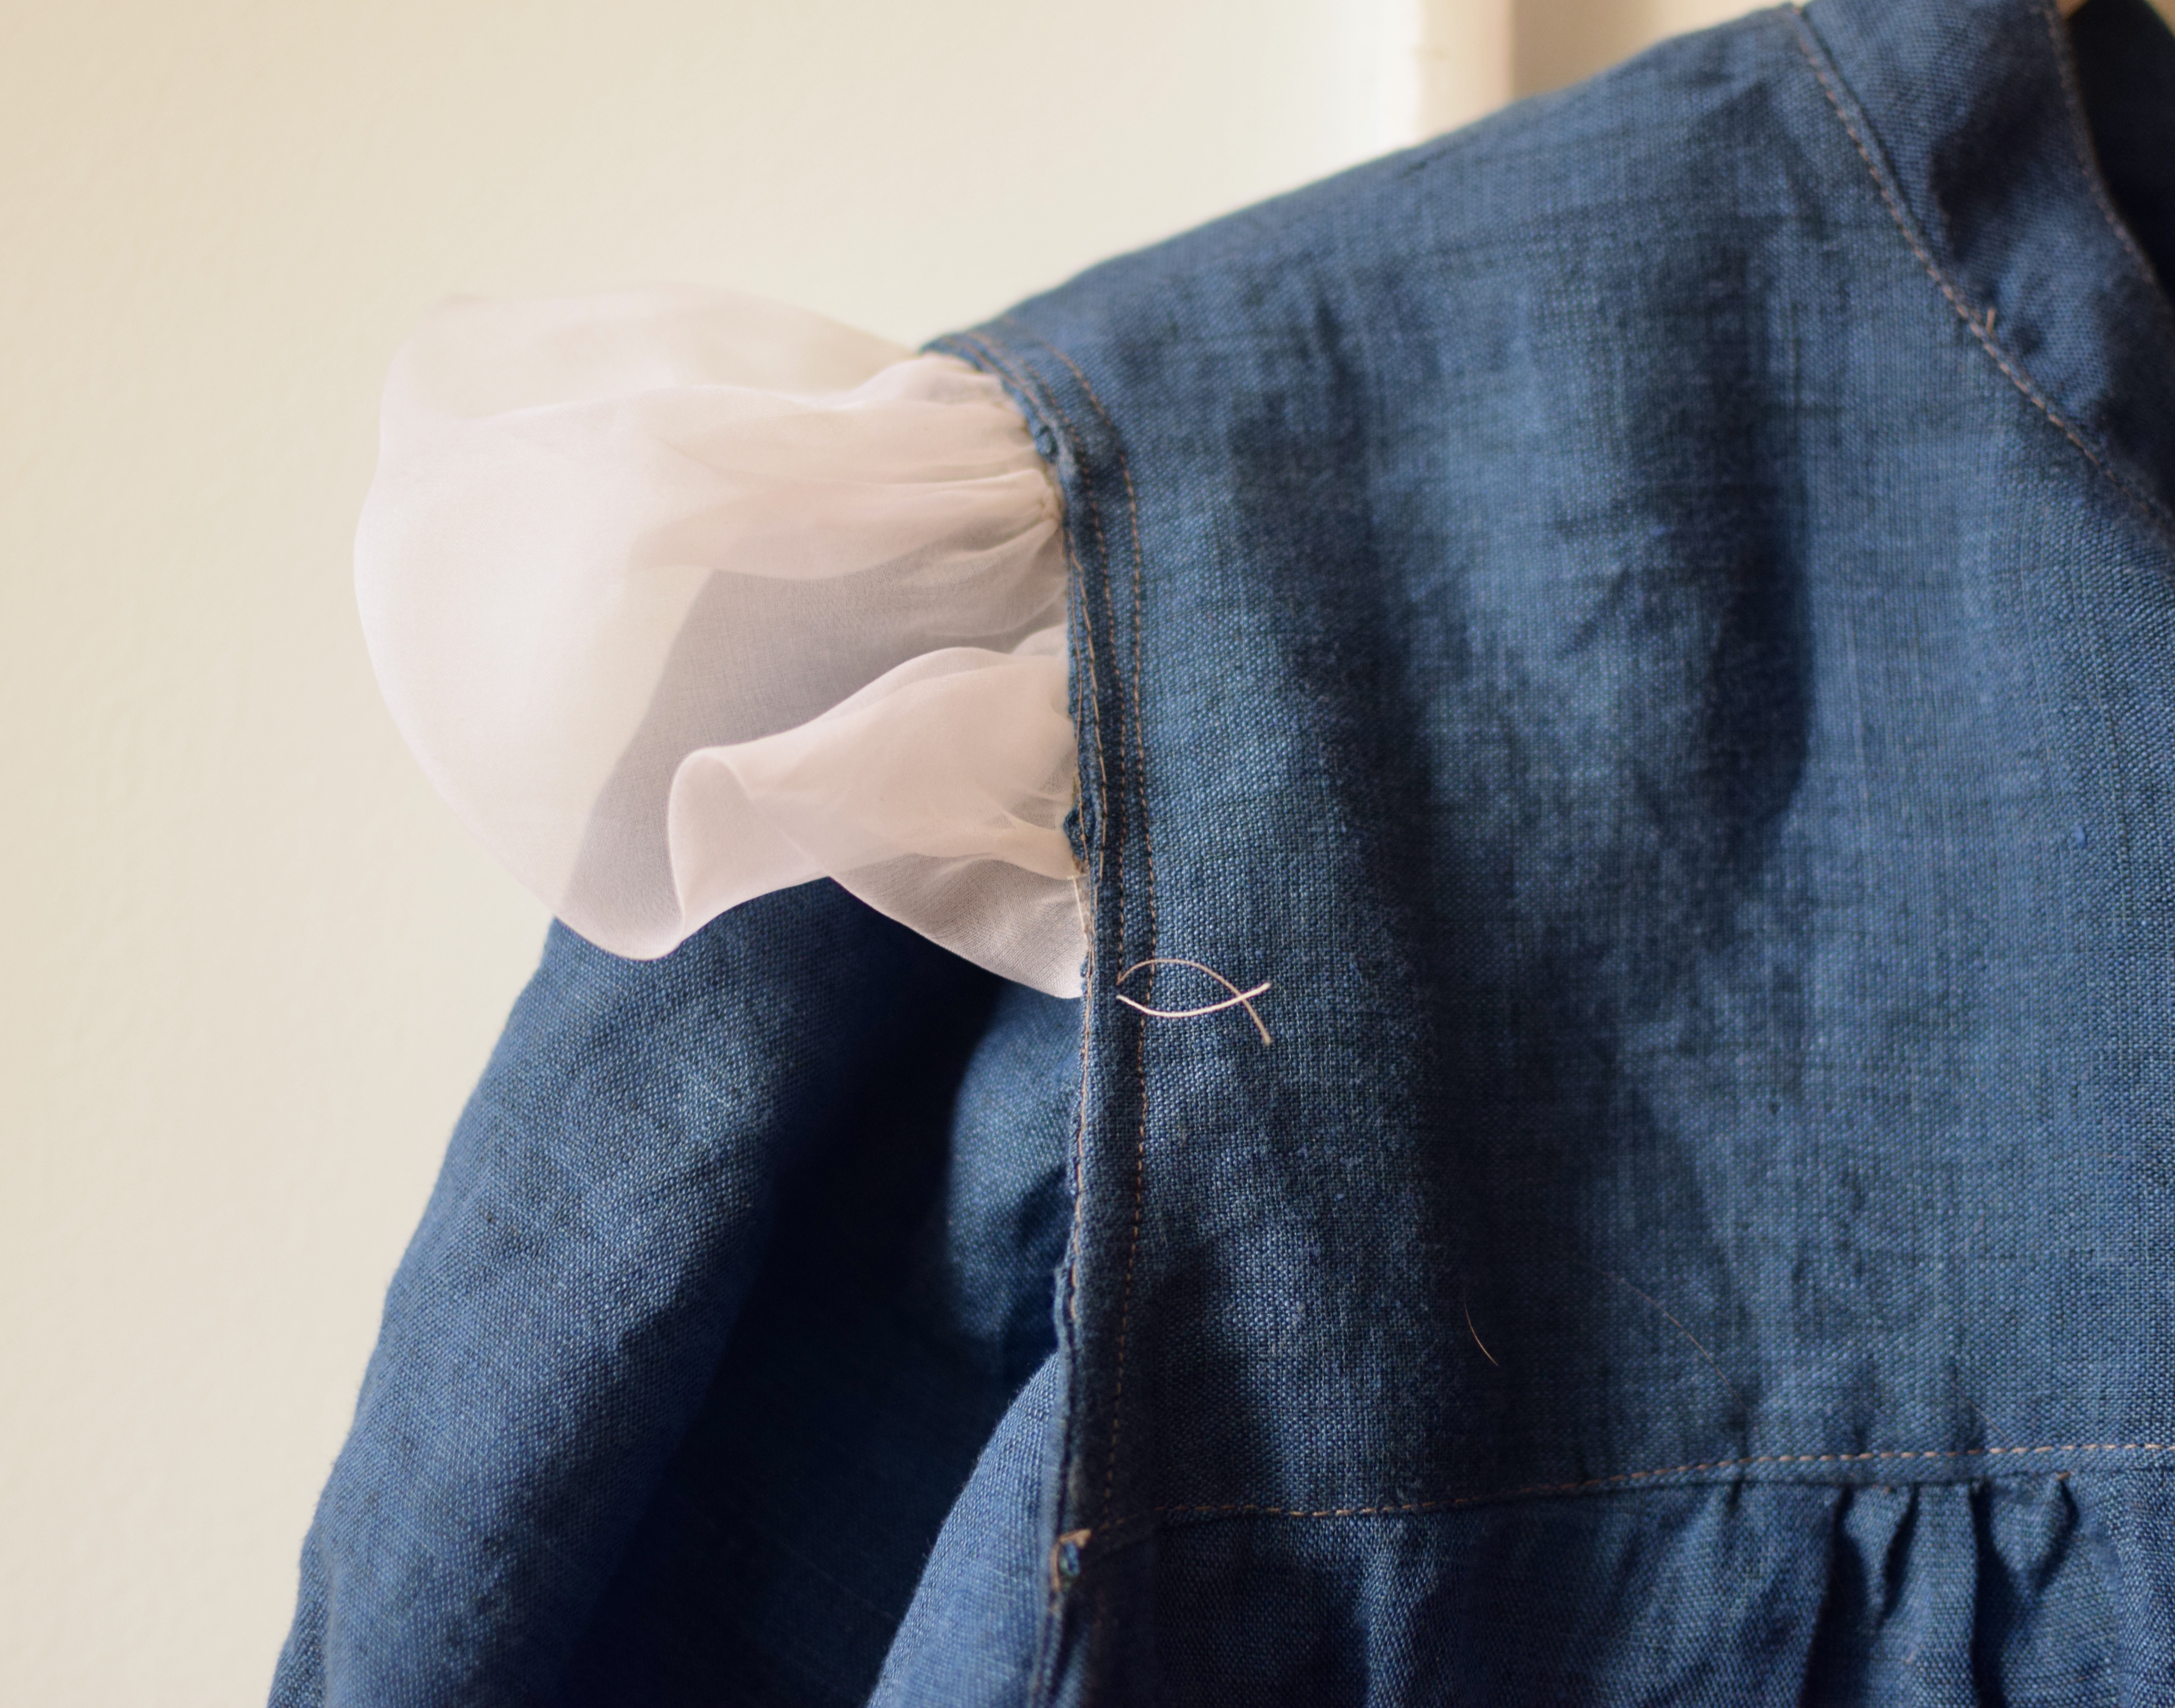
I have been on a blouse kick lately. Its nice to throw on a structured top with jeans and feel put together. Enter the Regalia blouse from Sew House Seven. I thought it looked fun so I pulled the trigger and sewed one up.
a rumpled front view
I used some blue linen leftovers paired with taupe thread. It was very straightforward to sew, and it fits nicely. I opted IN to the sleeve head pouf, and I like it. I did not have tulle so I used silk organza. It is a decidedly slight puff, but it feels dramatic to wear. The self-fabric yoke and french seams contribute to its sense of quality and craftsmanship, its a delight to wear.
the back fastens with a bow. this looks a little bit chunky to me, if i make this again I think I’ll do a button closure.
I finished a new coat and I’m pretty pleased with how it turned out.
me, pleased with how this coat turned out.
Choosing a quilted jacket pattern
I have been scheming to turn some stashed Pendleton into a quilted jacket for quite awhile, but was pretty nervous to cut into it. I was torn about what pattern to choose and almost went with Hovea from Megan Nielsen, but I didn’t quite like the neckline options. My biggest hesitation of the Tamarak from Grainline Studio was the lack of a collar.
Last year though, Grainline released an expansion pack that includes a collar, and even though I probably could have figured it out on my own, I bought it for the instructions (they are great!).
Materials
I’ve had this Pendelton wool in my stash since 2019. I fell in love with it at the Pendleton Factory Store in Portland (Oregon!). I also had some red silk charmeuse discards from a friend-of-a-friend, a talented seamstress in NYC. I was really inspired by this Tamarak, and planned on copying their idea to bind the seams with the charmeuse. It turned out too be incredibly fiddly, and I didn’t have enough of the charmeuse for bias binding anyway, so I went with pre-made black bias tape. I think it looks good!
The snaps were installed by Star Snaps. I do not have any snap tools, and decided to lean on the professionals since they are so closeby.
Before I started cutting, I watched the entire YouTube sewalong which was very helpful. I especially liked all of the quilting tips!
I lengthened the jacket by 2″ and I wanted to adjust the pocket placement to be on an angle, but I ended up sticking with the pattern’s placement because I was nervous that I’d get the welts wrong.
This fabric was challenging to sew with my machine. Because the charmeuse is so slippery and the wool is so toothy, it was a nightmare to keep them aligned while I quilted (YES I used a walking foot). The back piece was so big and the lining shifted so much that I had to patch it in parts. Just before I quilted the last pattern piece, my extremely talented friend suggested that I cut the lining bigger than the pattern piece to add some wiggle room in case of slipping. This proved to be a very great idea, please take this advice if you are making one for yourself!
Putting these struggles aside, this jacket rules. I lined it with wool batting from Purl Soho. I was a bit concerned with how to tackle the binding, because with something this thick I was really worried about sewing the second side of the binding and making it look professional. The solution was to hand sew all of the binding. The fronts and collar took an extremely long time to hand sew, but the result was absolutely worth it.
The Turia Dungarees pattern was released 10 years ago, and this summer I decided make my first two pairs. How did it take me so long to realize how great overall shorts are in summer?
me realizing how great overall shorts are in summer
Because this pattern has been out for so long, many people have made them and have some great suggestions on how to go further to make these even better. I finished the raw edges w regular width bias tape and extended the pockets to tuck into the waist seam and side seams.I can remember when I first started sewing bias tape was so hard for me to get right. This time, I used the regular-width bias tape and I didn’t mess it up at all!
tush shot
For this pair, I used leftover canvas from making my Field bag. I made my first pair from some Sally Fox twill, and immediately afterwards I saw the canvas sticking out of my fabric pile and thought, why not! The canvas is very stiff, so I was very nervous these would be extremely uncomfortable. They are very comfy, believe it or not.
I didn’t have enough fabric to cut 4x straps, so I cut 2 and turned the edges under. I wish I would have used bias tape to finish the raw edges, but by the time I realized this it was way too late. The contrast chest pocket (some leftover hand-woven cloth from Verb) was another consequence of too little fabric, but I love how it turned out.
Star snaps did an excellent job with the rivets, they did a better job than I could have. Great pattern! If you haven’t tried overall shorts, I highly recommend them.
You may be thinking, oh boy, another sundress. When I first saw the Sauvie Sundress pattern I thought the same thing. But I kept thinking about it. I had some linen/rayon stripey fabric from The Fabric Store sitting in my stash, and I knew this fabric wanted to become something summery. I bet you can guess what happened.
This fabric is perfect for this dress. It drapes beautifully, and its very soft. I used muslin from my stash as the lining. I wanted to use a blue fabric for a pop of color at the pockets, but I didn’t want it to show through the slightly sheer fabric.
The midi length is perfect, and the mitered corner finish on the hem is delightful to look at. Sew House Seven considered every detail, I am so happy with how it turned out. I never thought I would describe bust darts as graceful, but they are!
mitered corners on the hem
After wearing this a few times, I added the bra keeper snaps. I love the roominess in the dress, but my bra kept slipping into view. I never made them before, the instructions for these were great.
I’m not a tik-tocker but I am hip to the Coastal Grandma fad. After I made this Olya shirt in Vintage Finish linen from the Fabric store, Jacob’s immediate reaction was “that’s a coastal grandma shirt.” So, it is. But its a white linen collared shirt, and I am confident it will become a keeper.
it was not a great hair day, this is me trying to hide that fact
After my epic seam-finishing fail with my Olya dress,* I thought I would not ever make this pattern again. But, time heals all wounds, and I was inspired to give it another try. Without further ado, photos.
the most intriguing part of this shirt is the armscye (more hair day problems)
I even did a pretty good job on the placket!
*I used a really expensive Merchant and Mills striped linen to make my first Olya, but the weave is too loose for a structured shirt dress and the seams disintegrated. Someday I will take it apart to reuse the fabric for something else, but the overwhelming disappointment of that dress is too raw to think about now.
I was not in the market for another tank top pattern, but I saw Deer and Doe’s new summer collection and inspiration immediately struck to make the Hysope top.
I impulse-purchased this beautiful jacquard fabric while looking in the denim and twill section at Mood last year. Obviously this busy pattern stood out among the solid denims and canvas. I am not sure why they decided to put it there, but I am so glad they did! Before cutting into this fabric, I made a toile first. I used a silk taffeta-esque remnant from PCCR and got sewing. My machine did not like making button holes with this silky fabric, so I went without. Overall the fit was pretty good, but the length was a little bit too short for me. For my jaquard version, I lengthened the pattern by 2″ and I am very happy with this adjustment. One reviewer of this pattern observed that the side buttons really elevate this garment, which I agree with. Mine are horn buttons from Fringe Supply Co (RIP) from my stash.
This top comes together very quickly, this took less than 3 hours to sew. I see more Hysopes in my future!
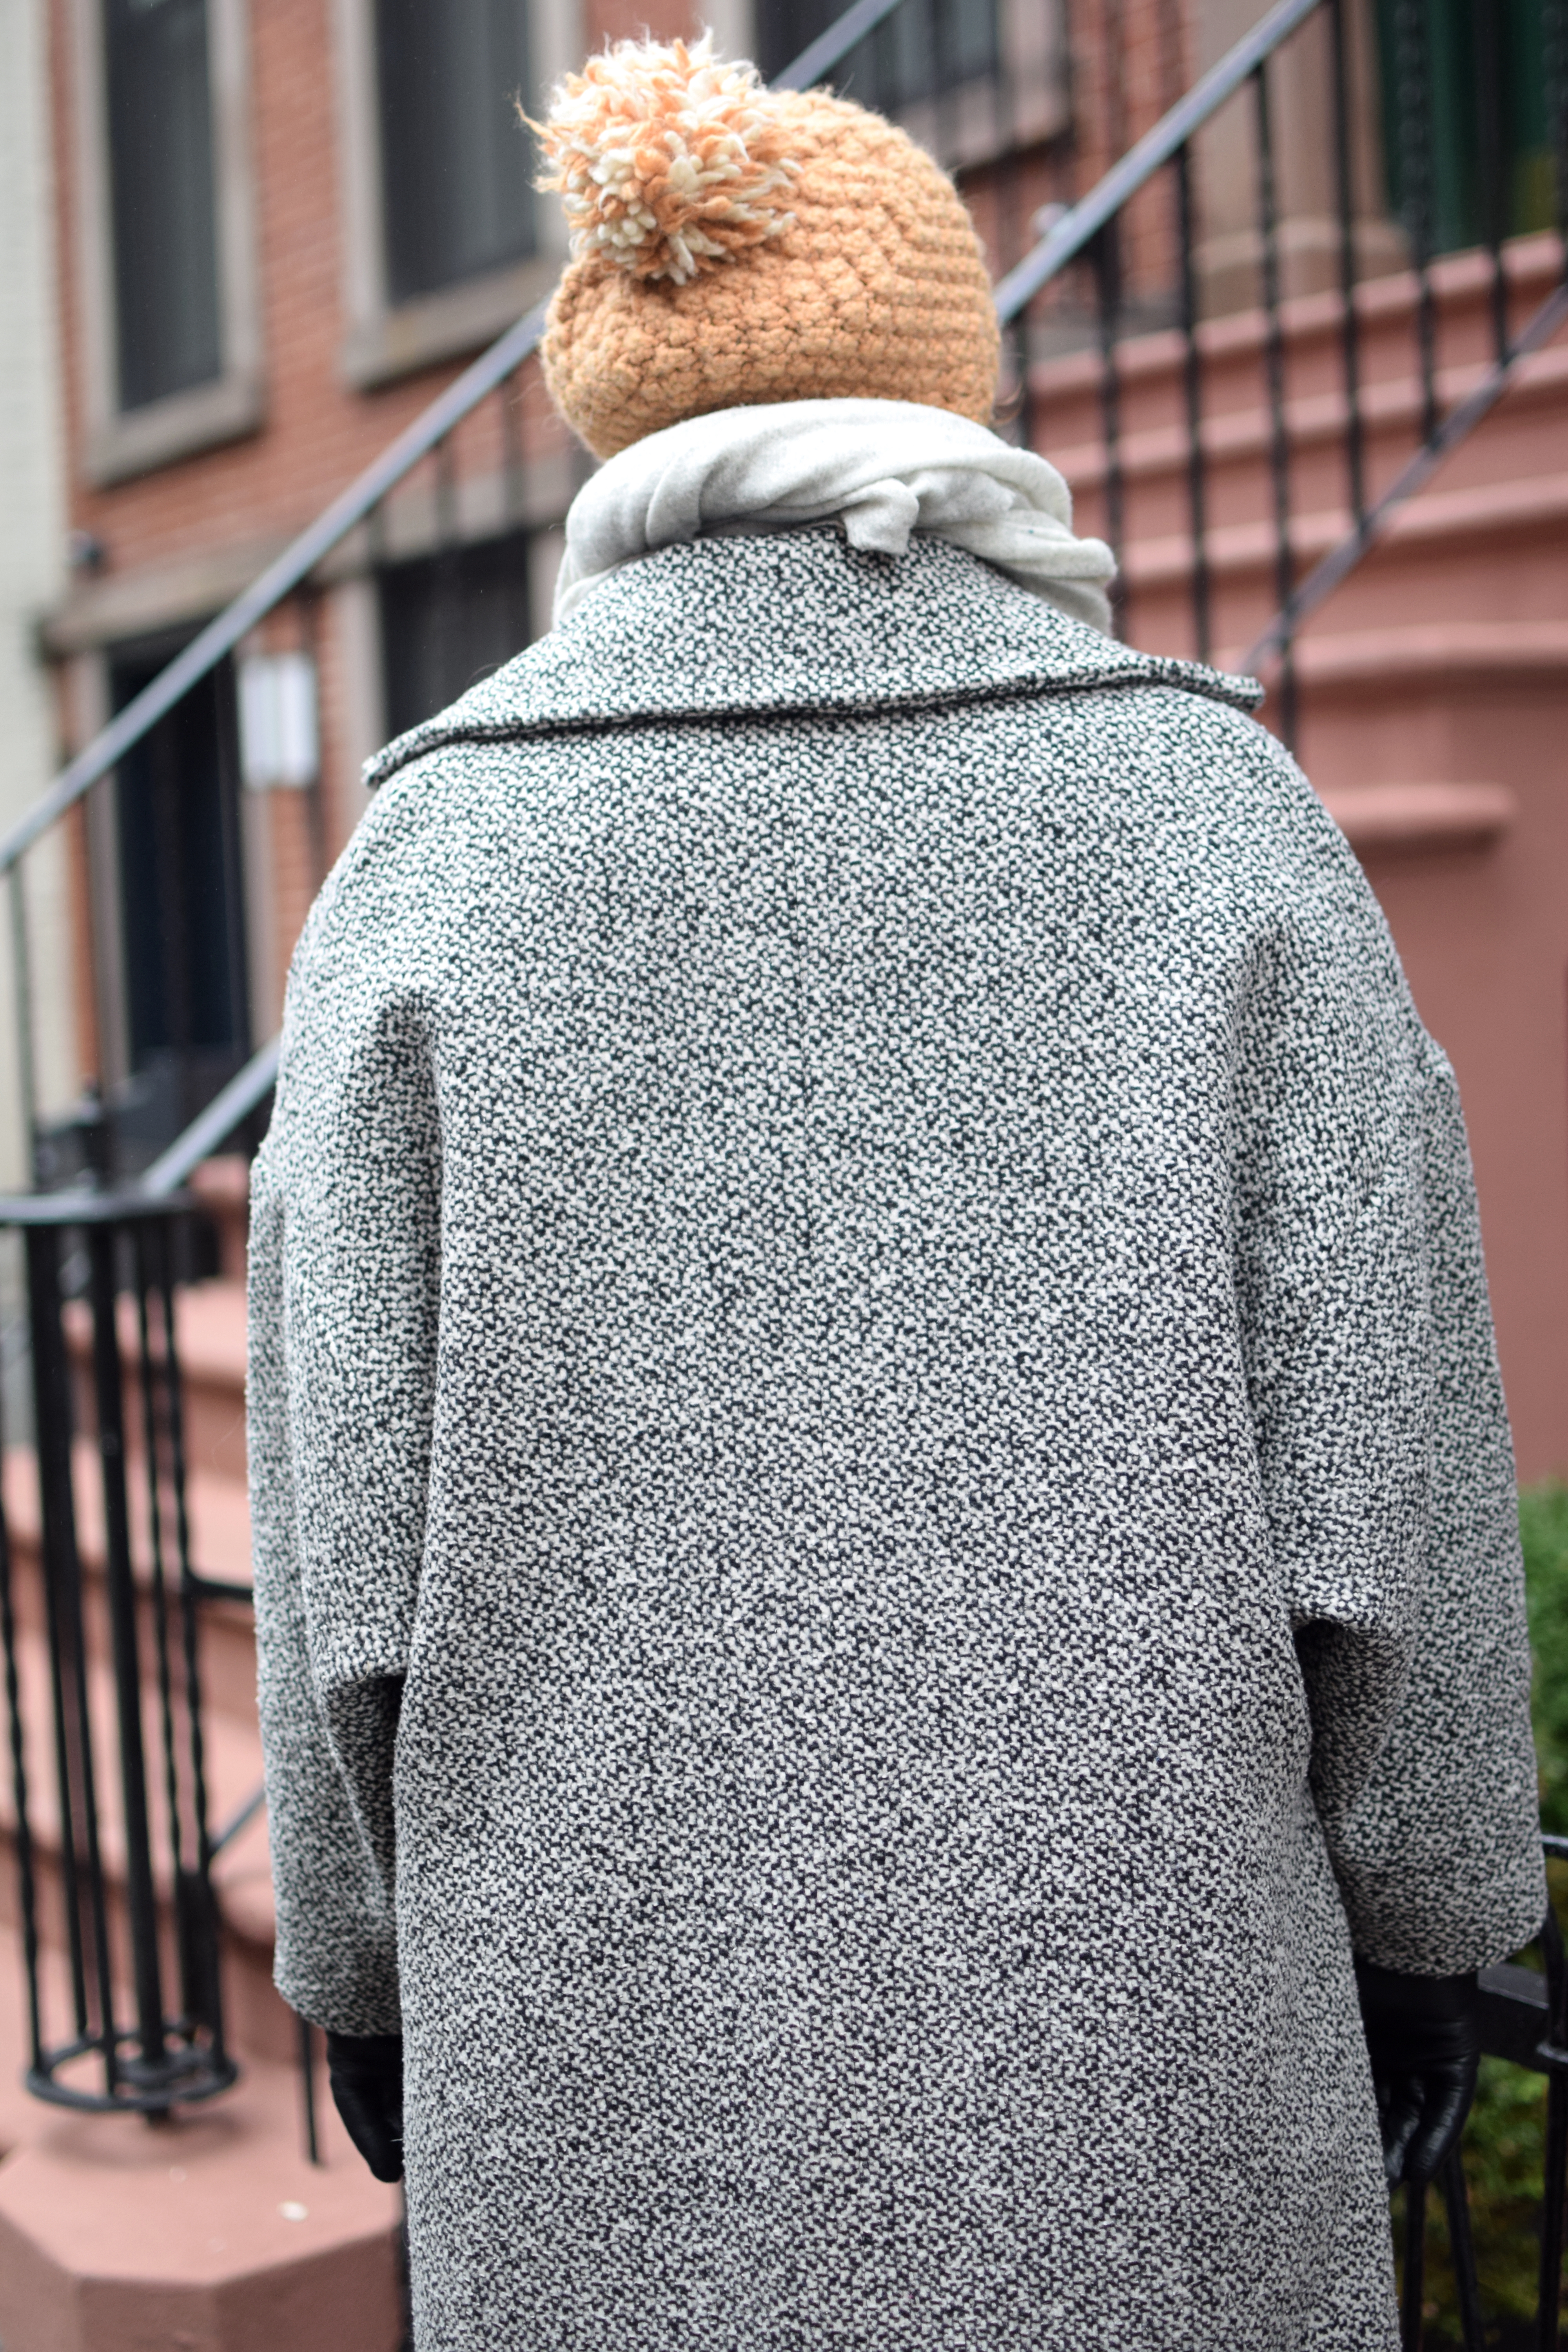
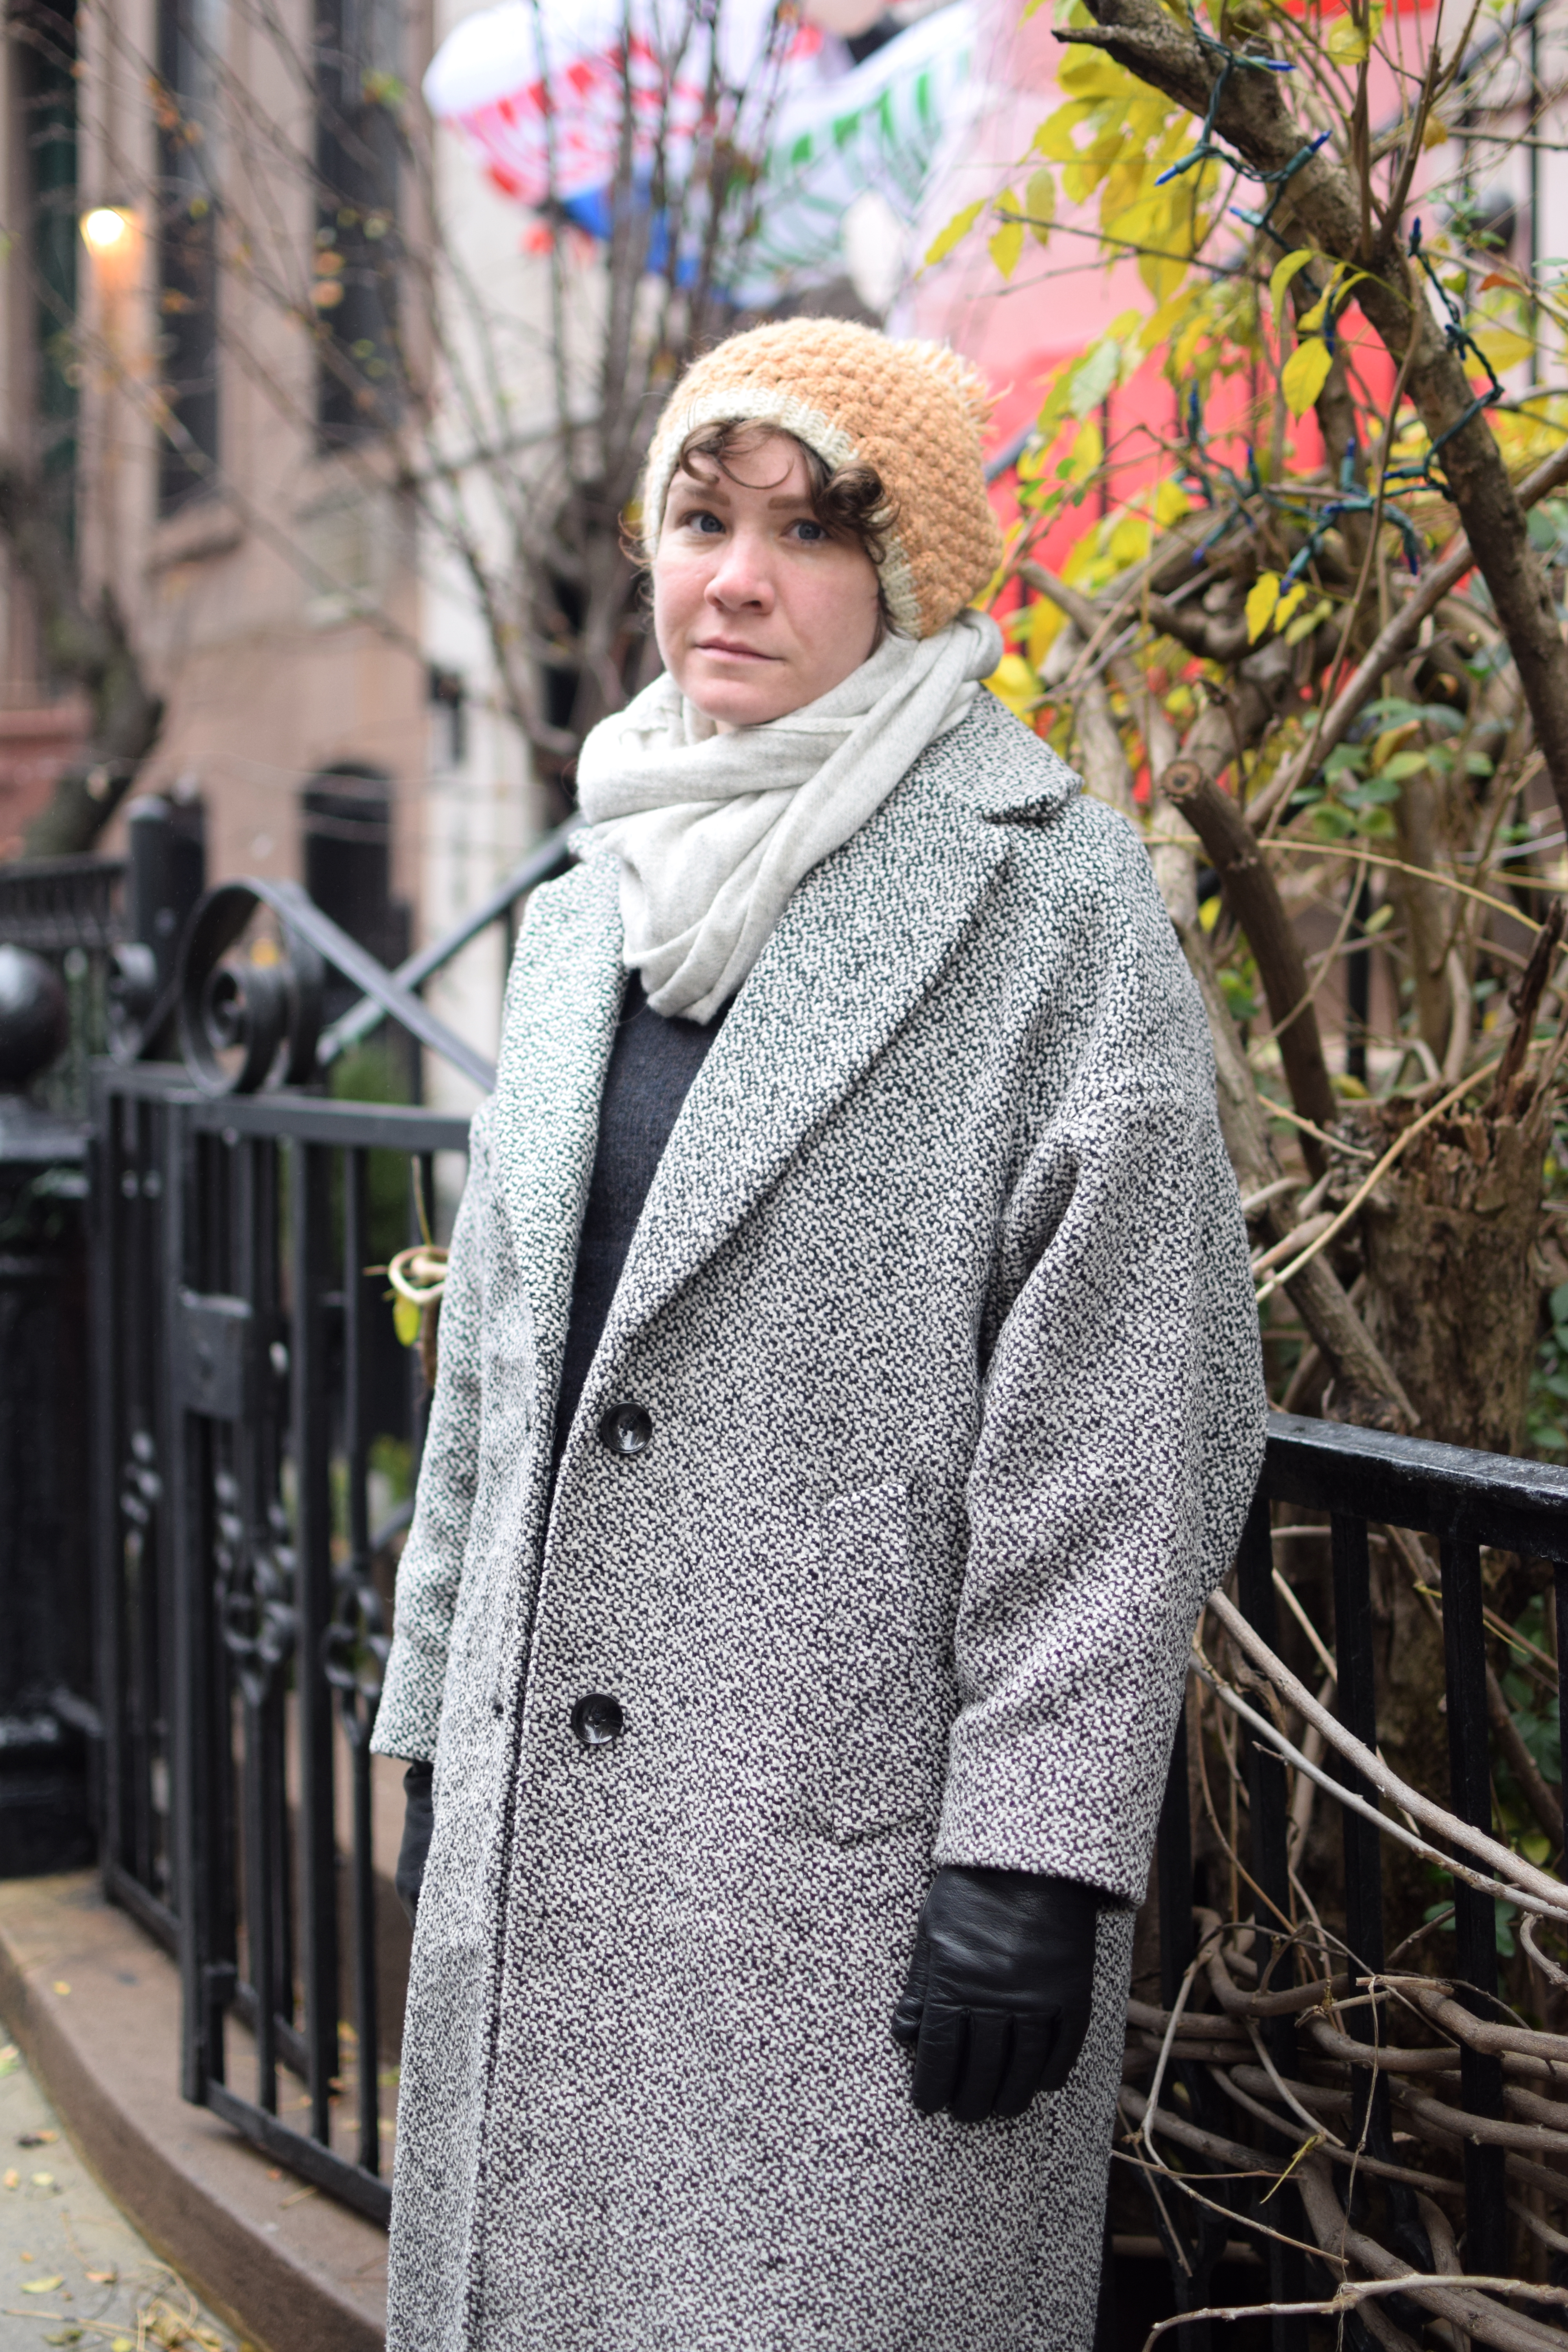
Here’s a Big Project for ya. This thing started because I didn’t have a winter coat that easily fit over bulky sweaters. I considered purchasing a coat, but I couldn’t find what I wanted. I was boppin’ through the Tessuti pattern catalog and found the Richmond Coat and thought, wow this is perfect. Many, many hours later, here it is.
Materials
I bought some salt and pepper wool coating from Blackbird Fabrics over a year ago, intending to make Jacob a coat (sorry, Jacob… you’ll get a coat soon). It has a super-cool 80s-looking vibe, and as soon as I saw the Richmond coat pattern I knew it was a perfect match. I envisioned a vermillion lining, but this rust color is the closest thing I could find at Mood. I used too-heavy interfacing and the collar is a bit crunchy. I hope it breaks in.
awkward pose so you can see the lining
Construction
Johnathan Embroidery did a stellar and super-quick job on the buttonholes, and the kind staff at Pacific Trimmings helped me pick out buttons. I sewed the buttons with “backer buttons” on the facing side, I don’t know what they are actually called. They look pretty professional!
After deliberating, I made the second size. My hip measurements suggested I should make the third size, but I didn’t want this oversized coat to be TOO big. It fits perfectly.
finally starting to look a bit like a coat
The most overwhelming part of making this coat was cutting out the pattern pieces and then manipulating such an unwieldy garment as it came together. The welt pockets were a beast– the first one took me more than 2 hours. I admit they look pretty good, though.
before I bagged the lining
Modifications
Instead of cutting the back pattern piece on the fold, I added seam allowance and cut it as a pair. As drafted, the back was such a huge piece of fabric, so I thought it could use a little extra structure.
I also added a hanging loop, but I would much prefer to use a hanger as the coat looks particularly upset when it hangs by the loop.
I planned on adding an interior breast pocket, but I couldn’t bear to do another welt pocket, and a patch pocket would have ruined the nice lines of the jacket interior. So this jacket only has 2 handwarmer pockets *shrug*.
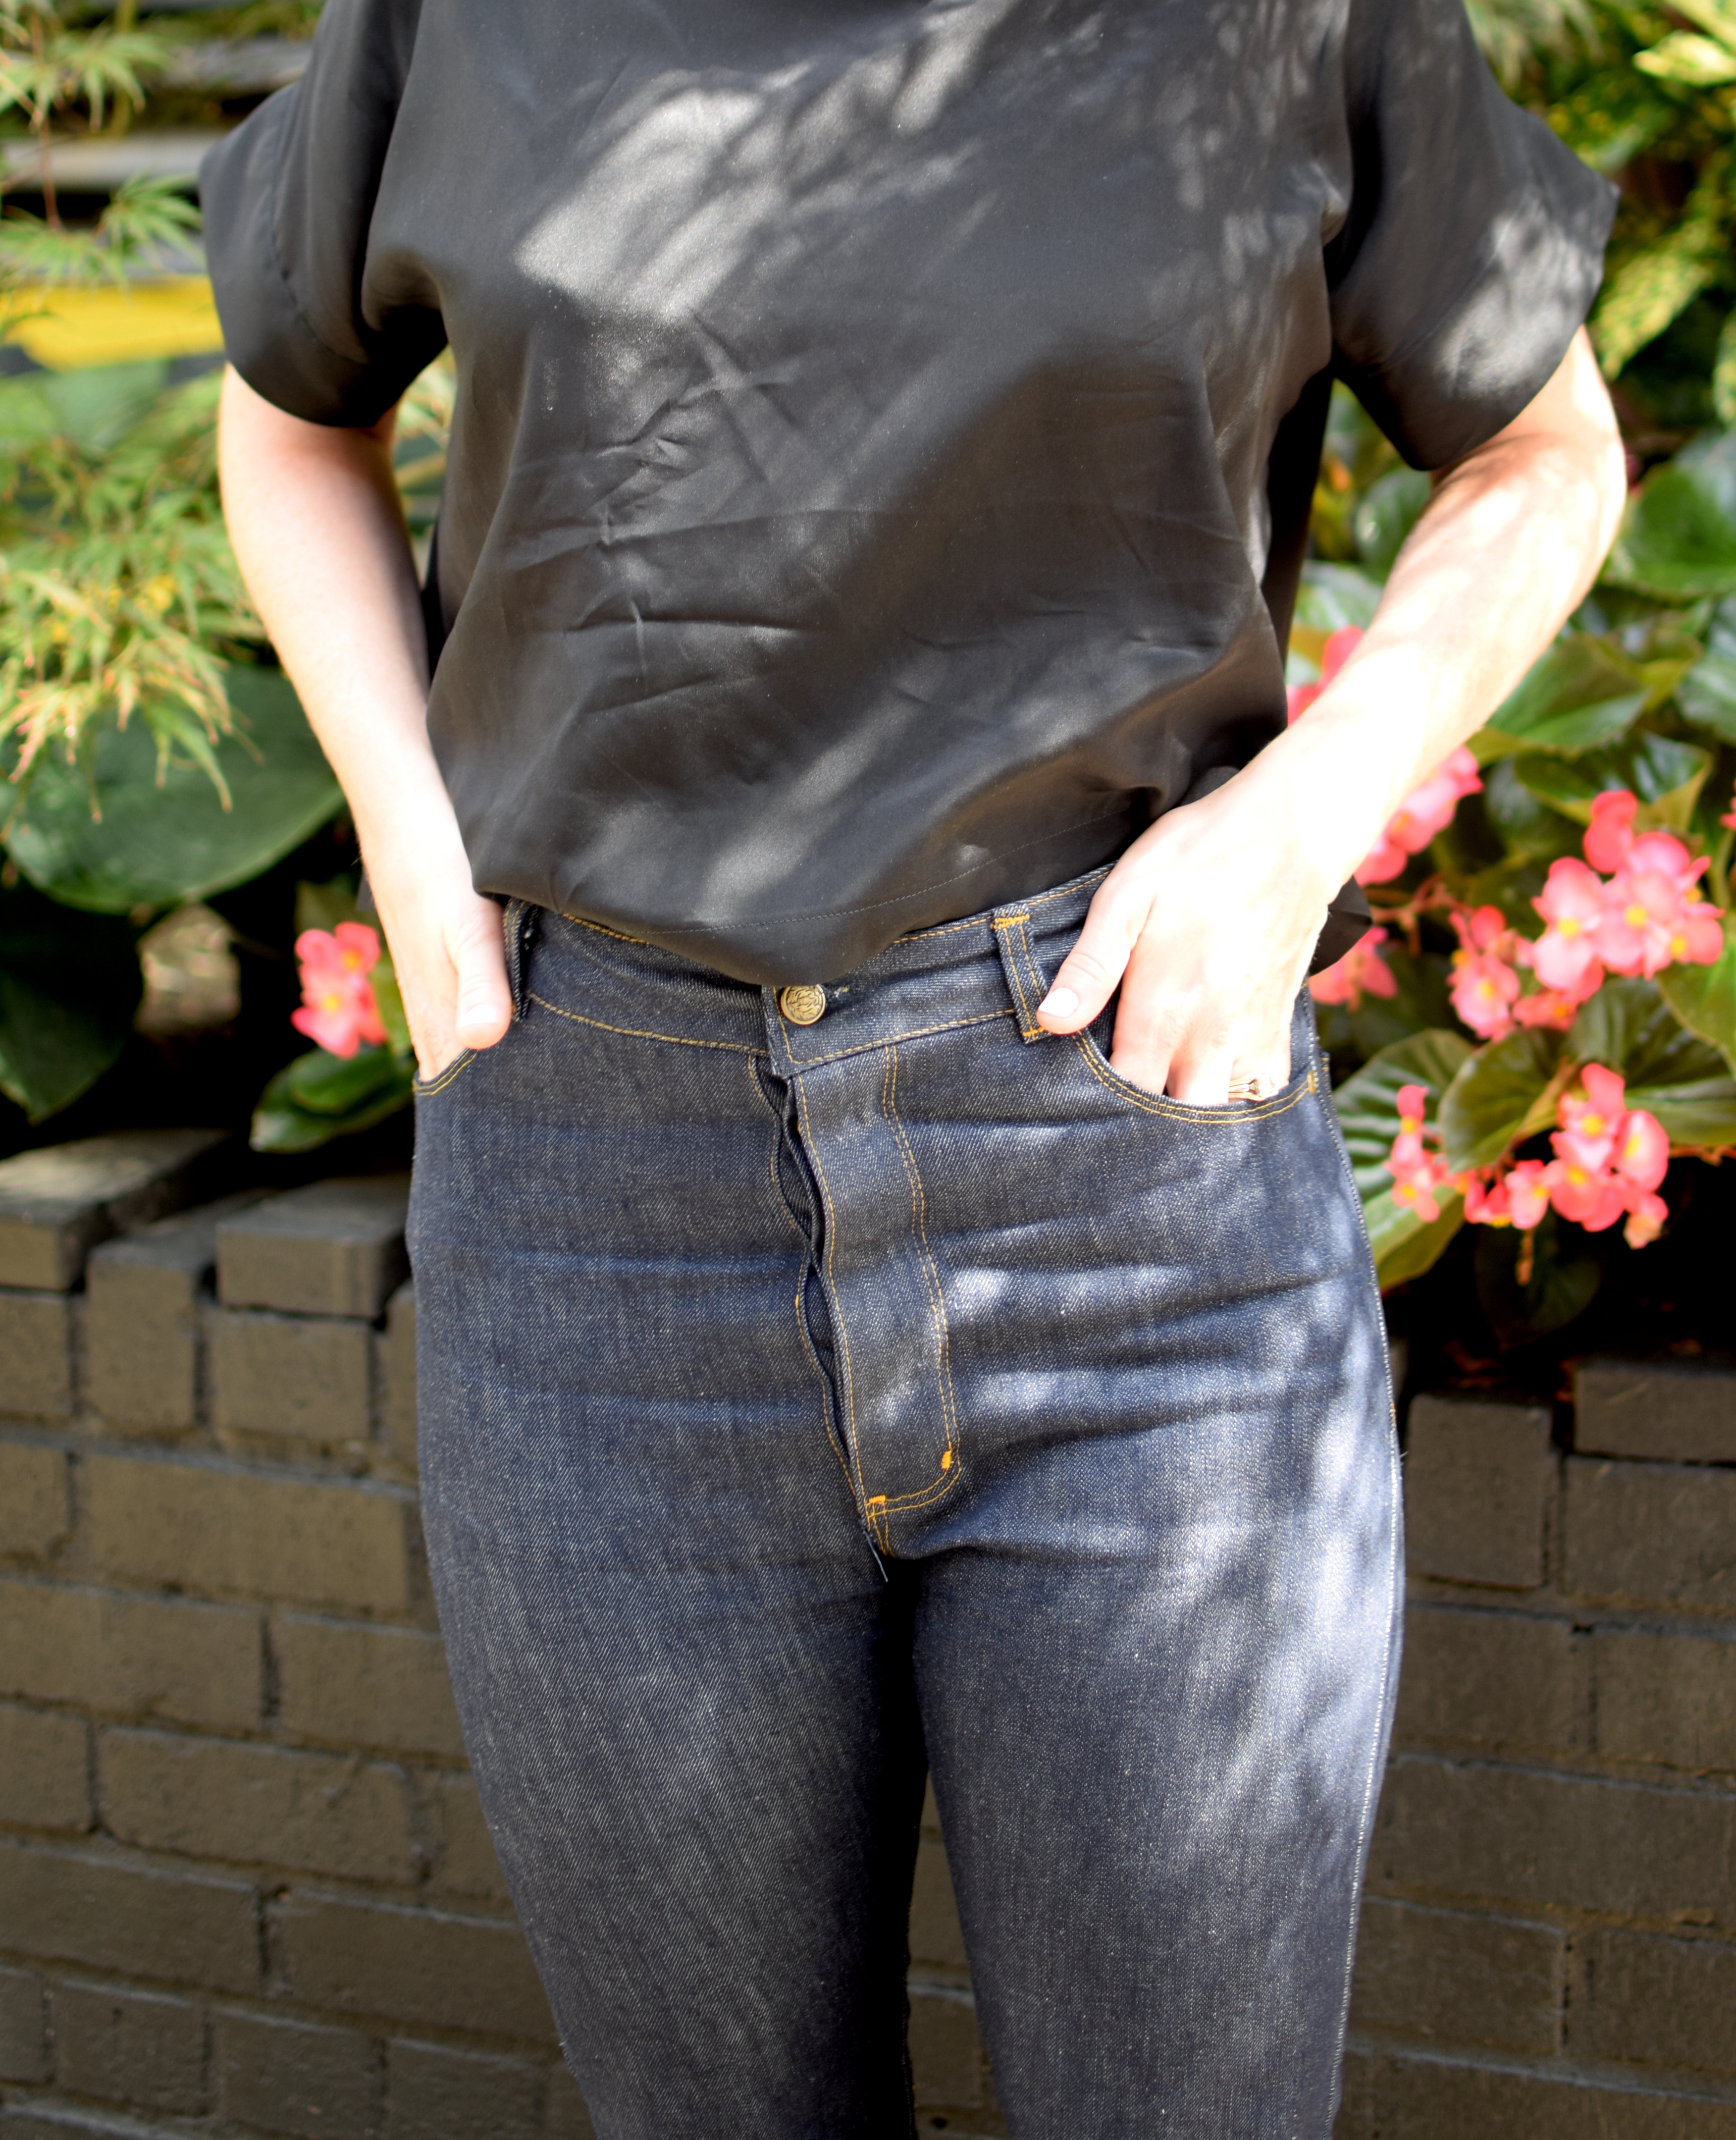
I’ve been wearing my first pair of Dawn jeans to death, and they have developed some holes! I’ve patched them but I needed a second pair in my rotation (once it cools down, right now i cannot imagine wearing tight jeans in this heat). Inspiration struck and I decided to sew another pair from my stash using some made-in-the-USA Cone Mills denim from Threadbare fabrics.
obligatory butt shot. i sewed on a patch I got in Indonesia!
I didn’t do anything to this denim before sewing it, they are truly RAW. we’ll see if i regret this. I basted the inseam and the side seams, tried them on, and was shocked by how well they fit. when i finished the waistband and belt loops, i put them on and i couldn’t close them. my last pair started out pretty good but stretched out, so i decided to wear them around the apartment for a few hours. after 1 day of wearing them around the house i went to get the buttons installed and i was able to close the jeans! they are still quite tight and are going to take some more breaking in to be comfortable.
after I finished constructing the jeans, I went to Star Snaps NYC to have rivets and buttons installed. I installed the rivets and buttons myself for my last pair, and doing this without the right equipment or access to space where its okay to make hammering noises was really challenging. They did a fab job and I totally recommend their services.